
Clearance Rack REFRESH Starts TONIGHT! 12 AM MT!


Say Goodbye to Petal Patterns Dies and Hello to New In Colors!

The card for today says goodbye to two retiring products and hello to two new In Colors (Summer Splash and Pretty in Pink)!
The Timeless Arrangements Stamp Set (Item 161521) along with it’s coordinating dies (Item 161525) will retire on April 30, 2024!

The Petal Patterns Dies (Item 161596) will also retire on April 30, 2024, and you can snag them for 50% off the retail price! Just $22.50! This is an amazing set of dies that I think have been overlooked! Add them to your cart before they are gone for good!

![]()

DIMENSIONS:
- Basic White Thick card base – 4 1/4 x 11, scored at 5 1/2
- Basic White Card Stock: 2 1/8″ Circle
- Summer Splash Card Stock: 5 1/2 x 5 1/2 Petal, 2 9/16″ Circle
- Pretty In Pink Card Stock: 5 1/2 x 5 1/2 Petal, 2 3/8″ Circle

INSTRUCTIONS:
- Burnish the fold of the card base with a Bone Folder.
- Crop the Summer Splash and Pretty In Pink layers with the coordinating Petal Patterns Dies.
- Adhere together with tiny bits of Multipurpose Liquid Glue.
- Rotate the “square” so one of the points with a petal that has an open center is at the top. Cut each side 2 1/4″ in from the point (or diagonally on the line of petals that have a solid center).
- Adhere to the card as shown with Multipurpose Liquid Glue. NOTE: the petals in the center of the card will overlap.
- Use a Stampin’ Cut & Emboss Machine to crop the Summer Splash card stock with the 2 9/16″ Stylish Shapes circle and the Basic White with the 2 1/8″ Stitched Shapes circle.
- Crop the Pretty In Pink with the 2 3/8″ Circle Punch.
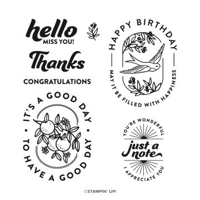
- Stamp the sentiments in Summer Splash and Pretty In Pink Classic Inks onto the cropped white circle.
- Adhere the to the Pretty In Pink circle with Multipurpose Liquid Glue.
- Adhere to the Summer Splash circle and to the card with Stampin’ Dimensionals.
- Embellish with white Classic Matte Dots.

![]()
 Would you like to have a chance to get the upcoming new In Colors? These colors will be featured in lots of products over the next two years – Papers, Embellishments, Ribbons, and more! Once again, I am offering an In Color Club – and would love to have you join! DETAILS HERE!

With the new catalog comes the new and beautiful Designer Series Papers (DSP)- and this year is no different – they are truly beautiful!
My Paper Share will include a sampling of ALL the new Designer Series Papers (DSP) at a fraction of what it costs to purchase all the individual packages!…AND back by popular demand, I’m offering cardstock bases in all 54 Colors including the new Basic Beige! VIEW ALL THE DETAILS HERE!
![]()

Registration closes April 26 at 12 PM ET.
REQUEST TO REGISTER BELOW!
Please email me with any questions!


Filled with Happiness Meets Delightfully Eclectic Designer Series Paper!

Filled with Happiness – An April Bee Box Add-On Class to Go!
Don’t miss out on this wonderful stamp set! It is on the Last Chance list and will not be available after this month! It is SO CUTE and pairs perfectly with the Modern Oval Punch! They go together like – peanut butter and jelly!!!

![]()
DIMENSIONS:
- Basic White Thick card base – 4 1/4 x 11, scored at 5 1/2
- Basic White Card Stock: 2 3/4 x 3 3/4 (Qty 2 – One Cropped with Punch)
- Pumpkin Pie Card Stock: 4 1/4 x 4 1/4, 3 1/4 x 2
- Delightfully Eclectic Designer Series Paper – 3 3/4 x 5

INSTRUCTIONS:
- Burnish the fold of the card base with a Bone Folder.
- Adhere the large Pumpkin Pie and Designer Series Paper pieces to the card base as shown with Multipurpose Liquid Glue.
- Adhere the small Pumpkin Pie piece as shown with Stampin’ Dimensionals.
- Stamp the sentiment in Tuxedo Black Memento Ink onto the Basic White layer. Repeat.
- Crop one of the sentiments with the coordinating Modern Oval Punch.
- Color with the following Stampin’ Blends Combo Packs: Pumpkin Pie, Mossy Meadow and Flirty Flamingo
- Adhere the larger sentiment as show with Multipurpose Liquid Glue.
- Adhere the cropped and colored image to the sentiment layer as shown with Stampin’ Dimensionals.
- Embellish with black Classic Matte Dots.
![]()
Registration closes April 26 at 12 PM ET.
REQUEST TO REGISTER BELOW!
Please email me with any questions!


Sale: $15.00
Price: $30.00


Current Catalogs

