My Top Picks Day 2! The Cutest: Have-a-Hoot Bundle!

Aug 25, 2020 | Uncategorized | 0 comments

My Cutest pick was easy – it’s the adorable Have a Hoot Bundle!  These owls are just.plain.cute!   The Have a Hoot stamp set features owls for both Halloween and Christmas!  
Look how CUTE! 
HAVE A HOOT BUNDLE

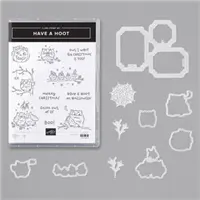
The Have a Hoot Bundle includes the Have a Hoot Stamp Set and the Peek-A-Hoot Dies. 


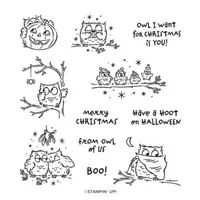
HAVE A HOOT STAMP SET
“Who” will be ready to create sweet projects for Halloween, Christmas, and more? You will, thanks to the darling owls in the Have a Hoot Stamp Set by Stampin’ Up! Ask your demonstrator about coordinating products. * 11 cling stamps
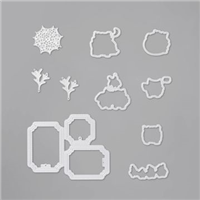
Peek-A-Hoot Dies
Create labels, journaling spots, frames, and more with the Peek-A-Hoot Dies from Stampin’ Up! Ask your demonstrator about coordinating products. * 10 dies*  Largest die: 4-3/16″ x 3-3/8″ (10.6 x 8.6 cm)

 
Here is a link to my Facebook Live where I created these cards:  


Start with a Blackberry Bliss card base, cut 5 1/2″ x 8 1/2″, score at 4 1/4″
Take a piece of the Designer Series Paper -I used the Harlequin pattern,  cut 4″ x 5 1/4″ and run it through the Stampin’ Cut and Emboss Machine with the “triple window die.” 
Using Tuxedo Memento Ink, stamp the Owl with the Spider and the Owl with the Moon onto a piece of Whisper White cardstock measuring 13/4″ x 2 1/2″.   
Stamp the Owl with the Pumpkin onto a 1 1/2″ square piece of Whisper White cardstock 
Color as desired – I used the following blends:  Light Black, Soft Suede Combo, Cajun Craze Combo, Light Mango Melody, Rich Razzleberry Combo

Use the dies to cut out the Owl with the Cape and Moon and the Owl with the Pumpkin. 

To position the pieces, attach dimensionals to the back corners of each die cut window on the designer series paper, and position the White stamped panels.   Attach this to the card base with dimensionals. 

Add the Pumpkin cut out shape to the card with a dimensional.   Pop up the owl and the moon with dimensionals, attaching to the card. 

Stamp the Boo onto a small strip of paper and attach to card front.   To finish the card, add three Iridescent Pearls with the Take Your Pick Tool.   

Add a Whisper White Panel to the inside of the card, and stamp with a greeting.  I also added a small strip of DSP scrap onto the bottom of the white panel. 

Need stamping supplies? I would bee GRATEFUL for your orders! You can order in my online store or email me if you need my help.

  • Shop My Online Store HERE
  •  Shop Clearance Rack HERE
  •  Earn FREE Stampin’Up! products – A way for me to thank you for ordering from me! Rewards 
  • Gift Certificates Available in Any Dollar Amount

0 Comments

Leave a Reply

Laura Milligan,
 Independent Stampin' Up! Demonstrator 
Laura Milligan Host Code Current 09.05.2023
Bee Box Club
Click to Purchase Past Tutorials

Get Notified! Blog Posts by Email!

Enter your email address:

Gift Cards

Follow Me

Current Catalogs

Disclaimer

The content in this blog is the sole responsibility of Laura Milligan as a Stampin’ Up!® Independent Demonstrator.  The use of and content of classes, services or products offered is not endorsed by Stampin’ Up!
Images © Stampin’ Up!

%d bloggers like this: