Soft & Elegant Thinking of You Card with the NEW Forever Florals Bundle

I had so much fun creating this card during today’s Facebook Live using the brand-new Forever Florals Bundle from Stampin’ Up! If you love soft textures, layered patterns, and a classic “Thinking of You” sentiment, this one is right up your alley. The embossed background adds beautiful dimension, while the florals and ribbon bring in just the right touch of warmth and charm. This bundle is quickly becoming a favorite of mine—it’s versatile, elegant, and perfect for so many occasions!
These products will be available March 3 with the upcoming Online Exclusives release.
3 Days of FREE SHIPPING is going on NOW – Friday, February 20! you’ll receive FREE SHIPPING on all online orders of $75 or more (before tax & after coupons & rewards).
Don’t forget! You also Earn FREE BEEs with every $50 purchase! My way of saying thank you for your loyalty. Read all about my rewards program here.
How to Get the February 2026 Lovely Arrangements Tutorial
You’ve got two easy options to get your hands on this tutorial:
Option 1: Earn It FREE
Place a $50 order (before tax and shipping) with me, and you’ll receive the Lovely Arrangements Tutorial Bundle for FREE. (a link to the tutorial will be emailed to you within 24-48 hours after you place your order).
• Available to U.S. residents only
• Orders must be placed through me
Option 2: Purchase the Tutorial
Not shopping right now or live outside the U.S.? No problem.
• Purchase the tutorial for $20
• Available to anyone, anywhere
This tutorial is perfect if you love fresh card ideas, thoughtful layouts, and projects that feel polished but totally doable.
Sweet Little Bunnies & a Basket of Joy with the Easter Basket Bundle
I don’t know about you, but I can never resist a bunny… and when you add a baby chick and the cutest woven basket detail? I’m completely done for. 🐰💛 This card was created using the Easter Basket Bundle from the Easter Joy Suite Collection, and I absolutely love how soft and sweet it turned out. The neutral patterns, layered textures, and that little “For You” sentiment make this one perfect for Easter gifting, springtime happy mail, or tucking into a basket for someone special. Let me show you how all these darling details came together!
Measurements:
- Basic White Thick Cardstock: 5 1/2 x 8 1/2, scored 4 1/4
- Easter Joy Specialty Designer Series Paper: 5 1/2 x 1, 4 1/4 x 3
- Basic White Cardstock: 4 1/2 x 3 1/4, 2 1/2 x 3/4 (sentiment), 4 x 3 (stamped images), 3 1/2 x 4 (basket)
- Soft Sea Foam Cardstock: 1 1/2 x 1 1/2
- Crumb Cake Cardstock: 3 x 2
Instructions:
- Burnish the fold of the card base with a Bone Folder.
- Adhere the strip of Designer Series Paper to the card base.
- Adhere the Designer Series Paper panel to the Basic White panel together with Liquid Glue and to the card with Stampin’ Dimensionals.
- Stamp the sentiment in Tuxedo Black. Crop with the Three Banner Punch. Adhere with Dimensionals.
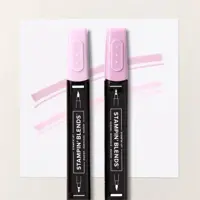
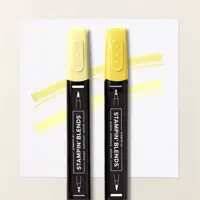
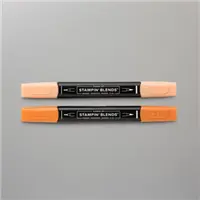
- Stamp the bunnies and chick in Tuxedo Black. Crop with a die-cut machine and the coordinating Easter Basket dies. Color with Bubble Bath, Lemon Lolly and Pumpkin Pie Stampin Blends.
- Crop the Basic White, Crumb Cake and bow with the Easter Basket Dies. Thread the strips through the basket as shown. Trim the ends with snips. Adhere the basket with Dimensionals.
- Adhere the bow with a Mini Glue Dot.
- Adhere the bunnies and chick with Dimensionals.
- Embellish with White Natural Matte Dots.
Price: $16.50
Valentine’s Day, No Hearts Required | Friendly Foliage Bundle
Who says Valentine’s cards need a parade of hearts to share a little love? This design lets greenery do the talking. Using the Friendly Foliage Bundle from Stampin’ Up! (below), I layered leafy die cuts inside that gorgeous frame and kept the palette calm and classic. The result feels fresh, thoughtful, and just a little unexpected, perfect for the guy in your life or anyone who prefers love served with a side of clean lines and quiet charm. Sometimes a simple “Sending Love” nestled in foliage says it best.
Measurements:
- Basic White Thick: 4 1/4 x 11, scored 5 1/2, 3 3/4 x 5
- Mossy Meadow Two-Tone Cardstock: 3 x 4 1/2 (panel), scraps for die-cuts
- Basic White: 2 3/4 x 4 1/4 (panel), 2 3/4 x 4 1/4 (stamped die-cut), 2 1/4 x 1/2 sentiment
Instructions:
- Burnish the fold of the card base with a Bone Folder.
- Adhere the Mossy Meadow to the card base with dimensionals.
- Adhere the Basic White panel to the Mossy Meadow with glue.
- Stamp the framed foliage and sentiment in Mossy Meadow Ink onto the coordinating Basic White panels.
- Crop the framed foliage stamped image with the coordinating dies (one tucked inside the other).
- Adhere the die-cut and sentiments as shown with Mini Stampin’ Dimensionals.
- Crop 4 of the die-cuts in Mossy Meadow Two-Tone Cardstock. Cut 2 in half. Adhere the four die-cut as shown with liquid glue.
- Embellish with Mossy Meadow Natural Matte Dots.


