Nov 22, 2025 | Gallery, More Friend Cards, More Thank You Cards |

Some days you just need a card that says it all—and this “Just Because I Appreciate You” card does exactly that. I created it with the Brushed with Beauty Suite Collection from Stampin’ Up!, and I love how soft, layered, and heartfelt it feels.
The suite’s gorgeous florals and gentle textures do a lot of the heavy lifting here. I paired a striped panel with vellum for a bit of softness, then added leafy die-cuts for dimension. The large “because” sentiment is the real focal point—bold enough to stand out, yet still elegant thanks to the coordinating dies.

Little details bring everything together: pearls, linen thread, and that subtle floral background from the designer series paper. It’s one of those cards that’s simple in intention but looks beautifully finished.
The best part? I’ve put together a free tutorial so you can create this card right along with me! Whether you’re new to cardmaking or already love working with the Brushed with Beauty Suite, this project is a great one to try.
DIMENSIONS:
- Very Vanilla Cardstock: 4 1/4 x 11, scored at 5 1/2, 4 x 4 (for all die-cuts)
- Brushed with Beauty Designer Series Paper: 4 x 5 1/4, 3 x 4
- Vellum Specialty Paper: 3 1/2 x 4 1/2, 4 x 2 (die-cut)
- Mossy Meadow Cardstock: 4 1/2 x 4 1/2 (for 2 die-cuts)

INSTRUCTIONS:
- Burnish the folds of the card base with a Bone Folder.
- Adhere the Brushed with Beauty Designer Series Paper to the card base with Multipurpose Liquid Glue.
- Adhere the Brushed with Beauty Designer Series Paper to the Vellum with Multipurpose Liquid Glue and to the card with Stampin’ Dimensionals.
- Stamp the two sentiments in Mossy Meadow Ink onto Very Vanilla. Crop each sentiment with the coordinating die-cuts, keeping the “Just” to the right side, then trimming to 2 inches wide.
- Use the “because” dies to crop the Vellum, Very Vanilla and Mossy Meadow. Adhere together with Multipurpose Liquid Glue.
- Crop the remaining Mossy Meadow with the greenery die and adhere as shown with Multipurpose Liquid Glue.
- Adhere all remaining pieces to the card with Stampin’ Dimensionals.
- Adhere a bow of Vanilla Baker’s Twine with a Mini Glue Dot.
- Embellish with Crumb Cake Pearls of Beauty.

FREE TUTORIALS- I send out Weekend Inspiration every weekend that includes a handful of Card Projects with tutorials and supply lists – and yes they are free! The first card on today’s post is one of the project tutorials! I send these out to all who are on my email list. Interested in getting these project sheets? Simply subscribe to my email list click here:


Nov 12, 2025 | Gallery, More Friend Cards |

It’s day 3 of my 25-Year Stampin’ Up! Anniversary Week Long Celebration with another cheerful thank-you card featuring the brand-new Pop-Up Petals Bundle. It’s sweet and simple on the outside—and when you open it, a happy little bouquet pops forward to say, “Thanks for being there.” I love a surprise element that’s easy to make!

DIMENSIONS:
- Darling Duckling Cardstock: 8 1/2 x 5 1/2, scored at 4 1/4 (card base), scraps for box tops
- Basic White Cardstock: 4 1/4 x 5 1/2 (card front), 2 3/4 x 4, 2 1/4 x 5/8 (sentiment), 8 1/4 x 5 1/4, scored at 4 1/8, 5 x 5 (stamped die-cuts)
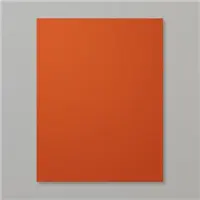
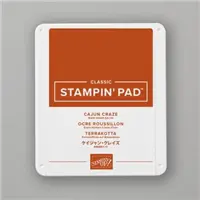
- Cajun Craze Cardstock: 4 x 5 1/4, 3 x 4 1/4
- Floral Impressions Designer Series Paper: 3 3/4 x 5, 2 3/4 x 1, 2 1/4 x 1 1/8, 1 3/4 x 1 1/8

INSTRUCTIONS:
- Burnish the folds of the card base with a Bone Folder.
- Adhere the Designer Series Paper, Cajun Craze and Basic White front panels together and to the card as shown.
- Stamp the vase in Cajun Craze. Stamp the sentiments, flowers and butterflies in Tuxedo Black Memento Ink.
- Crop the stamped images with the coordinating dies (interior sentiment cropped with Traditional Labels die, optional)
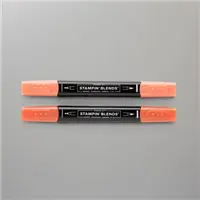
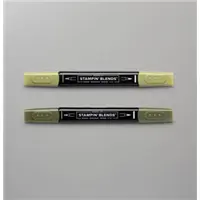
- Color the images with the following Stampin’ Blends: Darling Duckling, Cajun Craze and Mossy Meadow
- Crop the 8 1/4 x 5 1/4 with the two pop-up dies as shown, lining up the two points of the die with the fold.
- Crop the two “box folds” from the scrap of Darling Duckling.
- Adhere all pieces as shown with Liquid glue.
- Embellish with three Cajun Craze Earthy Matte Dots.

If you need to see the dies in action, you can catch the replay for yesterday’s card on my I’d Rather Bee Stampin’ Facebook Page or on YouTube below.


This week marks my 25th Stampin’ Up! Anniversary, and I’m so grateful for the customers and friends who have made this journey so meaningful. To celebrate, I’m giving away Stampin’ Rewards & daily prizes — and you could win!
- Every $25 ordered (before tax & shipping) from Nov. 10–15 = 1 entry
No limit — the more you order, the more entries you earn!
- Every comment left here on my blog or Facebook Page
will have a chance to win from a daily prize drawing (no purchase necessary).
Prize Drawings Include:
- Daily Prizes (for leaving a comment)
- (2) $25 Stampin’ Rewards winners
- (1) $100 Stampin’ Rewards grand prize winner


FREE TUTORIALS- I send out Weekend Inspiration every weekend that includes a handful of Card Projects with tutorials and supply lists – and yes they are free! The first card on today’s post is one of the project tutorials! I send these out to all who are on my email list. Interested in getting these project sheets? Simply subscribe to my email list click here:


Nov 11, 2025 | Gallery, More Friend Cards |

During my most recent Facebook Live on my I’d Rather Bee Stampin’ page, I shared this sweet card featuring the brand-new Pop of Petals Bundle from Stampin’ Up! This bundle is bursting with charm — and I couldn’t resist creating a cheerful, pop-up surprise inside!

The front of the card showcases a simple bouquet in soft, happy colors — a little vase of joy tied with linen thread and a touch of patterned paper. But when you open it… surprise! A tiny pop-up box of flowers appears, paired with the heartfelt sentiment.
Isn’t that such a lovely way to tell someone how much they mean to you? This design is perfect for a special friend — a beautiful reminder of how our creativity connects us.
Missed the Live? You can catch the replay on my I’d Rather Bee Stampin’ Facebook Page or on YouTube below.


This project is especially meaningful to me because I’m celebrating my 25th Anniversary as a Stampin’ Up! Demonstrator! 🎉
What an amazing journey it’s been — filled with creativity, friendship, and so much joy! I’m so grateful for every single one of YOU who has stamped, crafted, and shared this adventure with me.
To celebrate, I’m hosting a week-long 25th Anniversary Celebration!
✨ Watch for special offers, free gifts, and surprises all week long — it’s my way of saying thank you for making these 25 years so wonderful!

This week marks my 25th Stampin’ Up! Anniversary, and I’m so grateful for the customers and friends who have made this journey so meaningful. To celebrate, I’m giving away Stampin’ Rewards & daily prizes — and you could win!
- Every $25 ordered (before tax & shipping) from Nov. 10–15 = 1 entry
No limit — the more you order, the more entries you earn!
- Every comment left here on my blog or Facebook Page
will have a chance to win from a daily prize drawing (no purchase necessary).
Prize Drawings Include:
- Daily Prizes (for leaving a comment)
- (2) $25 Stampin’ Rewards winners
- (1) $100 Stampin’ Rewards grand prize winner


FREE TUTORIALS- I send out Weekend Inspiration every weekend that includes a handful of Card Projects with tutorials and supply lists – and yes they are free! The first card on today’s post is one of the project tutorials! I send these out to all who are on my email list. Interested in getting these project sheets? Simply subscribe to my email list click here:


Oct 27, 2025 | Gallery, More Friend Cards |

Today’s card features the beautiful Gathering Together Suite Collection by Stampin’ Up! and highlights the shutter technique — a fun and creative way to add movement and surprise to your handmade cards! I love how the rich fall colors and gold accents come together to create a warm, inviting feel, perfect for the season of gathering and gratitude. The background layers and metallic touches make this card extra special, while the simple “Gather” sentiment ties it all together beautifully.

DIMENSIONS:
- Cajun Craze Cardstock: 4 1/4 x 11, scored at 5 1/2
- Gold Foil: 4 x 5 1/4, 5 x 1/4, 3 x 1/4 (qty 3)
- Gathering Together Designer Series Paper: 3 3/4 x 5
- Cajun Craze Cardstock: 1 7/8 Stitched Square die-cut
- Early Espresso Cardstock: 2 3/4 x 1/2 die-cut
- Basic White Cardstock: 2 1/8 x 1 3/4 die-cut

INSTRUCTIONS:
- Burnish the fold of the card base with a Bone Folder.
- Adhere the Gold Foil to the card base with Multipurpose Liquid Glue.
- Crop the Cajun Craze Cardstock with the Stylish Shapes 1-7/8 Stitched Square die. Adhere 1/2 inch in from the top and sides of the Designer Series Paper.
- Adhere the Gold Foil strips around the edge of the square as shown with Multipurpose Liquid Glue. Snip the pieces overhanging the Designer Series Paper flush with the edge. Adhere to the card.
- Adhere a strip of Stampin’ Seal to the top of the Cajun Craze square and adhere a looped piece of Gold & White Baker’s Twine.
- Crop the Early Espresso Cardstock with the Stylish Shapes 2 3/4 x 1/2 Stitched Banner die. Adhere to the card with Stampin’ Dimensionals.
- Stamp the sentiment in Early Espresso Classic Ink onto the Basic White Cardstock. Crop with the Nested Essentials 2 1/8 x 1 3/4 stitched die. Adhere with Stampin’ Dimensionals.
- Embellish with Early Espresso Earthy Matte Dots.


FREE TUTORIALS- I send out Weekend Inspiration every weekend that includes a handful of Card Projects with tutorials and supply lists – and yes they are free! The first card on today’s post is one of the project tutorials! I send these out to all who are on my email list. Interested in getting these project sheets? Simply subscribe to my email list click here:


Oct 8, 2025 | Gallery, More Friend Cards |

During my most recent Facebook Live, I created this fun and festive card featuring the North Pole Delivery Suite Collection and the Jolly Delivery Bundle from Stampin’ Up! This suite just makes me smile — it’s filled with cheerful images, bright colors, and all the charm of holiday happy mail!
If you missed my live, you can catch the replay here:

For this card, I started with a Basic White card base and then added layers of Pool Party and Poppy Parade cardstock embossed with the Forever Plaid 3D Embossing Folder — it adds the perfect texture, almost like a cozy wall behind our little delivery scene.

The star of the show is that adorable dog in his red sweater carrying a special letter from the Jolly Delivery Bundle! Then I added a few of the Traditions of Christmas Designer Series Paper patterns to tie it all together.
The “special delivery” sentiment fits perfectly with the theme — a sweet reminder of the joy that comes from sending and receiving handmade cards this time of year.
A bit of Baker’s Twine and a couple of red embellishments finish the card beautifully!
FREE TUTORIALS- I send out Weekend Inspiration every weekend that includes a handful of Card Projects with tutorials and supply lists – and yes they are free! The first card on today’s post is one of the project tutorials! I send these out to all who are on my email list. Interested in getting these project sheets? Simply subscribe to my email list click here:


Sep 24, 2025 | Gallery, More Friend Cards |

Today I’m sharing another card I created with the Branching Out Bundle—this one is perfect for birthdays, but could easily be adapted for so many other occasions. It is a unique shape too – check out my video to see how to create this card base using the dies.
I love the natural look of the stamped pine branches paired with the detailed die-cut pinecones. A few simple accents, like the wood-grain embellishments and linen thread bow, bring everything together beautifully. The nested labels create such a polished look both inside and out—I couldn’t resist finishing the inside with a sweet sentiment, making this card extra special for the recipient.

If you missed my live, you can catch the replay here:


This bundle is filled with timeless elements you’ll reach for all year long. I’ve used it on everything from simple, rustic cards to more elegant, layered designs—and each one turns out beautiful!
✨ Last Call! ✨
My Branching Out Card Class To Go is still open, but not for long! This class features six gorgeous cards (two each of three designs), along with a PDF tutorial and video to guide you step by step. It’s the perfect way to craft with me from the comfort of your home!

For just $55 (+ $10 shipping if needed), you’ll receive:
- Autumn Toile Designer Series Paper
Streaked Dots
Black & White & Gold Baker’s Twine
Irregular Weave Trim Early Bird Registration closes Sept. 15 Noon ET! Free pkg. of Espresso & Olive Linen Thread!
Details and Registration here: Branching Out Card Class
FREE TUTORIALS- I send out Weekend Inspiration every weekend that includes a handful of Card Projects with tutorials and supply lists – and yes they are free! The first card on today’s post is one of the project tutorials! I send these out to all who are on my email list. Interested in getting these project sheets? Simply subscribe to my email list click here:


