Jan 30, 2026 | More Birthday Cards, Tutorials for Purchase |

There’s something about floral cards that never gets old. They’re timeless, they’re flexible, and they always feel right no matter the occasion. Today’s Facebook Live was a perfect reminder of that as I shared three handmade cards featuring the Lovely Arrangements Bundle from Stampin’ Up!
Each of these cards uses the same core elements but takes on a completely different personality. From soft and airy to rich and dramatic, this bundle makes it easy to mix textures, layers, and layouts while still keeping everything beautifully cohesive. The stamped florals paired with the delicate die-cut details are truly the kind you’ll reach for again and again.

These products also happen to be featured in my Lovely Blossoms Card Class to Go. Everything is thoughtfully designed so you can focus on enjoying the process and building confidence with your supplies.
⏰ Registration for the Card Class to Go closes Saturday, January 31 at 12 PM ET, so if these cards caught your eye, now’s the time to grab your spot. I’d love to have you crafting right along with me!
Scroll on for more details about each card and how you can join the class before registration closes.
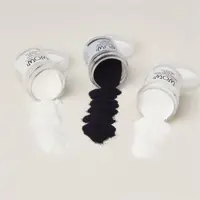
For the first card I made, I used the little petal die cut piece as a template, and used a sponge dauber with a Versamark ink pad to add ink to the card stencil – I then used Wow! Clear Embossing powder and my heat tool to add some texture to the card front. It’s very subtle but I love the look!
I glued the two die cut panels to the card front. I love, love, love the circle die!
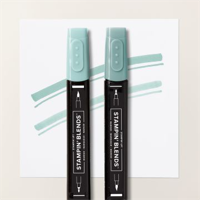
I used a Secret Sea Dark Blend to fleck some color onto the card front. I stamped and die cut the parts and pieces for the focal point and attached them to the card. The tiny sentiment panel is one of the dies included in the bundle. It’s a perfect match for the Happy Birthday sentiment!

The next card is the exact same card as above – but this time I used a palette of Secret Sea! Which is your favorite? When I asked my FB Live views which they prefered, I got a mixed reaction – some prefered the white, and some prefered the Secret Sea. It was fun for me to make the card in two different colors – it shows how versatile a layout can be with different colors used. IT was a fun experiment!

The last card was a completely different take with this bundle. I used the Square Snippets DSP for the die cut circle shape and alos the leaves. The flower is stamped in Pretty Peacock ink and I love how it pulls from the die cut circle shape.

If you love these cards, then you will love my current Class to Go offering! And what oculd be better on a cold winter day (it’s -8 here right now!) then cozying up with a cup of coffee or tea, and getting to stamp some beautiful cards! If you are interested in the class, don’t delay – registration ends soon!


Lovely Blossoms Card Class to Go!
Create beautiful, heartfelt cards from the comfort of your craft space with my Lovely Blossoms Card Class to Go! This class highlights a bundle I absolutely adore — the dies are stunning and the sentiments are ones you’ll reach for again and again.
Class to Go | $45 + $10 Shipping if Needed
Includes over $28 in Stampin’ Up! product
Make 6 gorgeous cards PDF tutorial + step-by-step video included (Craft on your schedule!)
EXTENDED! Registration closes Saturday, January 31 at 12 PM ET!


Jan 26, 2026 | Gallery, More Birthday Cards |

Some cards just feel calm and happy the moment you look at them, and this one fits that bill beautifully. 🤍
Today I’m sharing a Happy Birthday card created with the Stampin’ Up! Lovely Blossoms Suite Collection and the Lovely Arrangements Bundle, and I’ve made a FREE card tutorial so you can recreate it too.
The soft color palette, layered florals, and subtle pattern details make this card perfect for birthdays, but it could easily be adapted for other occasions just by swapping out the sentiment. I especially love how the blossoms frame the design and add gentle movement without overwhelming the card front.

Free Card Tutorial: Lovely Arrangements Happy Birthday Card
Measurements:
- Petal Pink: 4 ¼” x 11” card base
- Secret Sea: 4” x 5 1/8” banner
- Basic White: 3 5/8” x 4 ¾” banner
- Basic White: 4” x 4” for stamping
- Lovely Blossoms DSP: 3 ¾” x 2 ½”
Instructions:
- Score the Petal Pink card base on the long side at 5 ½” and fold. Then, run the closed card base through the Stampin’ Cut & Emboss Machine with the 5th largest Party Banner Die. Have the fold of your card at the top leaving the top edge of the die off the card near the fold. You don’t want to cut the fold off. You will cut the other three sides by making the sides a little narrower and the bottom into a banner.
- Die cut the Secret Sea cardstock using the 6th largest Party Banner Die. Then, attach that banner to the card front using Stampin’ SEAL.
- Cut the Basic White cardstock using the 7th largest Party Banner Die. Add the banner to the card front on top of the Secret Sea layer.
- Using the piece of DSP die cut using the linked circles die. Then, attach that to the center of the card front using liquid glue.
- With the last piece of Basic White cardstock stamp, two leaves in Old Olive ink, two flowers and one sentiment in Secret Sea ink. Then, die cut the flowers, leaves, and sentiment using the coordinating dies in the bundle.
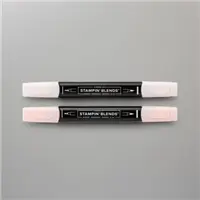
- Color the flowers lightly using Petal Pink Stampin’ Blends.
- Add the flowers, leaves, and sentiment to the card using Stampin’ Dimensionals as shown.
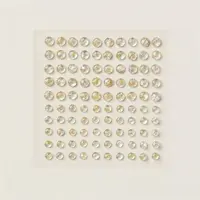
- Lastly, add three Moody Palette Glossy Dots to finish.


Aug 30, 2025 | Gallery, More Birthday Cards |

Happy Friday! On today’s Facebook Live, I shared a sneak peek of the new Branching Out Bundle from Stampin’ Up! This is such a versatile bundle – perfect for masculine cards, nature-inspired designs, and so much more. I paired it with earthy tones and one of my favorite new designer papers to create this classic birthday card.
Don’t Forget the Envelope!
I always like to finish my projects with a coordinating envelope. A strip of the same designer series paper was added to the flap for that extra special touch.
Missed the Live? You can catch the replay on my I’d Rather Bee Stampin’ Facebook Page or on YouTube below.

The Card
The card base is Very Vanilla, which really lets the rich tones of Early Espresso and Pecan Pie shine. I used the Branching Out Dies to create two frames – one in Early Espresso and one in Pecan Pie – and layered them over a 3” x 4” piece of designer series paper from the Branching Out suite. I love how the woodland images peek through the window of the frame!
For a little texture, I added die-cut branches (also from the Branching Out Bundle) in Very Vanilla and tied them with a touch of natural mesh ribbon. The sentiment, “Happiest Birthday Wishes,” is stamped in Early Espresso ink and cut with a stitched rectangle. A simple dot finishes the look- another new product alert the Streaked Dots.

Measurements
-
Very Vanilla Card Base: 5 ½” x 8 ½”, scored at 4 ¼”
-
Early Espresso Frame: 4” x 5 ½”
-
Pecan Pie Frame: 3 ¼” x 4 ¾”
-
DSP: 3” x 4”
-
Envelope Flap: 5 ¾” x 2 ¼”
-
Scraps of Very Vanilla for sentiment and branch die cuts

Watch the Replay
If you missed today’s Facebook Live, you can catch the replay to see step-by-step how this card came together. I know you’ll love playing with the Branching Out Bundle as much as I do!
FREE TUTORIALS- I send out Weekend Inspiration every weekend that includes a handful of Card Projects with tutorials and supply lists – and yes they are free! The first card on today’s post is one of the project tutorials! I send these out to all who are on my email list. Interested in getting these project sheets? Simply subscribe to my email list click here:


Jul 16, 2025 | Gallery, More Birthday Cards, More Friend Cards |

I had so much fun during my last Facebook Live creating these three cheerful cards using the Sweetest Jar Bundle. Each card shows just how versatile this adorable bundle is — from sending a little luck, to celebrating a birthday, to sharing a touch of sweetness!
Whether you love the playful shamrocks, the colorful shaker jar, or the charming little cookie jar, these cards are sure to make someone smile. I love how easy it is to mix and match the stamps and dies in this bundle to fit any occasion.

Want to make these cards too?
I have an Ordering Special happening now through Sunday, July 20th! When you place a $40+ order (after rewards) in my online store, you’ll receive all 3 card kits — free! It’s my way of saying thank you and giving you a head start on creating with your new goodies. Note: You will need the bundle since Stampin’ Up! policy doesn’t allow us to send stamped images in kits.
Don’t miss out on this sweet deal — shop right here!

Here’s a closer look at the cards below:
FREE TUTORIALS- I send out Weekend Inspiration every weekend that includes a handful of Card Projects with tutorials and supply lists – and yes they are free! The first card on today’s post is one of the project tutorials! I send these out to all who are on my email list. Interested in getting these project sheets? Simply subscribe to my email list click here:


Jun 18, 2025 | Gallery, More Birthday Cards, More Congrats Cards, More Love Cards |

During my recent Facebook Live over on my I’d Rather Bee Stampin’ page, I featured the absolutely gorgeous Beautiful Gallery Suite Collection from Stampin’ Up! I had so much fun creating these two cards — each with a little different look, but both showcasing the stunning elements from this suite!


The first card is bold and beautiful — I love how the richly colored florals pop against the softly embossed background. That Designer Series Paper is one of my favorites in the collection… such pretty patterns and colors! A little ribbon, some die-cut blooms, and those sweet embellishments finish it off perfectly.


The second card is softer and serene — I used the coordinating dies to create a tone-on-tone look with a pop of crisp white. The sentiment, “You’ve been on my mind,” is perfect for sending a little love to someone special. And isn’t that stitched circle die cut darling?


I’m thrilled to share that the Gallery Blooms Bundle is the star of my next Beautiful Gallery Card Class to Go! This class is packed with elegant, timeless designs that showcase the versatility of this stunning bundle — from soft florals to charming countryside scenes. You’ll receive all the pre-cut supplies you need to create six gorgeous cards, along with a step-by-step PDF tutorial to guide you through each one. Whether you’re a beginner or seasoned stamper, this class is the perfect way to add some gallery-worthy beauty to your card collection — right from the comfort of your own craft space!
Please email me with any questions!
VIEWING THIS POST BY EMAIL? To register, please EMAIL ME for a Registration Link!

FREE TUTORIALS- I send out Weekend Inspiration every weekend that includes a handful of Card Projects with tutorials and supply lists – and yes they are free! The first card on today’s post is one of the project tutorials! I send these out to all who are on my email list. Interested in getting these project sheets? Simply subscribe to my email list click here:


Apr 2, 2025 | Gallery, More Birthday Cards, More Gift Wrap Ideas |

I’m so excited to share this adorable birthday bag created with the Wildflower Birthday Suite from Stampin’ Up!—it’s the perfect way to package a sweet celebration!
Did you catch my FB Live? I also recreated the card I posted here on Monday – so cute!!! It uses many of the same products used for the bag I also made in my Live.
AND don’t miss the beginning of the Live – I do a color comparison of the upcoming new In Colors (2025-2027). The new colors are really good ones – Darling Duckling, Strawberry Slush, Timid Tiger, Secret Sea and Cloud Cover. At first glance, I always think these colors look the same as our current colors – but then I compare them and am always surprised at how different they are! Take a look and let me know what you think. Do you have a favorite?
And here’s some extra fun: Place a $50+ online order with me by this Friday, and I’ll send you a FREE surprise embellishment as a special thank-you!

FREE TUTORIALS- I send out Weekend Inspiration every weekend that includes a handful of Card Projects with tutorials and supply lists – and yes they are free! The first card on today’s post is one of the project tutorials! I send these out to all who are on my email list. Interested in getting these project sheets? Simply subscribe to my email list click here:


Sale: $8.00
Price: $10.00


