Feb 13, 2026 | Gallery, More Love Cards |

Who says Valentine’s cards need a parade of hearts to share a little love? This design lets greenery do the talking. Using the Friendly Foliage Bundle from Stampin’ Up! (below), I layered leafy die cuts inside that gorgeous frame and kept the palette calm and classic. The result feels fresh, thoughtful, and just a little unexpected, perfect for the guy in your life or anyone who prefers love served with a side of clean lines and quiet charm. Sometimes a simple “Sending Love” nestled in foliage says it best.

Measurements:
- Basic White Thick: 4 1/4 x 11, scored 5 1/2, 3 3/4 x 5
- Mossy Meadow Two-Tone Cardstock: 3 x 4 1/2 (panel), scraps for die-cuts
- Basic White: 2 3/4 x 4 1/4 (panel), 2 3/4 x 4 1/4 (stamped die-cut), 2 1/4 x 1/2 sentiment
Instructions:
- Burnish the fold of the card base with a Bone Folder.
- Adhere the Mossy Meadow to the card base with dimensionals.
- Adhere the Basic White panel to the Mossy Meadow with glue.
- Stamp the framed foliage and sentiment in Mossy Meadow Ink onto the coordinating Basic White panels.
- Crop the framed foliage stamped image with the coordinating dies (one tucked inside the other).
- Adhere the die-cut and sentiments as shown with Mini Stampin’ Dimensionals.
- Crop 4 of the die-cuts in Mossy Meadow Two-Tone Cardstock. Cut 2 in half. Adhere the four die-cut as shown with liquid glue.
- Embellish with Mossy Meadow Natural Matte Dots.


Jan 31, 2026 | More Love Cards, Tutorials for Purchase |

Sometimes the prettiest cards come together when you simply step back and let the paper shine. For today’s quick and simple thank you card, I did exactly that. The Lovely & Beautiful Designer Series Paper does all the heavy lifting with its soft florals, gentle colors, and effortless elegance. No fancy techniques required. Just clean layers, a sweet sentiment, and you’re done.
I paired the patterned paper with a sentiment from the Fabulous Sayings Stamp Set, framed perfectly using the Beautifully Celebrated Dies. That die shape adds just enough detail to make the card feel finished without stealing the spotlight. A couple of small embellishments and this card is ready to brighten someone’s mailbox in minutes.

Product of the Month Highlight
The Fabulous Sayings Stamp Set is my Product of the Month, which means you can add it to your order for just $5 with a $75 purchase. It’s one of those go-to sentiment sets you’ll reach for again and again.
If you’re short on time but still want beautiful results, this is a perfect reminder that great paper and a good sentiment are sometimes all you need. Simple, pretty, and totally doable!
Measurements:
- Basic White Thick: 4 1/4 x 11, scored 5 1/2, 3 3/4 x 5
- Lovely & Beautiful Designer Series Paper: 3 1/2 x 4 3/4, 5 3/4 x 2 1/4
- Basic White: 2 1/2 x 2
Instructions:
- Burnish the fold of the card base with a Bone Folder.
- Adhere the Basic White panel to the card base with Stampin’ Dimensionals.
- Adhere the Designer Series Paper to the card with Multipurpose Liquid Glue.
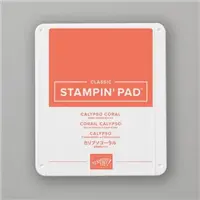
- Stamp the sentiment in Calypso Coral Ink.
- Crop with the smallest Beautifully Celebrated die.
- Adhere with Stampin’ Dimensionals.
- Embellish with Pearlized Faceted Circles.
- Adhere the Designer Series Paper to Medium Envelope flap with Multipurpose Liquid Glue.


ONLY 1 DAY LEFT! Earn the January 2026 Papercraft Collective Tutorial Bundle FREE with a $50 order placed with me, or purchase the full tutorial bundle for $20. Either way, you’ll be stitching a little extra love into your crafting time this January. 💌

How to Get the January 2026 Endless Love Tutorial
You’ve got two easy options to get your hands on this tutorial:
Option 1: Earn It FREE
Place a $50 order (before tax and shipping) with me, and you’ll receive the Endless Love Tutorial Bundle for FREE. (a link to the tutorial will be emailed to you within 24-48 hours after you place your order).
• Available to U.S. residents only
• Orders must be placed through me

Option 2: Purchase the Tutorial
Not shopping right now or live outside the U.S.? No problem.
• Purchase the tutorial for $20
• Available to anyone, anywhere

This tutorial is perfect if you love fresh card ideas, thoughtful layouts, and projects that feel polished but totally doable.


Jan 22, 2026 | More Love Cards, Tutorials for Purchase |

Yesterday I went live on Facebook and shared three fun and easy Valentine’s projects using the Love Notes Mix & Match Designer Series Paper by Stampin’ Up! — and it was such a fun crafty session! If you missed it live, no worries at all… the replay is ready and waiting for you.

Why I Love the Love Notes Mix & Match DSP
This paper pack is one of those products that does a lot of the work for you. The colors, patterns, and pre-designed elements make it incredibly easy to pull together projects quickly without sacrificing style. It’s perfect for:
- Quick cards
- Small treats and packaging
- Valentine projects (or love-themed cards year-round)
During the Facebook Live, I created three Valentine’s projects, each perfect for gifting and easy to customize:
- Candy Stick Holder – We started with a sweet and simple candy stick project that’s great for quick Valentine treats.

Pull-Out Pouch – Next up was a cute little pull-out pouch that’s just the right size to hold a gift card, tea bag, or a chocolate square.


Gusseted Pouch – We finished with a gusseted pouch, perfect for small goodies and a great way to dress up a simple gift.
Along the way, I shared tips for mixing patterns from the DSP, keeping embellishments balanced, and making projects that are cute and practical.
If you have this paper pack, I’d love to see what you create with it! Simple swaps and small changes make these ideas your own, and that’s one of my favorite things about Mix & Match products.
Thanks so much for crafting along with me — whether live or on the replay. Be sure to check back soon for more Valentine inspiration and upcoming creative sessions!


Sale: $9.00
Price: $10.00

The January 2026 Papercraft Collective Tutorial Bundle. You can earn the tutorial FREE with a $50 order placed with me, or purchase the full tutorial bundle for $20. Either way, you’ll be stitching a little extra love into your crafting time this January. 💌

How to Get the January 2026 Endless Love Tutorial
You’ve got two easy options to get your hands on this tutorial:
Option 1: Earn It FREE
Place a $50 order (before tax and shipping) with me, and you’ll receive the Endless Love Tutorial Bundle for FREE. (a link to the tutorial will be emailed to you within 24-48 hours after you place your order).
• Available to U.S. residents only
• Orders must be placed through me

Option 2: Purchase the Tutorial
Not shopping right now or live outside the U.S.? No problem.
• Purchase the tutorial for $20
• Available to anyone, anywhere

This tutorial is perfect if you love fresh card ideas, thoughtful layouts, and projects that feel polished but totally doable.
From My Craft Room to Yours
Being part of this January release feels extra special to me, especially since it kicks off a brand-new year of creativity with a theme that celebrates connection, kindness, and love. I can’t wait for you to see my project and to be inspired by the rest of the team’s beautiful designs.
If you love stamping with intention and creating cards that mean something, this one is for you. 💌
More details on ordering, links, and reminders are coming soon, but for now, mark your calendar for January 6, 2026 and get ready to fall head over heels for Endless Love.

Jan 15, 2026 | More Love Cards, Tutorials for Purchase |

Valentine’s Day crafting is one of my favorite creative seasons. There’s just something about hearts, hugs, and a little bit of whimsy that makes everything feel extra special. During my most recent Facebook Live, I shared two handmade Valentine cards that are full of charm and heartfelt details, and today I wanted to give them a little spotlight here on the blog.
Both cards were created using two absolutely adorable Stampin’ Up! bundles: the Endless Love Bundle and the Valentine Kisses Bundle. These sets pair beautifully together and make it so easy to create projects that feel playful, sweet, and totally gift-worthy.
If you missed the Facebook Live, be sure to catch the replay so you can see both cards come together step by step. And as always, if you’re inspired to create your own Valentines, I’d love to help you with the supplies you need.


The first Valentine features bold hearts, texture, and a fun pop of red that immediately says love. I used the Endless Love Bundle to create layers that feel clean but still full of personality.

The second Valentine might just steal your heart. The Valentine Kisses Bundle brings in the cutest imagery, and that sweet little bear holding a heart is impossible to resist.


The January 2026 Papercraft Collective Tutorial Bundle. You can earn the tutorial FREE with a $50 order placed with me, or purchase the full tutorial bundle for $20. Either way, you’ll be stitching a little extra love into your crafting time this January. 💌

How to Get the January 2026 Endless Love Tutorial
You’ve got two easy options to get your hands on this tutorial:
Option 1: Earn It FREE
Place a $50 order (before tax and shipping) with me, and you’ll receive the Endless Love Tutorial Bundle for FREE. (a link to the tutorial will be emailed to you within 24-48 hours after you place your order).
• Available to U.S. residents only
• Orders must be placed through me

Option 2: Purchase the Tutorial
Not shopping right now or live outside the U.S.? No problem.
• Purchase the tutorial for $20
• Available to anyone, anywhere

This tutorial is perfect if you love fresh card ideas, thoughtful layouts, and projects that feel polished but totally doable.
From My Craft Room to Yours
Being part of this January release feels extra special to me, especially since it kicks off a brand-new year of creativity with a theme that celebrates connection, kindness, and love. I can’t wait for you to see my project and to be inspired by the rest of the team’s beautiful designs.
If you love stamping with intention and creating cards that mean something, this one is for you. 💌
More details on ordering, links, and reminders are coming soon, but for now, mark your calendar for January 6, 2026 and get ready to fall head over heels for Endless Love.

Jan 13, 2026 | More Love Cards, Tutorials for Purchase |

Love is in the layers with this sweet little stunner. This card is one of those projects that feels classic and playful all at once, thanks to the Endless Love Bundle. The patterned heart backdrop (Made with Love Designer Series Paper) sets the tone, while that bold pierced heart and arrow steal the spotlight. Add a soft ribbon bow and a simple sentiment, and suddenly you have a card that says everything without trying too hard. It’s perfect for anniversaries, Valentine’s Day, or those “just because I love you” moments that matter most.
Measurements:
- Basic White Thick: 4 1/4 x 11, scored 5 1/2
- Poppy Parade: 3 3/4 x 4 1/2, 3 1/4 x 3 (die-cuts)
- Basic White: 3 1/2 x 4 1/4, 3 x 2 3/4 (circle), 2 1/2 x 3/4 (sentiment)
- Made with Love Designer Series Paper: 3 x 4, then cut into three, 1 x 4 strips
Instructions:
- Burnish the fold of the card base with a Bone Folder.
- Adhere the three strips of Designer Series Paper to the Basic White panel, evenly spaced, in the order of the original 3 x 4 panel.
- Adhere to the Poppy Parade panel with glue and to the card with dimensionals.
- Crop the Basic White circle with the 2 3/8″ Circle Punch. Adhere with dimensionals.
- Stamp the sentiment in Poppy Parade ink on the sentiment panel.
- Crop the sentiment, heart and arrow using the coordinating Endless Love dies.
- Secure the sentiment to the loop on the heart with Bubble Bath Faux Linen Ribbon.
- Adhere all pieces to the card as shown with Multipurpose Liquid Glue.
- Embellish with Strawberry Slush & Pretty in Pink Gems.


Even better, these products are featured in the January 2026 Papercraft Collective Tutorial Bundle. That means you can recreate this card and so many more gorgeous projects with step by step instructions from a talented group of designers. You can earn the tutorial FREE with a $50 order placed with me, or purchase the full tutorial bundle for $20. Either way, you’ll be stitching a little extra love into your crafting time this January. 💌

How to Get the January 2026 Endless Love Tutorial
You’ve got two easy options to get your hands on this tutorial:
Option 1: Earn It FREE
Place a $50 order (before tax and shipping) with me, and you’ll receive the Endless Love Tutorial Bundle for FREE. (a link to the tutorial will be emailed to you within 24-48 hours after you place your order).
• Available to U.S. residents only
• Orders must be placed through me

Option 2: Purchase the Tutorial
Not shopping right now or live outside the U.S.? No problem.
• Purchase the tutorial for $20
• Available to anyone, anywhere

This tutorial is perfect if you love fresh card ideas, thoughtful layouts, and projects that feel polished but totally doable.
From My Craft Room to Yours
Being part of this January release feels extra special to me, especially since it kicks off a brand-new year of creativity with a theme that celebrates connection, kindness, and love. I can’t wait for you to see my project and to be inspired by the rest of the team’s beautiful designs.
If you love stamping with intention and creating cards that mean something, this one is for you. 💌
More details on ordering, links, and reminders are coming soon, but for now, mark your calendar for January 6, 2026 and get ready to fall head over heels for Endless Love.

Sep 25, 2025 | Gallery, More Love Cards |

Today I’m sharing a fresh and cheerful card that features two of my favorite Stampin’ Up! products – the Blooming Phrases Stamp Set and the Sunflower 3D Embossing Folder. I love how the delicate flowers from Blooming Phrases look paired with the bold embossed background from the Sunflower Folder—it’s such a perfect mix of soft and textured! A touch of Linen Thread and an embossed greeting finish the look beautifully.
The best part? I’m offering this as a FREE tutorial for you to enjoy! You’ll find all the measurements, supplies, and step-by-step instructions so you can recreate this card at home.
Measurements:
- Thick White: 5 ½” x 8 ½” scored at 4 ¼”
- Basic White: 3 ¾” x 5”, 1 ¾” x 5 3/8”
- Basic Black: ½” X 4 1/8”
Instructions:
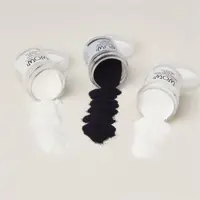
- Using Versamark ink, stamp words on Basic Black. Heat emboss using white embossing powder and Heat Tool.
- Use the Sunflower Embossing Folder to emboss the large Basix White cardstock panel.
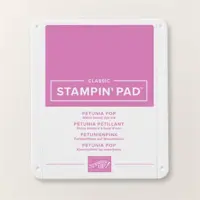
- Using Old Olive and the curvy end of the word stamp, stamp the stems and then the leaves onto the strip of White. Using Petunia Pop, stamp the flowers onto the stems.
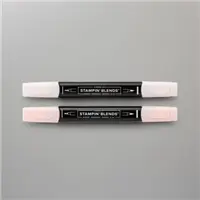
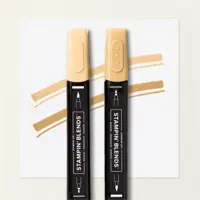
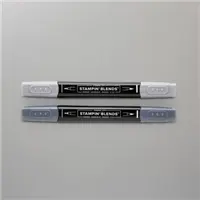
- Using the Light Peach Pie blend, color in the white areas of the flowers, then use the Dark to highlight the bottom of the center of the flowers.
- Using the Basic Black Blend, flick speckles over the flower panel.
- Using multi purpose glue, adhere sunflower layer onto front of card base.
- Using Stampin Dimensionals, adhere flower panel onto sunflower layer.
- Using linen thread, make a loopy bow and adhere to underside of word strip, then adhere over flower panel.


