

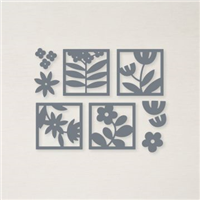
The All Squared Away Bundle caught my eye when I first glanced at our new 2021-2022 Annual Catalog. It’s fun and different! There are lots of things you can do with this bundle – and I will be sharing some more ideas with you this week, so be sure to stop back!

MEASUREMENTS:
- Basic White (base): 5 ½” x 4 ¼”
- Basic White (for die cuts): 3” x 3”
- Flirty Flamingo: 5 3/8” x 2” (2 pieces)
- Flirty Flamingo (for die cuts): 2” x 2”
- Designer Series Paper: 5 ¼” x 1 7/8” (2 pieces)
- Poppy Parade: 4” X 2 ½”
- Granny Apple Green (for die cut): 2” x 2”
INSTRUCTIONS:
- Score the card base at 2 1/8” on either end. Fold each end in towards the middle.
- Add designer series paper to two front panels and then add to the front of the card.
- Die-cut the Poppy Parade cardstock.
- Cut a 2” x 2” piece of adhesive sheet and attach it to the small piece of Basic White Cardstock. Do the same for the Flirty Flamingo and the Granny Apple Green cardstocks.
- Die-cut the square flower image out of the Basic White. Be sure to die cut over the part with the adhesive sheet.
- Die-cut out two flower images from the Flirty Flamingo cardstock.
- Die-cut out the flower stem from the Granny Apple Green cardstock.
- Attach the Flirty Flamingo flower head and Granny Apple Green stem to the front of the white square die cut.
- Stamp the saying on the Poppy Parade die cut with VersaMark ink. Sprinkle with White Embossing Powder and then heat set.
- Attach your Poppy Parade cardstock piece to the front of the card with Stampin’ Dimensionals. But only on the LEFT side, so that card can still open.
- From the scrap piece of Basic White, cut the smallest die cut from the “Stitched So Sweetly Dies” that will form the closure piece.
- Attach the second Flirty Flamingo flower to the front of the small white die-cut.
- Attach the small white die-cut to the front of the card with dimensional on the RIGHT side only. Attach it so that it holds the card closed.
- Color two gems with the Granny Apple Green Blends and attach them to the centers of the flowers. Add one more gem to the front of the card.


Christmas in July!
I am SO excited to offer a new event – Christmas in July! You won’t want to miss this! Get a jump start on your holiday stamping! The day will include a swag bag of products, adorable projects, box lunch and of course everyone’s favorite cookie will be included!!!
The event will feature the Tidings of Christmas bundle. You can add it to the event at the catalog price – (saving you tax and shipping.)
YOUR CHOICE of LIVE or TO GO!
- Christmas in July Live Event or TO GO- $85.00
- Christmas in July Live Event or TO GO with Add On Tidings of Christmas Bundle – $125.50
- Note: For the To Go version you will need the Tidings of Christmas Bundle to complete your projects. You will also need your own inks and adhesives and clear blocks.
Register here: CHRISTMAS IN JULY!
The deadline to register is June 29, 2021


Price: $18.00


0 Comments