Nov 21, 2024 | Gallery, More Bee Creative Tutorials, More Birthday Cards |

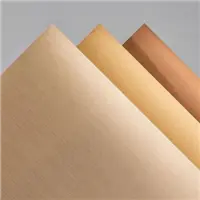
The Regal Winter Designer Series Paper in the 2024 Holiday Catalog is gorgeous and I especially love this Wild Wheat colored design. I used the following mix of products to create this quick card (full list of products is at the end of this blog post):
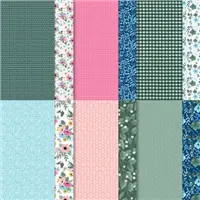
- Regal Winter Designer Series Paper – Item 164156
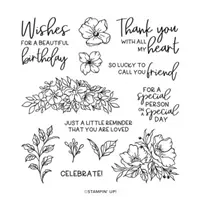
- Autumn Expressions Stamp Set – Item 164174
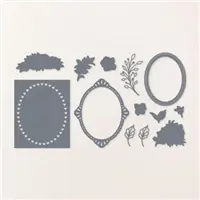
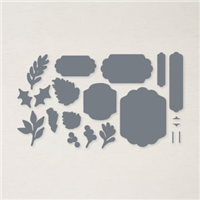
- Stylish Shapes Dies – Item 159183
- Gold Textured Adhesive-Backed Dots – 164027


MEASUREMENTS:
- Early Espresso Cardstock: 4 1/4 x 11 – score at 5 1/2 (card base), 3 1/2 x 4 3/4 (layer), 2 1/2 circle, 2 3/4 x 1/2 flagged pieces
- Regal Winter Designer Series Paper: 3 3/4 x 5
- Wild Wheat Cardstock: 3 3/4 x 5
INSTRUCTIONS:
- Fold the Early Espresso Cardstock in half and burnish the fold with a Bone Folder.
- Use Multipurpose Glue to attach the Designer Series Paper and Early Espresso to the Wild Wheat layer.
- Adhere the panel to the card base with dimensionals.
- Stamp the sentiment in Versamark Ink onto the Shaded Spruce layer. Heat emboss with white WOW! Embossing Powder.
- Crop the sentiment with the 2 1/2 Stylish Shapes circle die. Adhere with Stampin’ Dimensionals.
- Crop the Early Espresso piece with the Happy Little Things flagged banner die. Snip with Paper Snips, leaving one side a touch longer than the other. Adhere as shown.
- Finish the card by embellishing with Gold Textured Adhesive-Backed Dots and a bow of Linen Thread secured with a Mini Glue Dot.


Nov 14, 2024 | Gallery, More Bee Creative Tutorials, More Christmas Cards |

This simple Christmas Card with an adorable paper bow is quick and easy to make by using the following three key Stampin’ Up! products:
- Sentimental Christmas Designer Series Paper – Item 164209
- Peaceful Evergreen Dies – Item 164024
- Decorative Trees Stamp Set – Item 164275


MEASUREMENTS:
- Basic Beige Cardstock: 5 1/2 x 8 1/2 – score at 4 1/4 (card base), 3 3/4 x 5 (layer)
- Sentimental Christmas Designer Series Paper: 2 1/4 x 4 3/4 and 1 1/8 x 4 3/4
- Shaded Spruce Cardstock: 3 3/4 x 3/8 (sentiment) and scraps for die-cut bow

INSTRUCTIONS:
- Fold the Basic Beige Cardstock in half and burnish the fold with a Bone Folder.
- Use Multipurpose Glue to attach the two Designer Series Paper Panels to the Basic Beige layer.
- Adhere the Basic Beige panel to the card base with dimensionals.
- Stamp the sentiment in Versamark Ink onto the Shaded Spruce layer. Heat emboss with white WOW! Embossing Powder.
- Adhere the sentiment panel with Multipurpose Liquid Glue.
- Crop the four Shaded Spruce bow pieces with a Stampin’ Cut & Emboss Machine (Standard or Mini) and the Peaceful Evergreen Dies.
- Adhere all the bow pieces together with Mini Glue Dots. TIP: Wrap the bow pieces around a smooth pen or pencil while assembling to prevent it from creasing (I didn’t on the one that is creased).
- Finish the card by embellishing with Shaded Spruce Regal Foiled Adhesive-Backed Dots.

Nov 28, 2022 | Gallery, More Bee Creative Tutorials, More Christmas Cards |
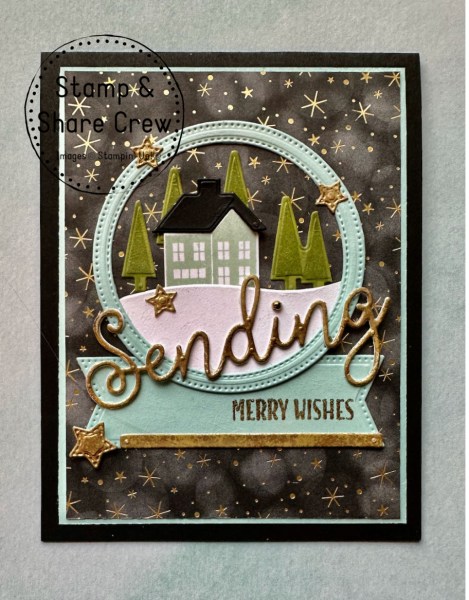
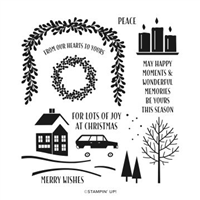
Create this beautiful holiday card buy combining several die-sets from Stampin’ Up! with the Window Wishes Bundle.
Measurements:
- Basic Black CS: 4 1/4” x 11, scored at 5 1/2”; scraps for roof
- Pool Party CS: 3 7/8” x 5 1/8”;
- Basic White CS: 1 1/2” x 2 3/4”; scraps for house
- DSP: 3 3/4” x 5”
Instructions:
- Using the largest two circles and the largest banner from the Stylish Shapes Dies, cut a circle frame and banner from the large piece of Pool Party.
- Attach large Pool Party piece and DSP to card base.
- Using die from the Window Dies, cut a ‘slope’ from the Basic White Cardstock. Attach to back of circle frame with Liquid Glue, and trim off the excess.
- Using Versamark Ink, stamp ‘Merry Wishes’ on bottom right of banner, and heat emboss with gold embossing powder. With die from Window Dies, cut long strip from Distressed Gold paper and attach to banner.
- Using Pool Party and Pear Pizzazz ink, stamp and die cut the house and trees. Die cut a roof from Basic Black Cardstock.
- Attach the banner to the card base and attach the circle frame, overlapping the banner slightly.
- Arrange house and trees inside circle frame, tucking under white slope where necessary.
- From the Distressed Gold paper, cut the word Sending from the Sending Dies, and several small stars from the Give it a Whirl dies. Attach to card.


WANT TO EARN FREE PRODUCT TWICE AS FAST? My Free-Bee’s are my way of thanking you for your continued support of my business. FREE BEES are a Laura Milligan, I’d Rather Bee Stampin’ EXCLUSIVE!
Earn $40 in free Stampin’ Up! product of your choice through my Free-Bees Reward Program.
For every $50 of product you purchase from me, you will receive 1 2 Free-Bees (November 25-28). If your order is $100, you will earn 2 4 Free-Bees (November 25-28).
DON’T FORGET! Orders over $150 will also earn Stampin’ Rewards through Stampin’ Up!
A $250 order will earn you 5 10 FREE BEES (November 25-28), which qualifies you for a $40 shopping spree on me, PLUS you will earn $25 in Stampin’ Rewards from Stampin’ Up!
Click here to download your Free-Bees Tracking Sheet
How to Earn Your Free-Bees:
- Place an order through me, either in person or online.
- Every $50 increment (without tax/shipping) qualifies as TWO “bees” (November 25-28).
- Track your bees using this sheet: Click here to download your Free-Bees Tracking Sheet
- Earn 10 bees and email me – I will verify your purchases and send you $40 in Stampin’ Up! product of your choice!

Nov 16, 2022 | Gallery, More Bee Creative Tutorials, More Christmas Cards |
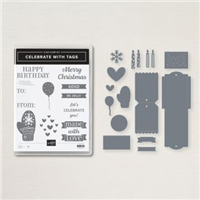
Create this Cheerful and Fun Holiday Card using the Celebrate with Tags Bundle by Stampin’ Up!

Measurements:
- Card Stock: Basic White 3 ½” x 11”
- DSP: Pacific Point Plaid 3” x 5”
- Card Stock: Basic White scraps
- Glimmer: Real Red 2 ½” x 2 ½”
- Ribbon: Real Red Ruffle 4”
- Baker’s Twine: White (2) 5”
Instructions:
- Cut a 3 ½” x 11” Basic White card base. Fold in half.
- Stamp the hearts onto the card front using Real Red ink (3x).
- Emboss the card front using the Wintry snowflake embossing folder.
- Cut a tag from the Pacific Pointe plaid DSP.
- Cut a 4” piece of Real Red Ruffle ribbon and thread it thru the hole in the top of the tag.
- Cut (2) 5” pieces of White Baker’s Twine.
- Wrap them around the ruffle ribbon and tie them together in a bow to secure at the top.
- Adhere the tag to the card front using Stampin’ Dimensionals. (Note: it can hang off the right side just a bit)
- Cut (3) snowflakes from Basic White cardstock and adhere to the tag.
- Cut a large heart from Real Red Glimmer paper and adhere to the tag using Stampin’ Dimensionals.
- Stamp the mitten onto Basic White cardstock using Pacific Point ink. Cut.
- Adhere the mitten to the tag using Stampin’ Dimenisonals.
- Cut a Basic White circle. Cut in half.
- Stamp “WITH” onto the half circle using Pacific Point ink.
- On a piece of Basic White cardstock, Stamp the LOVE banner using Real Red ink. Cut.
- Adhere the banner to the bottom of the half circle using Stampin’ Dimensionals.
- Adhere the piece to the card front using Stampin’ Dimensionals.
- Adhere a rhinestone to each snowflake.
- Adhere a rhinestone to the center of the mitten.
Sale: $8.00
Price: $10.00

Nov 10, 2022 | Gallery, More Bee Creative Tutorials, More Christmas Cards |

Create this fun yet simple Santa Holiday Card using the Limited Time Framed and Festive Stamp Set by Stampin’ Up!
Measurements:
- Real Red card base- 8 ½” x 5 ½”
- Basic White- 5 ¼” x 4
- Basic Black- 1” x 2 5/8” and 1” x 1”
- Shimmery White- 1” x 2 5/8”
- Brushed Metallic- 1 ¼” x 1 ¼”

Instructions:
- Score the Real Red card base on the long side at 4 ¼” and fold.
- Stamp the sentiment on the Basic White layer (card stock #2) in Versa Mark towards the bottom in the center. Then, add gold embossing power, shake off excess, and heat emboss.
- Adhere the Basic White layer to the card front using Stampin’ SEAL.
- Attach the Shimmery White card stock vertically to the center of the Real Red Glimmer Paper using liquid glue.
- Attach the long strip of Basic Black card stock to the Real Red Glimmer Paper horizontally as shown in the photo.
- Attach the Brushed Metallic square piece to the center of the Basic Black strip to create a belt for Santa’s belly. Then, add the small Basic Black square to the top of the metallic square with liquid glue to finish it off.

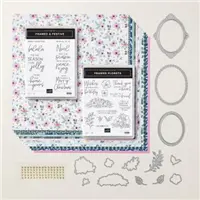
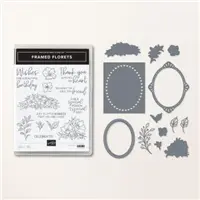
Add just the right touch of elegance to any occasion, including Christmas and seasonal celebrations, with the sweet Fitting Florets Collection. From color schemes to sentiments and embellishments to dies, these unique products blend together so that your cards and crafts fit whatever occasion you might need. Send birthday wishes, express your gratitude, or spread Christmas cheer—with so many options to mix and match you’ll be set no matter the celebration all year!
This collection will be available to customers NOW – January 4, 2023!
The following products are also available for purchase in the Mini Catalog starting January 2023:
- Framed Florets Bundle (item 162407)
- Framed Florets Stamp Set (item 161815)
- Framed Florets Dies (item 160623)
The following exclusive products are only available until January 4, 2023 while supplies last:
- Framed & Festive Cling Stamp Set (item 160888)
- Fitting Florets Designer Series Paper (item 161814)
- Gold Adhesive-Backed Swirls (item 161822)

Oct 17, 2022 | Gallery, More Bee Creative Tutorials, More Friend Cards |

Create this beautiful yet simple Hello Card using the Forever Fern Stamp Set and Rectangle Postage Stamp Punch by Stampin’ Up!
Measurements:
- Pool Party cardstock: 8 ½” x 5 ½” (score at 4 ¼”), scraps for punching
- Soft Suede cardstock: 3 ⅞” x 5 ⅛”
- Crumb Cake cardstock: 3 ¾” x 5”
- Coastal Cabana cardstock: scrap for punching
- Bermuda Bay cardstock: scrap for punching
- Very Vanilla cardstock: scrap for die cutting
- Linen Thread: approx. 6-8”
Instructions:
- Fold the Pool Party cardstock in half to create the card base.
- Choose 3 different leaf/branch stamps from the Forever Fern stamp set. With Versamark ink, stamp one all over the Pool Party scraps, one all over the Coastal Cabana scraps and the third one all over the Bermuda Bay scraps.
- Use the Rectangular Postage Stamp punch, punch out two from the stamped Pool Party cardstock, two from the stamped Coastal Cabana cardstock and two from the stamped Bermuda Bay cardstock (cut one in half). Partial punched pieces are ok because some will get trimmed anyway (see the sample picture).
- Stick the punched pieces on the Crumb Cake card layer (portrait orientation) in two rows starting approx. ⅛” from the left edge. Make sure to stagger the rows, like if you were laying bricks!
- Row 1 (top-bottom): Bermuda Bay, Pool Party, Coastal Cabana, Bermuda Bay
- Row 2 (top-bottom): Pool Party, Coastal Cabana, Bermuda Bay
- Flip the Crumb Cake layer over and trim off any pieces sticking over the edges. Doing this from the back gives you a straight edge to guide your scissors along.
- Stick the Crumb Cake layer on the Soft Suede layer. Then, stick the Soft Suede layer on the Pool Party card base.
- On a scrap of Very Vanilla cardstock, stamp the “hello” from the Forever Fern set with Soft Suede ink. Die cut it out using a small, long label die from the Seasonal Labels dies set.
- Tie a bow with big loops from Linen Thread. Stick it on the back of the die cut label so that one loop and tail are visible on the top right and the other loop and tail are visible on the bottom left. Use Stampin’ Dimensionals to stick the label onto the card just below center on the right side.
- Finish the card off by placing a small pearl on either end of the label.
FREE TUTORIALS- I send out Weekend Inspiration every weekend that includes a handful of Card Projects with tutorials and supply lists – and yes they are free! The first card on today’s post is one of the project tutorials! I send these out to all who are on my email list. Interested in getting these project sheets? Simply subscribe to my email list click here:

Want it all?? Have a big wish list? The BEST deal is always buying the Stampin' Up! Starter Kit! You get $125 in product of your choice for just $99 & Free Shipping! No obligation
I am blessed to lead an amazing team with members all across the United States. My team consists of both business builders and happy shoppers! The question I am most often asked about joining the SU family is – “do I have to sell?” The answer is NO! You are welcome to be a happy shopper – and a smart cookie, I might add, to get all the products you love at the demonstrator discount!
Please contact me with any questions! I’d love to have you join my “We’d Rather Bee Stampin'” team!
You will then enjoy 20% off all future purchases while you are active! What have you got to lose? The link to join is below! The best part – there is no obligation to sell, or hold parties ever!!! You can simply become a “happy shopper” and get discounts on all your Stampin’ Up! purchases! If you’d like to pursue this as a business and make a little extra money, I can help you with that as well!