Oct 14, 2022 | Gallery, More Bee Creative Tutorials, More Thank You Cards |

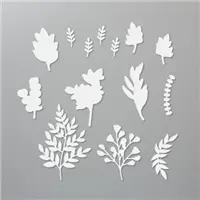
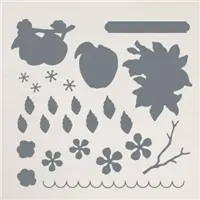
Create this colorful fall thank you card using the Forever Flourishing and Amazing Thanks Dies by Stampin’ Up!
Measurements:
- Soft Suede Card Stock: 8-1/2” x 5-1/2”, scrap for “thanks”
- Pumpkin Pie Card Stock: 4” x 5-1/4”, scrap for leaves
- Very Vanilla Card Stock: 3-13/16” x 5-1/16”, 4” x 5-1/4”, scrap for “thanks” shadow.
- Old Olive Card Stock: Scrap for leaves
- Crumb Cake Card Stock: 1-3/4” x 4”, scrap for leaves
- Daffodil Delight Card Stock: Scrap for leaves
- Ribbon: 12”
Instructions:
- Fold a 5-1/2” x 8-1/2” piece of Soft Suede CS in half to create a card base. Glue a 4” x 5-1/4” piece of Very Vanilla CS to the back inside of the card base.
- Die-cut and punch a variety of leaf shapes using Crumb Cake, Old Olive, Daffodil Delight, and Pumpkin Pie CS. Randomly glue the leaf shapes to a 3-13/16” x 5-1/16” piece of Very Vanilla CS with Multipurpose Liquid Glue; allow to dry completely. Using the large fern die-cut, add texture to the front of the card stock piece by dry embossing in several locations. The “sandwich” for dry embossing using a die-cut is: Plate #1, plate #2, card stock piece facing upwards, die-cut facing down, Silicone Craft Sheet, and plate #4. Glue the embossed card to the center of the 4” x 5-1/4” piece of Pumpkin Pie CS. Mount to the center front of the card base.
- Die-cut “thanks” from a piece of Soft Suede CS and a shadow “thanks from a piece of Very Vanilla CS. Glue the die-cuts together with Multipurpose Liquid Glue. Mount to the center top of a 1-3/4” x 4” piece of Crumb Cake CS. Wrap a piece of ribbon around the card stock below the thanks die-cuts and tie a knot; trim ribbon ends. Glue the card stock piece to the card front slightly above center.
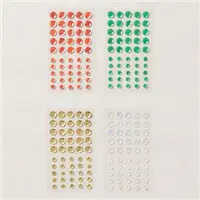
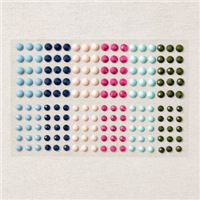
- Randomly add Gold sequins to the card front.
- Add a couple of die-cut leaves to the bottom right corner of the Very Vanilla CS piece on the inside of the card.

FREE TUTORIALS- I send out Weekend Inspiration every weekend that includes a handful of Card Projects with tutorials and supply lists – and yes they are free! The first card on today’s post is one of the project tutorials! I send these out to all who are on my email list. Interested in getting these project sheets? Simply subscribe to my email list click here:

Want it all?? Have a big wish list? The BEST deal is always buying the Stampin' Up! Starter Kit! You get $125 in product of your choice for just $99 & Free Shipping! No obligation
I am blessed to lead an amazing team with members all across the United States. My team consists of both business builders and happy shoppers! The question I am most often asked about joining the SU family is – “do I have to sell?” The answer is NO! You are welcome to be a happy shopper – and a smart cookie, I might add, to get all the products you love at the demonstrator discount!
Please contact me with any questions! I’d love to have you join my “We’d Rather Bee Stampin'” team!
You will then enjoy 20% off all future purchases while you are active! What have you got to lose? The link to join is below! The best part – there is no obligation to sell, or hold parties ever!!! You can simply become a “happy shopper” and get discounts on all your Stampin’ Up! purchases! If you’d like to pursue this as a business and make a little extra money, I can help you with that as well! 


Sep 28, 2022 | Gallery, More Bee Creative Tutorials, More Gift Wrap Ideas |
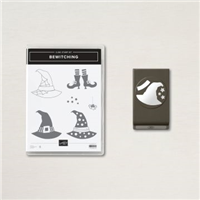
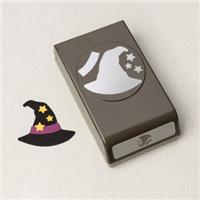
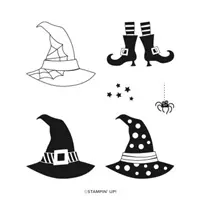
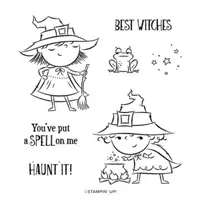
Need a quick Halloween Treat Bag? Gather the Bewitching Bundle, the Best Witches Stamp Set, and the Stars Treat Bag! The bag assembly is done for you, all you need to do is decorate!
MEASUREMENTS:
- Crushed Curry: 3 1/4″ x 5″ (bag insert), 3″ x 3″ (die-cutting)
- Basic Black: 2″ x 3/4″ (sentiment)
- Basic White: 2 1/2″ x 2 1/4″ (punched image)

INSTRUCTIONS:
- Stamp the with feet in Tuxedo Black Memento Ink directly onto the bag as shown.
- Add adhesive to the corners of the Crushed Curry and insert into the inside of the bag (behind the stars).
- Crop the Crushed Curry cardstock with a Stampin’ Cut & Emboss Machine and the Stylish Shapes 2 1/2″ stitched circle die.
- Adhere to the bag with dimensionals.
- Stamp the sentiment in Versamark Ink onto Basic Black Cardstock. Emboss with White Embossing Powder.
- Crop with a Stampin’ Cut & Emboss Machine and the Labels Aglow Die. Snip the ends with Paper Snips. Adhere with Multipurpose Liquid Glue.
- Stamp the hat in Tuxedo Black Memento Ink onto the Basic White. Crop with the Witch Hat Builder Punch. Color with Basic Black and Daffodil Delight Stampin’ Blends Combo Packs. Adhere with Multipurpose Liquid Glue.
- Use the Witch Hat Builder Punch to crop one star from Crushed Curry cardstock. Adhere to the corner of the witch had with a Mini Glue Dot.
- Embellish with Matte Black Dots.

Want it all?? Have a big wish list? The BEST deal is always buying the Stampin' Up! Starter Kit! You get $125 in product of your choice for just $99 & Free Shipping! No obligation
I am blessed to lead an amazing team with members all across the United States. My team consists of both business builders and happy shoppers! The question I am most often asked about joining the SU family is – “do I have to sell?” The answer is NO! You are welcome to be a happy shopper – and a smart cookie, I might add, to get all the products you love at the demonstrator discount!
Please contact me with any questions! I’d love to have you join my “We’d Rather Bee Stampin'” team!
You will then enjoy 20% off all future purchases while you are active! What have you got to lose? The link to join is below! The best part – there is no obligation to sell, or hold parties ever!!! You can simply become a “happy shopper” and get discounts on all your Stampin’ Up! purchases! If you’d like to pursue this as a business and make a little extra money, I can help you with that as well!
Sep 27, 2022 | Gallery, More Bee Creative Tutorials |
I did a quick walk through of my studio yesterday for my weekly Facebook Live! Take a look:

This is a “working” studio – I have “in person” events here but also do a lot of prepping for my online classes here on the large tables. It was in “good shape” yesterday because my neighborhood had an Artist’s Festival over the weekend- I was one of the featured artists, so got everything looking good for the show! It was a fun day and so since my studio was looking good, I thought it would be a good day to share my studio!
Let me know what you think! Do you like Vintage? I sure do!!!
FREE TUTORIALS- I send out Weekend Inspiration every weekend that includes a handful of Card Projects with tutorials and supply lists – and yes they are free! The first card on today’s post is one of the project tutorials! I send these out to all who are on my email list. Interested in getting these project sheets? Simply subscribe to my email list click here:
Want it all?? Have a big wish list? The BEST deal is always buying the Stampin' Up! Starter Kit! You get $125 in product of your choice for just $99 & Free Shipping! No obligation
I am blessed to lead an amazing team with members all across the United States. My team consists of both business builders and happy shoppers! The question I am most often asked about joining the SU family is – “do I have to sell?” The answer is NO! You are welcome to be a happy shopper – and a smart cookie, I might add, to get all the products you love at the demonstrator discount!
Please contact me with any questions! I’d love to have you join my “We’d Rather Bee Stampin'” team!
You will then enjoy 20% off all future purchases while you are active! What have you got to lose? The link to join is below! The best part – there is no obligation to sell, or hold parties ever!!! You can simply become a “happy shopper” and get discounts on all your Stampin’ Up! purchases! If you’d like to pursue this as a business and make a little extra money, I can help you with that as well!

Sep 22, 2022 | Gallery, More Bee Creative Tutorials, More Christmas Cards |

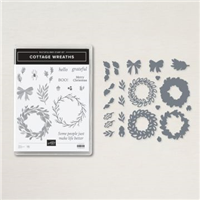
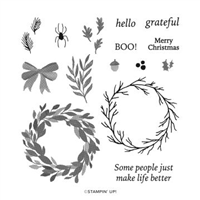
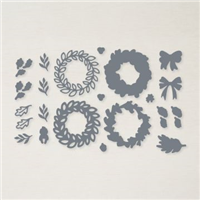
For my Facebook Live yesterday, I created a fun-fold envelope card with the Cottage Wreath Bundle. Watch the video below to see how I made the Christmas Card. I used a fun fold – Envelope Flap Card inspired by Susan Campfield.

Today is the last day to sign up for my Cottage Wreath Bee Box!
Extra Class! This month I am offering an extra class featuring the Glad We’re Friends Stamp Set. Cost is just $30 and includes the stamp set and kits to make 3 different cards. Adorable stamp set and great card ideas for you!!
REQUEST TO REGISTER BELOW! – Registration closes today, September 22.
Please email me with any questions!

Here’s a view with the flap opened –

I also used the same bundle to show some versatility – you can create fall cards, Halloween cards in addition of course to the Christmas card! All three cards use the same envelope flap fold- Love it!!! 

FREE TUTORIALS- I send out Weekend Inspiration every weekend that includes a handful of Card Projects with tutorials and supply lists – and yes they are free! The first card on today’s post is one of the project tutorials! I send these out to all who are on my email list. Interested in getting these project sheets? Simply subscribe to my email list click here:
Want it all?? Have a big wish list? The BEST deal is always buying the Stampin' Up! Starter Kit! You get $125 in product of your choice for just $99 & Free Shipping! No obligation
I am blessed to lead an amazing team with members all across the United States. My team consists of both business builders and happy shoppers! The question I am most often asked about joining the SU family is – “do I have to sell?” The answer is NO! You are welcome to be a happy shopper – and a smart cookie, I might add, to get all the products you love at the demonstrator discount!
Please contact me with any questions! I’d love to have you join my “We’d Rather Bee Stampin'” team!
You will then enjoy 20% off all future purchases while you are active! What have you got to lose? The link to join is below! The best part – there is no obligation to sell, or hold parties ever!!! You can simply become a “happy shopper” and get discounts on all your Stampin’ Up! purchases! If you’d like to pursue this as a business and make a little extra money, I can help you with that as well!
Sale: $8.00
Price: $10.00

Sep 21, 2022 | Gallery, More Bee Creative Tutorials, More Christmas Cards |

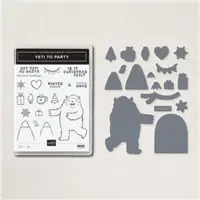
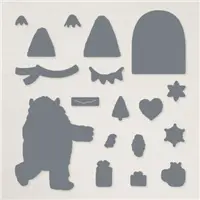
Yeti to Party is such a fun stamp set – and this month only, you can get the coordinating dies! Get it as a bundle and save 10%. My project for today creates a super cute gift card holder!
Time to start getting “yeti” for Christmas!
I love to give gift card holders and when presented in a cute card like this it’s a great gift!

Measurements:
- Balmy Blue: card base 4-1/4” x 9-1/2” scored at 1-3/4” and 4”, 2-3/4” x 4”
- Basic White: 4” x 9-1/2” scored at 5-1/4” then ½” cut off remaining 4-1/4” panel on top and bottom to score line, 2-3/4” x 4”, 4” x 4”, 1-1/2” 2”, 1” x 1”
- Soft Suede: 1” x 3”
- Designer Series Paper or “DSP”: 2” x 4”, 1-1/2” x 4”, 1-1/2” x 2-1/4”

Instructions:
- Stamp sentiment in Balmy Blue on large Basic White piece taking care to stamp it where it won’t show once card closed.
- Adhere Basic White piece onto Balmy Blue card case with Multipurpose Liquid Glue.
- With about 1-3/4” Tear & Tape on inside top and bottom edges of Balmy Blue, close inside flap where gift card will go. Adhere 2” x 4” DSP to Balmy Blue flap that will show on front of card when closed then adhere the 1-1/2” x 4” piece to the inside left on top of where gift card will go.
- Stamp yeti in Balmy Blue and cocoa mug in Soft Suede and die cut both as well as scarf out of Soft Suede. Using Wink of Stella while ink still newly stamped, brush where steam is and inside of mug. It should smear. Using Multipurpose Liquid Glue, adhere mug to yeti hand and scarf around neck.
- Die cut Basic White 2-3/4” x 4” piece with appropriately sized scalloped rectangle then stamp snowflakes with Balmy Blue.
- Adhere Balmy Blue rectangle layer to Basic White center flap then scalloped rectangle to Balmy Blue with Multipurpose Liquid Glue.
- Stamp sentiment in Soft Suede and trim to desired size. Adhere to DSP scrap then trim again.
- With Stampin’ Dimensionals, attach yeti to right of snowflake piece leaving room for sentiment then use Dimensionals to affix sentiment so it ends off the left edge.
- Sprinkle a few Adhesive-Backed Seasonal Sequins.
FREE TUTORIALS- I send out Weekend Inspiration every weekend that includes a handful of Card Projects with tutorials and supply lists – and yes they are free! The first card on today’s post is one of the project tutorials! I send these out to all who are on my email list. Interested in getting these project sheets? Simply subscribe to my email list click here:
Want it all?? Have a big wish list? The BEST deal is always buying the Stampin' Up! Starter Kit! You get $125 in product of your choice for just $99 & Free Shipping! No obligation
I am blessed to lead an amazing team with members all across the United States. My team consists of both business builders and happy shoppers! The question I am most often asked about joining the SU family is – “do I have to sell?” The answer is NO! You are welcome to be a happy shopper – and a smart cookie, I might add, to get all the products you love at the demonstrator discount!
Please contact me with any questions! I’d love to have you join my “We’d Rather Bee Stampin'” team!
You will then enjoy 20% off all future purchases while you are active! What have you got to lose? The link to join is below! The best part – there is no obligation to sell, or hold parties ever!!! You can simply become a “happy shopper” and get discounts on all your Stampin’ Up! purchases! If you’d like to pursue this as a business and make a little extra money, I can help you with that as well!

Sep 16, 2022 | Gallery, More Bee Creative Tutorials, More Christmas Cards |

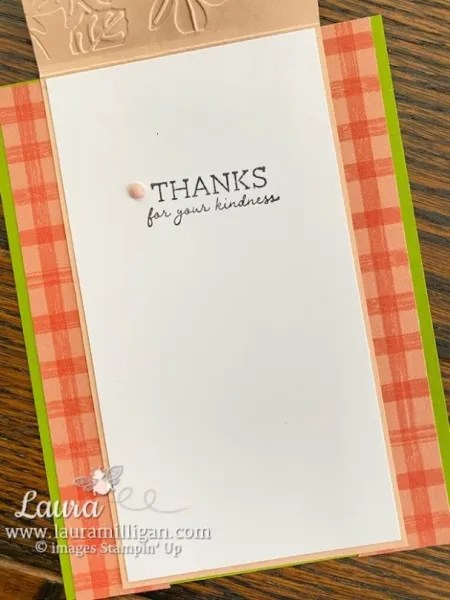
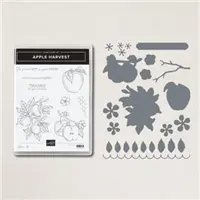
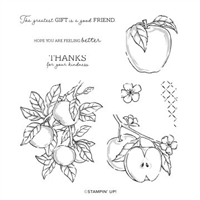
Last week Stampin’ Up! released some new dies- Perfect Partners – that coordinate with stamp sets in our current catalogs. There are a lot of great dies – last week I featured the This Birthday Piggy bundle. This week, I shared a fun fold card featuring the Apple Harvest Bundle. It’s a beautiful stamp set and the dies really compliment it – making great cards for fall – apple season, and also for teachers! I have a daughter who is a teacher and so I love making apple themed cards for her and for her to share with her fellow teachers!

For my Facebook Live on September 6, I created a card with the Apple Harvest Bundle. Watch the video below to see how I made the card.

This fun fold is really easy to make! Of course you could use any punch for the “window” – for my card I used the Rectangular Postage stamp punch.
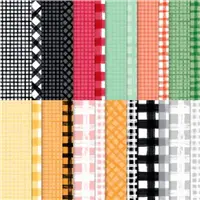
I love the combination of the Petal Pink cardstock with the Gingham Cottage Designer Series Paper.
Measurements for this card:
card base – Granny Apple Green – 4 1/4″ x 5 1/2″
Basic White – 2 7/8″ x 5 3.8″
Petal Pink: 3″ x 11″ – scored at 5 1/2
DSP: 1″ x 5 1/2″, cut 2
FREE TUTORIALS- I send out Weekend Inspiration every weekend that includes a handful of Card Projects with tutorials and supply lists – and yes they are free! The first card on today’s post is one of the project tutorials! I send these out to all who are on my email list. Interested in getting these project sheets? Simply subscribe to my email list click here:
Want it all?? Have a big wish list? The BEST deal is always buying the Stampin' Up! Starter Kit! You get $125 in product of your choice for just $99 & Free Shipping! No obligation
I am blessed to lead an amazing team with members all across the United States. My team consists of both business builders and happy shoppers! The question I am most often asked about joining the SU family is – “do I have to sell?” The answer is NO! You are welcome to be a happy shopper – and a smart cookie, I might add, to get all the products you love at the demonstrator discount!
Please contact me with any questions! I’d love to have you join my “We’d Rather Bee Stampin'” team!
You will then enjoy 20% off all future purchases while you are active! What have you got to lose? The link to join is below! The best part – there is no obligation to sell, or hold parties ever!!! You can simply become a “happy shopper” and get discounts on all your Stampin’ Up! purchases! If you’d like to pursue this as a business and make a little extra money, I can help you with that as well!