Dec 17, 2025 | Gallery, More Christmas Cards, More Gift Wrap Ideas |

Yesterday’s Facebook Live was all about last-minute gifting with heart — the kind of projects that look extra special but don’t require extra time. And friends… these three little gifts check every box. Pretty, practical, and perfect for those “just one more gift” moments we all find ourselves in this time of year.
SHOP MY AMAZON STOREFRONT! Want favorite products of mine featured in this video? You can find them in my Amazon Storefront! Please note: As an Amazon Associate, I earn a small commission from qualifying purchases.
If you missed the Facebook Live, you can catch the replay on my I’d Rather Bee Stampin’ page or via Youtube by clicking on the image below.


Monogram Notebook & Pen Set
This might be my favorite kind of gift — useful and beautiful. I dressed up a simple notebook with Designer Series Paper, a bold monogram, and coordinating embellishments, then finished it off with a matching pen tied on with ribbon. It’s personal, polished, and perfect for teachers, friends, or stocking stuffers. And yes… it looks way more complicated than it actually is 😉

Quick Christmas Gift Card Holder
Who says a gift card can’t be the perfect gift? This Merry Christmas gift card holder is full of classic holiday florals and rich seasonal colors. The layered circle, delicate greenery, and pop of sparkle give it a beautiful handmade feel without being fussy. This is a wonderful option for neighbors, coworkers, or anyone who appreciates something heartfelt and handmade.


Sweet Treat Holder with a Festive Pup
This one is pure holiday happiness wrapped in Designer Series Paper. I created a flat treat holder that’s perfect for slipping in Ghirardelli Chocolate Bars.
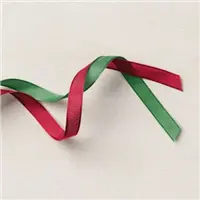
The playful puppy focal point paired with a bold red bow makes it feel instantly joyful — like happy mail delivered straight from Santa’s workshop. Simple layers, strong focal point, and lots of charm.
FREE TUTORIALS- I send out Weekend Inspiration every weekend that includes a handful of Card Projects with tutorials and supply lists – and yes they are free! The first card on today’s post is one of the project tutorials! I send these out to all who are on my email list. Interested in getting these project sheets? Simply subscribe to my email list click here:


Sale: $14.85
Price: $16.50
Sale: $13.20
Price: $16.50
Sale: $9.00
Price: $10.00

Dec 16, 2025 | Gallery, More Christmas Cards, More Gift Wrap Ideas |

Last week’s Facebook Live felt a bit like stepping into Santa’s workshop, only with prettier paper and far less noise! I shared two easy, charming DIY gift bags that you can create with your favorite Stampin’ Up! Designer Series Paper. These little packages are perfect for holiday gifting and come together faster than a peppermint stick melts in hot cocoa.
Whether you need a petite bag for a sweet treat (I used tea bags) or a tall pouch for a cozy drink mix, these projects make gifting feel extra thoughtful. The Designer Series Paper really shines here, turning simple measurements into something festive and polished.
If you missed the Facebook Live, you can catch the replay on my I’d Rather Bee Stampin’ page or via Youtube by clicking on the image below.


The Small Gift Bag
Perfect for:
• Tea bags
• Chocolate squares
• Sugar packets
• Small favors or stocking stuffers
Paper Needed:
Four pieces measuring 4 x 6
Scoring:
• Score each piece 1/2 inch on both short sides
• Score 3 inches on the long side
Once you fold and assemble the panels, the paper forms an adorable, sturdy little bag. Add your ribbon, tags, or embellishments, and it’s ready to gift. These are delightful for holiday place settings or quick neighbor treats.

The Large Hot Chocolate Pouch
Perfect for:
• A packet of hot cocoa
• Gourmet drink mixes
• Flat treats or small gifts
Paper Needed:
One piece measuring 4 1/2 x 12
Scoring:
• Score 1/2 inch on each short side
• Score the long side at 6 inches
This creates a tall, sleek pouch that looks incredibly polished with a bit of ribbon at the top. I used coordinating Designer Series Paper and embellishments to tie everything together, and it made the project feel ready for a holiday market booth.
FREE TUTORIALS- I send out Weekend Inspiration every weekend that includes a handful of Card Projects with tutorials and supply lists – and yes they are free! The first card on today’s post is one of the project tutorials! I send these out to all who are on my email list. Interested in getting these project sheets? Simply subscribe to my email list click here:
Sale: $13.20
Price: $16.50
Sale: $18.90
Price: $21.00
Sale: $9.00
Price: $10.00

Apr 2, 2025 | Gallery, More Birthday Cards, More Gift Wrap Ideas |

I’m so excited to share this adorable birthday bag created with the Wildflower Birthday Suite from Stampin’ Up!—it’s the perfect way to package a sweet celebration!
Did you catch my FB Live? I also recreated the card I posted here on Monday – so cute!!! It uses many of the same products used for the bag I also made in my Live.
AND don’t miss the beginning of the Live – I do a color comparison of the upcoming new In Colors (2025-2027). The new colors are really good ones – Darling Duckling, Strawberry Slush, Timid Tiger, Secret Sea and Cloud Cover. At first glance, I always think these colors look the same as our current colors – but then I compare them and am always surprised at how different they are! Take a look and let me know what you think. Do you have a favorite?
And here’s some extra fun: Place a $50+ online order with me by this Friday, and I’ll send you a FREE surprise embellishment as a special thank-you!

FREE TUTORIALS- I send out Weekend Inspiration every weekend that includes a handful of Card Projects with tutorials and supply lists – and yes they are free! The first card on today’s post is one of the project tutorials! I send these out to all who are on my email list. Interested in getting these project sheets? Simply subscribe to my email list click here:
Sale: $8.00
Price: $10.00

Dec 21, 2023 | More Christmas Cards, More Gift Wrap Ideas |

If you are scurrying around trying to finish up some Christmas projects, or are looking for a cute place setting for your Christmas dinner table, I am hoping this project will be of help for you! It is quick and super and fast! Just what we need on the 21st of December!
This project uses the Nested Essentials dies – hopefully you have them in your stash – and then just pick out any Christmas Designer Series Paper – and your project will be done quick as a wink!
Watch the recording below to see how these go together!
Of course these could be used for any occasions – just by switching the DSP to a different color scheme/ holiday!!

Nov 28, 2023 | More Friend Cards, More Gift Wrap Ideas |

On my most recent Facebook Live, I shared a great Christmas gift idea- hand stamped cards – packaged in a super cute way, of course!
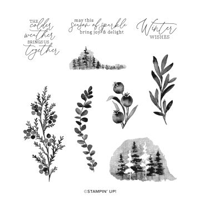
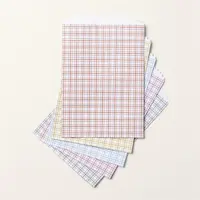
I made four cards – they are clean and simple – and they feature the Winter Meadow DSP. Four cards and envelopes fit perfectly in one of our In Color Treat bags – wrapped in a belly band of the Winter Meadow DSP creatd a nice gift – for teachers, neighbors, friends, a hostess to a Christmas gathering you may be invited to, etc.
The In Color Treat Bags are a beautiful compliment to the Winter Meadow DSP – almost all five colors coordinate really well!
You can watch my Facebook Live on replay below and you will see how easily and quickly this gift comes together!

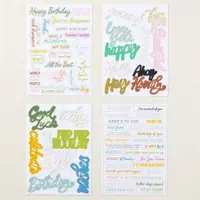
Here’s a look at the four cards: The words for the cards are all from the So Sincere stamp set.

Nov 9, 2023 | More Birthday Cards, More Gift Wrap Ideas |

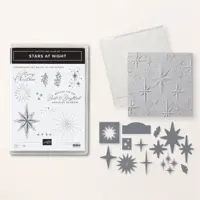
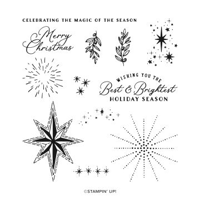
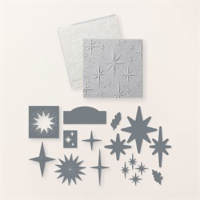
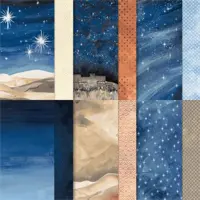
On Monday I shared this simple yet stunning card using scraps of O Holy Night Designer Series Paper and the Stars at Night Bundle. The Hybrid Embossing folder makes it easy to cut and emboss all with one trip through the Stampin’ Cut & Emboss Machine.
You can watch my Facebook Live on replay below: