Oct 30, 2023 | More Birthday Cards, More Gift Wrap Ideas |

New product alert! I made a beautiful card today on my Facebook Live – and it goes together so quickly! I featured new product that will be available starting Nov. 7 via my Online Store! This is the Meandering Meadow suite – and includes the gorgeous Garden Meadow Desginer Series Paper – and the Garden Meadow bundle. The DSP itself is a must have! I of course love the bundle as I am a gardener and love all things related to gardening.

Here is the recording of the Facebook Live – Watch the recording to see how quickly this card goes together! So simple – but so pretty. I designed this card so that you could see both sides of the DSP!

Here’s a look at the card from the inside – the backside of this paper is so beautiful as well – don’t you think?
I finished up the card with a stamped greeting and flower on the inside – and one of the new dragonfly embellishments that are included in this new suite.


Oct 11, 2023 | More Birthday Cards, More Gift Wrap Ideas |

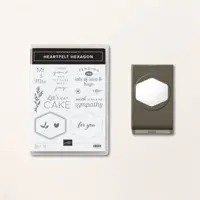
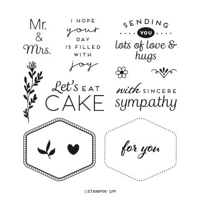
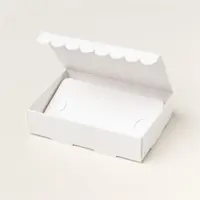
For my Facebook Live this week I made the card above featuring a new bundle called Heartfelt Hexgaon. it’s a wonderful bundle – great words in the stamp set and an awesome hexagon shaped punch! What I didn’t show on my Live was the Scalloped Gift Card Box you see on the left! After I finished my Live, I made the box for my daughter Rachel. She was coming into town for a few days and it was her birthday. I had a gift card to give her – and used the supplies I had out for the card to make her a cute box!!!! In her box, I did include a gift card and also a pair of cute fall earrings – and both fit in the box perfectly! It’s a really easy was to make a gift card and small gift seem more special!

Here is the recording of the Facebook Live –

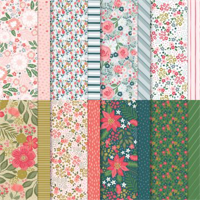
The card – the papers I used are so pretty. They are from a stack of Designer Series Papers in the current Mini Catalog called Garden Walk. It is a great 6″ x 6″ stack – with beautiful papers for all occasions – there is even a “Christmasy” paper!

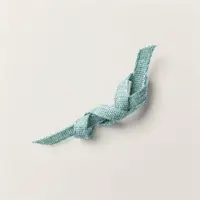
Here’s a look at the box – just changed the measurements up a bit – but other than that, it is the same as the card. And I LOVE the Lost Lagoon Ribbon – so pretty and easy to work with, and it compliments the DSP I chose perfectly!


Sep 30, 2023 | More Gift Wrap Ideas |

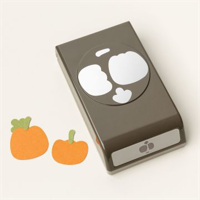
This week I did a little pop in Facebook Live – I wanted to share this adorable pumpkin candy holder idea – inspired by Jill Olsen and Kathi Miller. JUST SO CUTE!
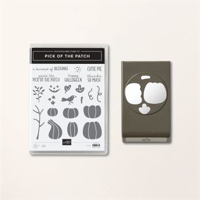
I put my own spin on these little pumpkins – and created three different ones – the first is my favorite color of pumpkin – the white ones. Then I shared a pumpkin made with Lost Lagoon cardstock! I’ve seen some pumpkins around town in so many fun colors – they are my favorite! And then the third pumpkin was created with the Pumpkin Patch bundle in tradtional pumpkin colors.
These would be darling little place markers or treats for Thanksgiving dinner! A little something for a teacher, a friend – really anyone! Hope you will try one!!!
Here is the recording of the Facebook Live – you can see how these go together by watching!


Measurementsfor the box that holds the candy –
BOX: 3 5/8″ x 4 1/8″.
Score along both edges of short side at 1 1/2”. Score along both edges of the long side- at 5/8″. Please watch the video to see me create the box.

Sep 14, 2023 | More Gift Wrap Ideas |

An adorable and quick, made from scratch Halloween treat bag created with the Stampin’ Up! Tricks & Treats Bundle, Bag of Bones Dies (NOW BACK IN STOCK), and Them Bones Designer Series Paper.
 Dimensions:
- Basic Black (gift bag) – 5 x 11
- Basic White (sentiment) – 1 1/2 x 2 1/2
- Designer Series Paper – 2 1/2 x 3 3/4, plus Dog and Cat Images

Instructions:
- Use the Tricks & Treats bag die to crop two pieces of Basic Black Cardstock.
- Burnish the folds and adhere the bag together.
- Adhere the Designer Series Paper to the front of the bag.
- Stamp the sentiment in Tuxedo Black Memento Ink on the Basic White. Crop with the Tricks & Treats die.
- Adhere with Stampin’ Dimensionals.
- Crop the dog and cat from the Them Bones Designer Series Paper using the coordinating Bag of Bones Dies.
- Adhere as shown with Stampin’ Dimensionals.
- Embellish with white Classic Matte Dots.
- Fill a 6 x 8 Cellophane Bag with treats. Tie closed with Black & White 1/4 Gingham Ribbon.
- Slip inside the gift bag.


May 18, 2023 | Gallery, More Friend Cards, More Gift Wrap Ideas |
I wanted to send a coffee gift card to a friend – and of course wanted to make it look cute! This is what I came up with – it’s cute and quick – my favorite kind of project!!!
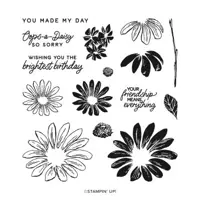
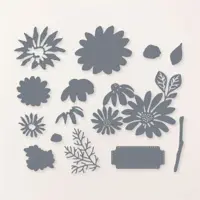
And really, the possibilities for this are endless – instead of a gift card, what about a tea bag? Or a chocolate square? The base of this gift card holder is the new Countryside Inn dies, and then of course the Cheerful Daises bundles adds the cuteness factor! I love the Lemon Lolly color – it’s one of our new Core Colors and is quickly becoming a favorite of mine!
Here’s the recording- What do you think?
If you need a gift card, try this one out! Perfect for a little pick me up for a friend, end of year teacher thank you, etc!
FREE TUTORIALS- I send out Weekend Inspiration every weekend that includes a handful of Card Projects with tutorials and supply lists – and yes they are free! The first card on today’s post is one of the project tutorials! I send these out to all who are on my email list. Interested in getting these project sheets? Simply subscribe to my email list click here:


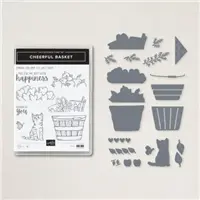
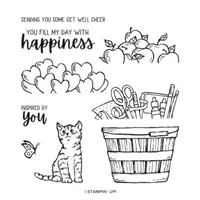
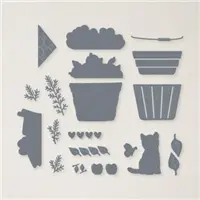
Dec 8, 2022 | Gallery, More Gift Wrap Ideas |
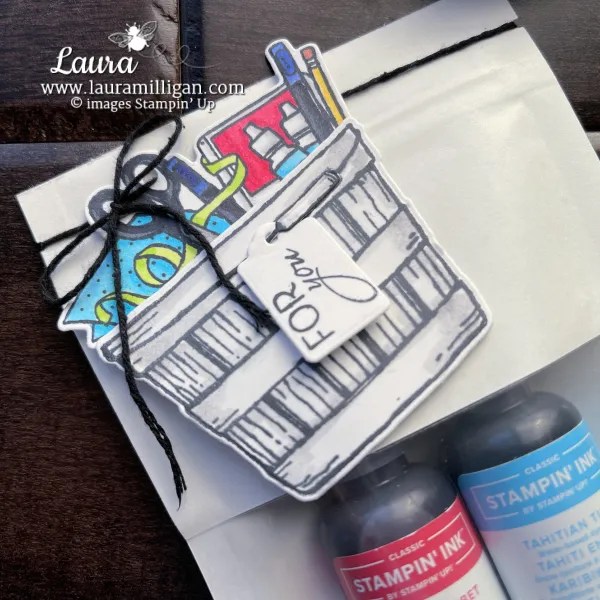
Pair the Cheerful Basket Bundle with a Peekaboo Treat Bag (both from Stampin’ Up!) to create a cute craft-themed gift bag, filled with ink refills and more!
I AM OFFERING A CHEERFUL BASKET CARD CLASS TO GO!
REQUEST TO REGISTER BELOW! – Registration closes December 12!
Please email me with any questions!

 MEASUREMENTS:
- Basic White: 4″ x 4″ (stamping and die-cutting)
INSTRUCTIONS:
- Stamp the image on the bottom of the treat bag as shown.
- Stamp the images in Tuxedo Black onto the Basic White layer.
- Crop with the coordinating dies and a Stampin’ Cut & Emboss Machine.
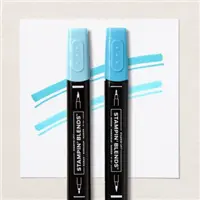
- Color with Stampin’ Blends.
- Use a 1/8 hand-held circle punch to crop holes into the scissor handles.
- Adhere together with Liquid Glue.
- Thread Black Baker’s Twine around the top of the treat bag and through the scissor handle holes. Secure with a bow.
- Stamp the top of the basket one more time onto a piece of Basic White. Snip out the handle closely with Paper Snips.
- Put the snipped handle through the hole of the “for you” tag. Adhere as shown with Liquid Glue.

FREE TUTORIALS- I send out Weekend Inspiration every weekend that includes a handful of Card Projects with tutorials and supply lists – and yes they are free! The first card on today’s post is one of the project tutorials! I send these out to all who are on my email list. Interested in getting these project sheets? Simply subscribe to my email list click here:
Want it all?? Have a big wish list? The BEST deal is always buying the Stampin' Up! Starter Kit! You get $125 in product of your choice for just $99 & Free Shipping! No obligation
I am blessed to lead an amazing team with members all across the United States. My team consists of both business builders and happy shoppers! The question I am most often asked about joining the SU family is – “do I have to sell?” The answer is NO! You are welcome to be a happy shopper – and a smart cookie, I might add, to get all the products you love at the demonstrator discount!
Please contact me with any questions! I’d love to have you join my “We’d Rather Bee Stampin'” team!
You will then enjoy 20% off all future purchases while you are active! What have you got to lose? The link to join is below! The best part – there is no obligation to sell, or hold parties ever!!! You can simply become a “happy shopper” and get discounts on all your Stampin’ Up! purchases! If you’d like to pursue this as a business and make a little extra money, I can help you with that as well!