Dec 17, 2025 | Gallery, More Christmas Cards, More Gift Wrap Ideas |

Yesterday’s Facebook Live was all about last-minute gifting with heart — the kind of projects that look extra special but don’t require extra time. And friends… these three little gifts check every box. Pretty, practical, and perfect for those “just one more gift” moments we all find ourselves in this time of year.
SHOP MY AMAZON STOREFRONT! Want favorite products of mine featured in this video? You can find them in my Amazon Storefront! Please note: As an Amazon Associate, I earn a small commission from qualifying purchases.
If you missed the Facebook Live, you can catch the replay on my I’d Rather Bee Stampin’ page or via Youtube by clicking on the image below.


Monogram Notebook & Pen Set
This might be my favorite kind of gift — useful and beautiful. I dressed up a simple notebook with Designer Series Paper, a bold monogram, and coordinating embellishments, then finished it off with a matching pen tied on with ribbon. It’s personal, polished, and perfect for teachers, friends, or stocking stuffers. And yes… it looks way more complicated than it actually is 😉

Quick Christmas Gift Card Holder
Who says a gift card can’t be the perfect gift? This Merry Christmas gift card holder is full of classic holiday florals and rich seasonal colors. The layered circle, delicate greenery, and pop of sparkle give it a beautiful handmade feel without being fussy. This is a wonderful option for neighbors, coworkers, or anyone who appreciates something heartfelt and handmade.


Sweet Treat Holder with a Festive Pup
This one is pure holiday happiness wrapped in Designer Series Paper. I created a flat treat holder that’s perfect for slipping in Ghirardelli Chocolate Bars.
The playful puppy focal point paired with a bold red bow makes it feel instantly joyful — like happy mail delivered straight from Santa’s workshop. Simple layers, strong focal point, and lots of charm.
FREE TUTORIALS- I send out Weekend Inspiration every weekend that includes a handful of Card Projects with tutorials and supply lists – and yes they are free! The first card on today’s post is one of the project tutorials! I send these out to all who are on my email list. Interested in getting these project sheets? Simply subscribe to my email list click here:


Sale: $14.85
Price: $16.50
Sale: $13.20
Price: $16.50
Sale: $9.00
Price: $10.00

Dec 17, 2025 | Gallery, More Christmas Cards |

Card Tutorial: Peace, Love & Joy!
Measurements:
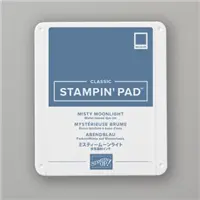
- Misty Moonlight: 5 ½” x 8 ½”, scored at 4 ¼”
- Cloud Cover: 3 ¾” x 5”; 2 ½” x 3 ¾”
- Peaceful Garden DSP: 3 5/8” x 4 7/8”
- Peaceful Garden Glimmer: 2 ¼” x 2 ¼” (blue); 3 ½” x 1” (gray)
- Basic White: ½” x 4”; scrap for dove die cut; 5 ¼” x 4” for inside of card
Instructions:
- Stamp sentiment in Misty Moonlight ink onto the ½” strip of Basic White.
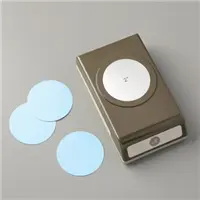
- Punch a 2” circle from the square of dark blue glimmer paper.
- Using the Stampin’ Cut & Emboss machine, cut one dove from Basic White cardstock, and one leaf from the gray glimmer paper.
- Assemble your card as shown. The sentiment is adhered using Stampin’ Dimensionals. All other layers are adhered with Multipurpose Liquid glue. The 5 ¼” x 4” piece of basic white goes inside the card.


Sale: $17.10
Price: $19.00
Sale: $21.60
Price: $24.00

Dec 16, 2025 | Gallery, More Christmas Cards, More Gift Wrap Ideas |

Last week’s Facebook Live felt a bit like stepping into Santa’s workshop, only with prettier paper and far less noise! I shared two easy, charming DIY gift bags that you can create with your favorite Stampin’ Up! Designer Series Paper. These little packages are perfect for holiday gifting and come together faster than a peppermint stick melts in hot cocoa.
Whether you need a petite bag for a sweet treat (I used tea bags) or a tall pouch for a cozy drink mix, these projects make gifting feel extra thoughtful. The Designer Series Paper really shines here, turning simple measurements into something festive and polished.
If you missed the Facebook Live, you can catch the replay on my I’d Rather Bee Stampin’ page or via Youtube by clicking on the image below.


The Small Gift Bag
Perfect for:
• Tea bags
• Chocolate squares
• Sugar packets
• Small favors or stocking stuffers
Paper Needed:
Four pieces measuring 4 x 6
Scoring:
• Score each piece 1/2 inch on both short sides
• Score 3 inches on the long side
Once you fold and assemble the panels, the paper forms an adorable, sturdy little bag. Add your ribbon, tags, or embellishments, and it’s ready to gift. These are delightful for holiday place settings or quick neighbor treats.

The Large Hot Chocolate Pouch
Perfect for:
• A packet of hot cocoa
• Gourmet drink mixes
• Flat treats or small gifts
Paper Needed:
One piece measuring 4 1/2 x 12
Scoring:
• Score 1/2 inch on each short side
• Score the long side at 6 inches
This creates a tall, sleek pouch that looks incredibly polished with a bit of ribbon at the top. I used coordinating Designer Series Paper and embellishments to tie everything together, and it made the project feel ready for a holiday market booth.
FREE TUTORIALS- I send out Weekend Inspiration every weekend that includes a handful of Card Projects with tutorials and supply lists – and yes they are free! The first card on today’s post is one of the project tutorials! I send these out to all who are on my email list. Interested in getting these project sheets? Simply subscribe to my email list click here:


Sale: $13.20
Price: $16.50
Sale: $18.90
Price: $21.00
Sale: $9.00
Price: $10.00

Dec 6, 2025 | Gallery, More Christmas Cards, More Holiday Cards |

This week on my Facebook Live, I shared a super fun and festive project that I couldn’t wait to post here—a handmade Christmas ornament created with the Modern Christmas Suite Collection from Stampin’ Up! Isn’t it gorgeous hanging on the tree?
This ornament comes together with just a few key pieces, and the star of the show is definitely the shaker dome! I filled it with iridescent sequins for a sparkling, snow-globe effect that catches the lights on the tree beautifully. The bold black, white, and gold designer paper from the suite gives it a modern, fresh look while still feeling classic Christmas.
To finish it off, I framed the ornament with one of our metal hoops and added a simple twine hanger. It’s an easy project—and such a fun one! These would make beautiful gifts, package toppers, or even a whole set of handcrafted ornaments for your own tree.
If you missed the Facebook Live, you can catch the replay on my I’d Rather Bee Stampin’ page. I hope this inspires you to create a few ornaments of your own this holiday season. It’s crafting at its most joyful!
If you missed the Facebook Live, you can catch the replay on my I’d Rather Bee Stampin’ page or via Youtube by clicking on the image below.

FREE TUTORIALS- I send out Weekend Inspiration every weekend that includes a handful of Card Projects with tutorials and supply lists – and yes they are free! The first card on today’s post is one of the project tutorials! I send these out to all who are on my email list. Interested in getting these project sheets? Simply subscribe to my email list click here:


Sale: $15.20
Price: $19.00
Sale: $11.50
Price: $23.00

Nov 24, 2025 | Gallery, More Christmas Cards, More Holiday Cards |

Today’s Facebook Live was such a fun one! I shared a simple-but-stunning pleated card idea featuring the Stampin’ Up!® Elegant Pine Snowflakes Suite — and it’s the perfect little twist when you want your holiday cards to feel extra special without a lot of fuss.
The star of the show is that gorgeous patterned paper. The soft folds create beautiful dimension, and the pine-filled background gives this card such a warm, woodland feel. A layered snowflake, a bit of ribbon, and a clean sentiment are all you need to pull the whole design together. If you missed the live, the replay is available — and you can craft right along with me!
This is one of those layouts you’ll want to try with all kinds of Designer Series Paper. The fold does the work for you, and the finished card feels like something straight out of a boutique.
If you missed the Facebook Live, you can catch the replay on my I’d Rather Bee Stampin’ page or via Youtube by clicking on the image below.

Black Friday Special: Get a FREE Personalized Pouch!
I’m so excited to share this year’s Black Friday Special — and it’s a good one!
November 25 – December 1, 2025
Place a $75+ online order (before shipping & tax, after rewards) and you’ll receive a FREE personalized pouch!
Each pouch is customized with your name and features my exclusive “I’d Rather Be Stampin’” bee design. It’s adorable, practical, and perfect for keeping your favorite crafting tools close at hand. You’re going to love it! (no adhesive included).

But if you’d rather purchase a pouch outright, you can absolutely do that, too:

Personalized Adhesive Pouch – $25 + $6 shipping
Includes:
• Stampin’ Dimensionals
• Mini Dimensionals
• Multipurpose Liquid Glue
• Mini Glue Dots
Everything tucked neatly inside and ready for your next crafting session.
Personalized Adhesive Pouch
FREE TUTORIALS- I send out Weekend Inspiration every weekend that includes a handful of Card Projects with tutorials and supply lists – and yes they are free! The first card on today’s post is one of the project tutorials! I send these out to all who are on my email list. Interested in getting these project sheets? Simply subscribe to my email list click here:


Nov 19, 2025 | Gallery, More Christmas Cards, More Holiday Cards |

Today during my Facebook Live, I shared three beautiful winter cards created with the Elegant Pine & Snowflakes Suite Collection from Stampin’ Up! This suite is absolutely stunning—full of delicate snowflakes, soft winter greens, and elegant touches that make your handmade cards feel extra special for the season.
Each project features layered textures, pretty wintery color combinations, and those gorgeous die-cut elements that bring so much dimension. Whether you’re crafting for the holidays, winter birthdays, or just sending a warm hello, these designs are sure to inspire you!
And, I’m offering a special ordering perk:

ORDERING SPECIAL – Now through Sunday, Nov. 21!
Place a $50+ order (after rewards)
👉 You’ll receive all three card kits FREE!
Everything will be prepped, ready for you to assemble at home. You will need the die cuts and stamps for this bundle.
Place a $75+ order
👉 You’ll get the card kits AND a pack of sparkly gems for FREE!
(Because every snowflake card needs a little extra shimmer!)
These cards were so much fun to design and share with you today. I hope they inspire you to sit down with your stamps, ink, and paper and enjoy a little winter crafting magic!
If you missed the Facebook Live, you can catch the replay on my I’d Rather Bee Stampin’ page or via Youtube by clicking on the image below.

This first card is all about the DSP! The three different snowflakes are cropped right from the Designer Series Paper! Push the easy button!! And I couldn’t resist adding a little – ok, a lot of sparkle with the beautiful gems!! To me, they are the star of the show!

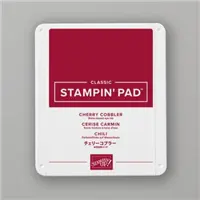
This next card used a snowflake cropped directly from the DSP. I have added a splash of color with Cherry Cobbler cardstock – and used one of the patterened DSP as a panel for the card as well.

The third card uses a soft gray Designer Series Paper – don’t miss this one! This is an online exclusive and is sold in 12 X 12 inch packages – and features the gorgeous paper – already embossed with beautiful soft snowflakes! I have used this so much on many recent projects! Silent Snowfall Specialty Paper – item 166062
I had so much fun designing and sharing these cards with you – I hope you love them as well!

FREE TUTORIALS- I send out Weekend Inspiration every weekend that includes a handful of Card Projects with tutorials and supply lists – and yes they are free! The first card on today’s post is one of the project tutorials! I send these out to all who are on my email list. Interested in getting these project sheets? Simply subscribe to my email list click here:


