Feb 16, 2026 | Gallery, More Holiday Cards |

I don’t know about you, but I can never resist a bunny… and when you add a baby chick and the cutest woven basket detail? I’m completely done for. 🐰💛 This card was created using the Easter Basket Bundle from the Easter Joy Suite Collection, and I absolutely love how soft and sweet it turned out. The neutral patterns, layered textures, and that little “For You” sentiment make this one perfect for Easter gifting, springtime happy mail, or tucking into a basket for someone special. Let me show you how all these darling details came together!

Measurements:
- Basic White Thick Cardstock: 5 1/2 x 8 1/2, scored 4 1/4
- Easter Joy Specialty Designer Series Paper: 5 1/2 x 1, 4 1/4 x 3
- Basic White Cardstock: 4 1/2 x 3 1/4, 2 1/2 x 3/4 (sentiment), 4 x 3 (stamped images), 3 1/2 x 4 (basket)
- Soft Sea Foam Cardstock: 1 1/2 x 1 1/2
- Crumb Cake Cardstock: 3 x 2
Instructions:
- Burnish the fold of the card base with a Bone Folder.
- Adhere the strip of Designer Series Paper to the card base.
- Adhere the Designer Series Paper panel to the Basic White panel together with Liquid Glue and to the card with Stampin’ Dimensionals.
- Stamp the sentiment in Tuxedo Black. Crop with the Three Banner Punch. Adhere with Dimensionals.
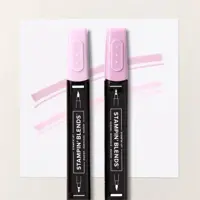
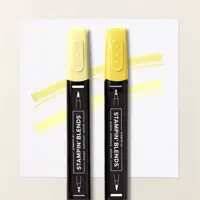
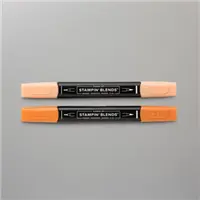
- Stamp the bunnies and chick in Tuxedo Black. Crop with a die-cut machine and the coordinating Easter Basket dies. Color with Bubble Bath, Lemon Lolly and Pumpkin Pie Stampin Blends.
- Crop the Basic White, Crumb Cake and bow with the Easter Basket Dies. Thread the strips through the basket as shown. Trim the ends with snips. Adhere the basket with Dimensionals.
- Adhere the bow with a Mini Glue Dot.
- Adhere the bunnies and chick with Dimensionals.
- Embellish with White Natural Matte Dots.


Dec 6, 2025 | Gallery, More Christmas Cards, More Holiday Cards |

This week on my Facebook Live, I shared a super fun and festive project that I couldn’t wait to post here—a handmade Christmas ornament created with the Modern Christmas Suite Collection from Stampin’ Up! Isn’t it gorgeous hanging on the tree?
This ornament comes together with just a few key pieces, and the star of the show is definitely the shaker dome! I filled it with iridescent sequins for a sparkling, snow-globe effect that catches the lights on the tree beautifully. The bold black, white, and gold designer paper from the suite gives it a modern, fresh look while still feeling classic Christmas.
To finish it off, I framed the ornament with one of our metal hoops and added a simple twine hanger. It’s an easy project—and such a fun one! These would make beautiful gifts, package toppers, or even a whole set of handcrafted ornaments for your own tree.
If you missed the Facebook Live, you can catch the replay on my I’d Rather Bee Stampin’ page. I hope this inspires you to create a few ornaments of your own this holiday season. It’s crafting at its most joyful!
If you missed the Facebook Live, you can catch the replay on my I’d Rather Bee Stampin’ page or via Youtube by clicking on the image below.

FREE TUTORIALS- I send out Weekend Inspiration every weekend that includes a handful of Card Projects with tutorials and supply lists – and yes they are free! The first card on today’s post is one of the project tutorials! I send these out to all who are on my email list. Interested in getting these project sheets? Simply subscribe to my email list click here:


Sale: $15.20
Price: $19.00
Sale: $11.50
Price: $23.00

Nov 24, 2025 | Gallery, More Christmas Cards, More Holiday Cards |

Today’s Facebook Live was such a fun one! I shared a simple-but-stunning pleated card idea featuring the Stampin’ Up!® Elegant Pine Snowflakes Suite — and it’s the perfect little twist when you want your holiday cards to feel extra special without a lot of fuss.
The star of the show is that gorgeous patterned paper. The soft folds create beautiful dimension, and the pine-filled background gives this card such a warm, woodland feel. A layered snowflake, a bit of ribbon, and a clean sentiment are all you need to pull the whole design together. If you missed the live, the replay is available — and you can craft right along with me!
This is one of those layouts you’ll want to try with all kinds of Designer Series Paper. The fold does the work for you, and the finished card feels like something straight out of a boutique.
If you missed the Facebook Live, you can catch the replay on my I’d Rather Bee Stampin’ page or via Youtube by clicking on the image below.

Black Friday Special: Get a FREE Personalized Pouch!
I’m so excited to share this year’s Black Friday Special — and it’s a good one!
November 25 – December 1, 2025
Place a $75+ online order (before shipping & tax, after rewards) and you’ll receive a FREE personalized pouch!
Each pouch is customized with your name and features my exclusive “I’d Rather Be Stampin’” bee design. It’s adorable, practical, and perfect for keeping your favorite crafting tools close at hand. You’re going to love it! (no adhesive included).

But if you’d rather purchase a pouch outright, you can absolutely do that, too:

Personalized Adhesive Pouch – $25 + $6 shipping
Includes:
• Stampin’ Dimensionals
• Mini Dimensionals
• Multipurpose Liquid Glue
• Mini Glue Dots
Everything tucked neatly inside and ready for your next crafting session.
Personalized Adhesive Pouch
FREE TUTORIALS- I send out Weekend Inspiration every weekend that includes a handful of Card Projects with tutorials and supply lists – and yes they are free! The first card on today’s post is one of the project tutorials! I send these out to all who are on my email list. Interested in getting these project sheets? Simply subscribe to my email list click here:


Nov 19, 2025 | Gallery, More Christmas Cards, More Holiday Cards |

Today during my Facebook Live, I shared three beautiful winter cards created with the Elegant Pine & Snowflakes Suite Collection from Stampin’ Up! This suite is absolutely stunning—full of delicate snowflakes, soft winter greens, and elegant touches that make your handmade cards feel extra special for the season.
Each project features layered textures, pretty wintery color combinations, and those gorgeous die-cut elements that bring so much dimension. Whether you’re crafting for the holidays, winter birthdays, or just sending a warm hello, these designs are sure to inspire you!
And, I’m offering a special ordering perk:

ORDERING SPECIAL – Now through Sunday, Nov. 21!
Place a $50+ order (after rewards)
👉 You’ll receive all three card kits FREE!
Everything will be prepped, ready for you to assemble at home. You will need the die cuts and stamps for this bundle.
Place a $75+ order
👉 You’ll get the card kits AND a pack of sparkly gems for FREE!
(Because every snowflake card needs a little extra shimmer!)
These cards were so much fun to design and share with you today. I hope they inspire you to sit down with your stamps, ink, and paper and enjoy a little winter crafting magic!
If you missed the Facebook Live, you can catch the replay on my I’d Rather Bee Stampin’ page or via Youtube by clicking on the image below.

This first card is all about the DSP! The three different snowflakes are cropped right from the Designer Series Paper! Push the easy button!! And I couldn’t resist adding a little – ok, a lot of sparkle with the beautiful gems!! To me, they are the star of the show!

This next card used a snowflake cropped directly from the DSP. I have added a splash of color with Cherry Cobbler cardstock – and used one of the patterened DSP as a panel for the card as well.

The third card uses a soft gray Designer Series Paper – don’t miss this one! This is an online exclusive and is sold in 12 X 12 inch packages – and features the gorgeous paper – already embossed with beautiful soft snowflakes! I have used this so much on many recent projects! Silent Snowfall Specialty Paper – item 166062
I had so much fun designing and sharing these cards with you – I hope you love them as well!

FREE TUTORIALS- I send out Weekend Inspiration every weekend that includes a handful of Card Projects with tutorials and supply lists – and yes they are free! The first card on today’s post is one of the project tutorials! I send these out to all who are on my email list. Interested in getting these project sheets? Simply subscribe to my email list click here:


Nov 14, 2025 | Gallery, More Christmas Cards, More Holiday Cards |

Only TWO Days Left to Win BIG in My 25th Anniversary Celebration!
Today I’m sharing a soft and magical holiday card I created using the Delicate Pines Bundle from Stampin’ Up! I love how the snowflake shape of the pines define the card — and the pop of red berries adds just the right touch of festive charm. The blended background really lets the focal point shine!
And good news… I’m sharing the FREE tutorial below so you can create this card right along with me. But first — a quick reminder!

My 25th Stampin’ Up! Anniversary Celebration Continues
…and there are ONLY TWO DAYS LEFT to get your orders in for a chance to win BIG!
I’m celebrating 25 years as a Stampin’ Up! demonstrator, and I’m so grateful for each of YOU who have made this journey so special. To say thank you, I’m giving away Stampin’ Rewards and daily prizes — and you could be one of the lucky winners!
How to Enter:
- Every $25 ordered (before tax & shipping) from Nov. 10–15 = 1 entry
- No limit — the more you order, the more entries you earn!
- Every comment here on my blog or on my Facebook Page = 1 entry into the daily drawing (not eligible for Stampin’ Rewards Prizes)
(No purchase necessary for comment entries!)
Prize Drawings:
- Daily Prizes — drawn from blog & Facebook comments
- (2) $25 Stampin’ Rewards winners
- (1) $100 Stampin’ Rewards Grand Prize winner
There is still plenty of time to get your name into the drawings — but only until the 15th!

This card uses the Delicate Pines Bundle from the Elegant Pine Snowflakes Suite Collection! A MUST HAVE! Ordering it today or tomorrow for 3 entries into my Anniversary Drawing for your chance to WIN Stampin’ Rewards!
DIMENSIONS:
- Basic White Thick Cardstock: 4 1/4 x 11, scored at 5 1/2
- Shaded Spruce Cardstock: 4 x 5 1/4
- Basic White Cardstock: 3 3/4 x 5, 4 1/4 x 5 (for stamped image die-cuts)

INSTRUCTIONS:
- Burnish the folds of the card base with a Bone Folder.
- Adhere the Shaded Spruce panel to the card base.
- Use a Blending Brush to add Shaded Spruce ink to the outside of edges of the Basic White Panel. Stamp the sentiment and adhere to the card.
- Stamp the 3 pine snowflakes in Shaded Spruce and 6 pinecones in Early Espresso. Crop with coordinating dies.
- Adhere the snowflakes together and to the card with Stampin’ Dimensionals. Adhere the pinecones with Mini Glue Dots.
- Embellish with Real Red Delightful Decorative Dots.

FREE TUTORIALS- I send out Weekend Inspiration every weekend that includes a handful of Card Projects with tutorials and supply lists – and yes they are free! The first card on today’s post is one of the project tutorials! I send these out to all who are on my email list. Interested in getting these project sheets? Simply subscribe to my email list click here:


Aug 28, 2025 | Gallery, More Christmas Cards, More Holiday Cards |

Blessed to Have You in My Life – Featuring the Amber Autumn Bundle
During my most recent Facebook Live, I shared this cozy, fall-inspired card featuring the brand-new Amber Autumn Bundle from Stampin’ Up! Isn’t this the perfect bundle to celebrate the beauty of the season and the blessings of friendship?
For my card, I paired the Amber Autumn stamps and dies with the gorgeous Autumn Toile Designer Series Paper. The soft, earthy tones are just right for fall and pair beautifully with Early Espresso cardstock and ink. I love how the Forever Plaid Embossing Folder adds a bit of texture and warmth behind the focal image.

Missed the Live? You can catch the replay on my I’d Rather Bee Stampin’ Facebook Page or on YouTube below.


The sentiment “Blessed to have you in my life” takes center stage, accented with the Irregular Weave Trim and a few Streaked Dots for a rustic finishing touch.
Inside, I kept it simple with another heartfelt sentiment: “Grateful for You.”
Here are the measurements if you’d like to recreate this card:
-
Early Espresso Cardstock – 5 1/2″ x 8 1/2″, scored at 4 1/4″
-
Very Vanilla Cardstock – 4″ x 5 1/4″ (qty 2 – one embossed with Forever Plaid), 3 1/2″ x 3 1/2″ (Largest Stylish Shapes Circle Die), 1 1/2″ x 4″ (for words)
-
Autumn Toile Designer Series Paper – 2 1/2″ x 5 1/4″, 1/2″ x 5 1/4″
This card came together so easily and would be perfect to send to someone special this season. I always say—happy mail is the best kind of mail! ✉️💛
What do you think—will you be making some autumn cards this year with this gorgeous new bundle?
FREE TUTORIALS- I send out Weekend Inspiration every weekend that includes a handful of Card Projects with tutorials and supply lists – and yes they are free! The first card on today’s post is one of the project tutorials! I send these out to all who are on my email list. Interested in getting these project sheets? Simply subscribe to my email list click here:


