

Create this beautiful yet simple Hello Card using the Forever Fern Stamp Set and Rectangle Postage Stamp Punch by Stampin’ Up!
Measurements:
- Pool Party cardstock: 8 ½” x 5 ½” (score at 4 ¼”), scraps for punching
- Soft Suede cardstock: 3 ⅞” x 5 ⅛”
- Crumb Cake cardstock: 3 ¾” x 5”
- Coastal Cabana cardstock: scrap for punching
- Bermuda Bay cardstock: scrap for punching
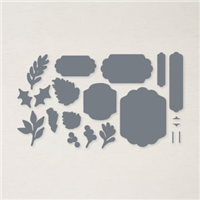
- Very Vanilla cardstock: scrap for die cutting
- Linen Thread: approx. 6-8”
Instructions:
- Fold the Pool Party cardstock in half to create the card base.
- Choose 3 different leaf/branch stamps from the Forever Fern stamp set. With Versamark ink, stamp one all over the Pool Party scraps, one all over the Coastal Cabana scraps and the third one all over the Bermuda Bay scraps.
- Use the Rectangular Postage Stamp punch, punch out two from the stamped Pool Party cardstock, two from the stamped Coastal Cabana cardstock and two from the stamped Bermuda Bay cardstock (cut one in half). Partial punched pieces are ok because some will get trimmed anyway (see the sample picture).
- Stick the punched pieces on the Crumb Cake card layer (portrait orientation) in two rows starting approx. ⅛” from the left edge. Make sure to stagger the rows, like if you were laying bricks!
- Row 1 (top-bottom): Bermuda Bay, Pool Party, Coastal Cabana, Bermuda Bay
- Row 2 (top-bottom): Pool Party, Coastal Cabana, Bermuda Bay
- Flip the Crumb Cake layer over and trim off any pieces sticking over the edges. Doing this from the back gives you a straight edge to guide your scissors along.
- Stick the Crumb Cake layer on the Soft Suede layer. Then, stick the Soft Suede layer on the Pool Party card base.
- On a scrap of Very Vanilla cardstock, stamp the “hello” from the Forever Fern set with Soft Suede ink. Die cut it out using a small, long label die from the Seasonal Labels dies set.
- Tie a bow with big loops from Linen Thread. Stick it on the back of the die cut label so that one loop and tail are visible on the top right and the other loop and tail are visible on the bottom left. Use Stampin’ Dimensionals to stick the label onto the card just below center on the right side.
- Finish the card off by placing a small pearl on either end of the label.

FREE TUTORIALS- I send out Weekend Inspiration every weekend that includes a handful of Card Projects with tutorials and supply lists – and yes they are free! The first card on today’s post is one of the project tutorials! I send these out to all who are on my email list. Interested in getting these project sheets? Simply subscribe to my email list click here:

Want it all?? Have a big wish list? The BEST deal is always buying the Stampin' Up! Starter Kit! You get $125 in product of your choice for just $99 & Free Shipping! No obligation
I am blessed to lead an amazing team with members all across the United States. My team consists of both business builders and happy shoppers! The question I am most often asked about joining the SU family is – “do I have to sell?” The answer is NO! You are welcome to be a happy shopper – and a smart cookie, I might add, to get all the products you love at the demonstrator discount!
Please contact me with any questions! I’d love to have you join my “We’d Rather Bee Stampin'” team!
You will then enjoy 20% off all future purchases while you are active! What have you got to lose? The link to join is below! The best part – there is no obligation to sell, or hold parties ever!!! You can simply become a “happy shopper” and get discounts on all your Stampin’ Up! purchases! If you’d like to pursue this as a business and make a little extra money, I can help you with that as well! 
![]()


0 Comments