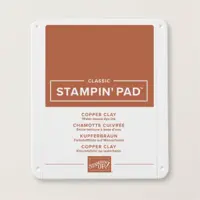
This thankful card was created with Copper Clay Ink and NEW Products from the 2023 Holiday Catalog (shown below), available for purchase on September 6, 2023!
- All About Autumn Suite Collection | 162193 | p. 42 | $105.75
- Autumn Leaves Bundle | 162186 | p. 44 | $55.75
- Distressed Tile 3D Embossing Folder | 162189 | p. 43 | $9.50
- Adhesive-Backed Speckled Dots | 162191 | p. 43 | $8.00
- Copper & Natural Ribbon Combo Pack | 162192 | p. 43 | $9.50
- All About Autumn Specialty 6×6 Designer Series Paper | 162178 | p. 43 | $15.00
- Very Vanilla Thick Card Base – 5 1/2 x 8 1/2, scored at 4 1/4
- Designer Series Paper – 4 3/4 x 1 (strip), 1 7/8 x 1 3/8 (die-cut)
- Very Vanilla – 5 1/4 x 4 (embossed layer), 5 x 1/4 (strip), 2 3/8 x 1 (die-cut sentiment), 6 x 3 1/2 (stamped/die-cut leaves)
Instructions:
- Burnish the fold of the card base.
- Tuck the Very Vanilla layer inside the Distressed Tile 3D Embossing Folder and run through a die-cut machine.
- Adhere to the card with Stampin’ Dimensionals.
- Adhere the Very Vanilla strip to the Designer Series Paper strip with Multipurpose Liquid Glue.
- Adhere to the card with Stampin’ Dimensionals.
- Stamp the maple leaf in Copper Clay ink onto the Very Vanilla piece two times without re-inking. Stamp the sentiments as shown onto the Very Vanilla.
- Crop all with the coordinating Autumn Leaves dies and a die-cut machine.
- Crop the Designer Series Paper with the Autumn Leaves die-cut.
- Adhere the ribbon as shown with Stampin’ Seal Plus.
- Adhere the sentiment and Designer Series Paper die-cuts together and to the card with Stampin’ Dimensionals.
- Embellish with Adhesive-Backed Speckled Dots.


Such a pretty card Laura. The embossed background is the star.