
Sometimes a card just calls for a little extra sparkle and a whole lot of celebration! This Let’s Celebrate card is all about bold stars, beautiful colors, and layered details that make a big impression.

I used the Shining Stars Dies (Just $5 with a $75 Purchase) to create the large star focal point, layering different sizes in Pretty Peacock, Pool Party, and Soft Sea Foam Two-Tone Cardstock. I love how these colors work together! The deep Pretty Peacock adds contrast, while Pool Party and Soft Sea Foam bring in those soft, fresh shades that make the layered stars really stand out.
The white background features little star cutouts that add another fun detail without taking away from the main focal point. And by popping up the sentiment and layering the stars, this card has lots of dimension and interest!

A Sneak Peek at Birthday Shoutout!
Did you notice the sentiment? “Let’s Celebrate!” comes from the upcoming Birthday Shoutout Stamp Set, which I’m giving you a little sneak peek of today! This sentiment is perfect for birthdays, milestones, accomplishments, and all those moments that deserve a little celebration.

- Basic White Thick Cardstock: 8 1/2 x 5 1/2, scored at 4 1/4
- Basic White Thick Cardstock: 4 x 5 1/4
- Pretty Peacock Two-Tone Cardstock: 6 x 6
- Pool Party Two-Tone Cardstock: 5 x 5
- Soft Sea Foam Two-Tone Cardstock: 4 x 4
- Burnish the fold of the card base with a Bone Folder.
- Crop the center of the 4 x 5 1/4 Basic White piece with the 2nd largest Shining Star Die and 8 of the smallest star dies as shown.
- Crop the Two-Tone Cardstock starting with the 2nd largest Shining Star Die, working your way down, alternating colors until you crop the Soft Sea Foam with the smallest Shining Star Die.
- Adhere the two pieces of “star-cropped” Basic White to the card base as shown with Stampin’ Dimensionals.
- Adhere the large Pretty Peacock star to the card base with Multipurpose Liquid Glue. Adhere the remaining stars as shown with Stampin’ Dimensionals.
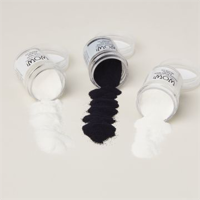
- Heat Emboss the sentiment in Basic WOW! White Embossing Powder onto a piece of Pretty Peacock Two-Tone Cardstock. Trim to size as needed. Adhere to the card with Stampin’ Dimensionals.


FREE TUTORIALS- I send out Weekend Inspiration every weekend that includes a handful of Card Projects with tutorials and supply lists – and yes they are free! The first card on today’s post is one of the project tutorials! I send these out to all who are on my email list. Interested in getting these project sheets? Simply subscribe to my email list click here:














0 Comments