

Get ready to spread some festive joy with the NEW Stampin’ Up! Classic Wedding Bundle — featuring an adorable holiday card design with a car decked out in Christmas lights, piled high with gifts, and a cheerful ‘CHEER’ license plate!
Card Tutorial: Classic Wedding Holiday Card
Measurements:
- Thick Basic White – 5 ½ x 8 ½ scored at 4 ¼ on the 8 ½ inch side
- Basic White – 4 1/8 x 5 3/8, 3 x 3 ½ for car, 3/8 x 15/16
- Real Red – scraps for lights and bows and car back lights
- Garden Green – scraps for lights and present
- Granny Apple Green – scraps for lights and bow and present
- Designer Series Paper – 1 x 3 ¼ – 4 different patterns
- Silver Foil – scraps for window frame, light string, truck handle and bumper
Instructions:
- Fold and burnish card base with bone folder.
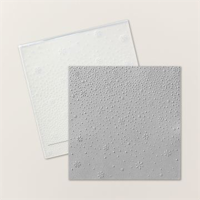
- Run the larger piece of basic white with the snowflake sky 3D embossing folder though the Stampin’ Cut and Embossing machine. Adhere to the front of the card.
- Stamp the outline of the car with memento ink and then stamp the fill in with real red.
- Do all your die cutting, the car, the presents, bows, silver pieces.
- Snip off the lights and adhere to the silver string of lights.
- Cut the presents with cardstock and DSP, adhere the bows to the presents as shown.
- Using multi-purpose glue, adhere all the silver to the car.
- Using the light basic black blend, color the tires.
- After adhering all the pieces to the car, adhere to the front of the card so that the tires are about 3/8 to a ½ inch from the bottom of the card.
- Put the completed presents on the top of the car using stamping dimensionals and glue.
- Stamp CHEERS! in real red, then cut off the S! and cut down to 3/8 x 15/16.
- Scatter the snowflake embellishments as desired.
- Finish inside and envelope as desired.

![]()
![]()


Price: $10.00


0 Comments