

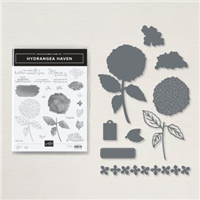
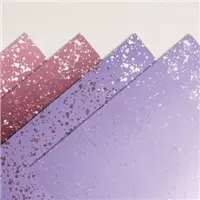
For my Facebook Live Take Two yesterday I shared some more projects using the Hydrangea Hill Suite Collection. For my first card, I used the lovely Pearlescent Specialty Paper for the flower head. I stamped the image first and then cut lots of the small flowers using the strip of flower dies. I placed them on the stamped flower head image with glue dots and then added more of them with mini dimensionals to create some added texture and depth.

Click below to watch my FB Live to see how I put these projects together. Are you a subscriber to my Youtube Channel? If not, be sure to subscribe when you are there, so that you know when I post a new video! I’d BEE Grateful!

Here’s a close up of the Pearlescent flower head – wish you could see it in person -it is so shimmery and so pretty!

Next was a card using the beautiful Designer Series Paper. As I often say, with DSP this beautiful you don’t really need to add much more to your project!

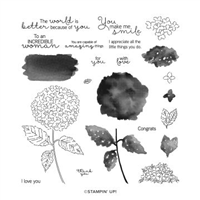
I added a strip of the Hydrangea Hill Mercury Glass Designer Acetate on the bottom panel of the card. Again, wish you could see it in person – it’s so pretty! I added a greeting by stamping on one of the dies from the So Sentimental Bundle, stamped the small flowers and leaves and finished up with a few of the Pastel Pearls and a Linen Thread double bow.

My last project – this was just plain fun! My love of bees got the best of me – I was shopping at Target and came across her! I knew I could come up with something cute with her – and I am pretty pleased with this adorable Queen Bee! Her wings were made with the Brilliant Wings Dies – I cut one of the largest solid butterfly shapes with Daffodil Delight cardstock, and then cut the largest detailed wing die with vellum. I attached them wings together with glue dots and then attached her wings onto the bee – also with glue dots.

Since she is a “Queen Bee”, I thought she needed some sort of crown – so I used Linen Thread and wrapped it around her head – securing it with glue dots. I then used the ‘strip of small flowers’ die from the Hydrangea die and cropped a few Daffodil Delight flowers for her crown. I think she is pretty cute!
I also found some little chocolate lady bugs and bees and I added some wings to them as well! They just make me smile! Wouldn’t these be a fun way to brighten someone’s day?

Measurements for my projects:
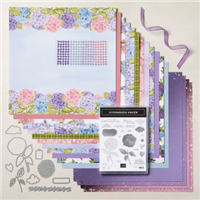
Pearlescent Hydrangea Card:
Very Vanilla Card Base: 5 ½ x 8 ½, scored at 4 ¼, 3 ½ x 5 ¼,
Pearlescent Specialty Paper: small pieces for die cutting all the little flowers and the word panel
Hydrangea Hill Designer Series Paper: 1 3/8 x 1/2, ½ x 4
Mercury Glass Card:
Seaside Spray Card Base : 5 ½ x 8 ½, scored at 4 1/4
Purple Posy: 4 x 5 ¼
Hydrangea Hill Mercury Glass Designer Acetate – 4 x 1 ¼,
Basic White: approx. 4 x 5 1/4 for die cutting/stamping
Hydrangea Hill Designer Series Paper: 3 ¾ x 4 – cut into 1 ¼ inch strips
Want it all?? Have a big wish list? The BEST deal is always buying the Stampin' Up! Starter Kit! You get $125 in product of your choice for just $99 & Free Shipping! No obligation
I am blessed to lead an amazing team with members all across the United States. My team consists of both business builders and happy shoppers! The question I am most often asked about joining the SU family is – “do I have to sell?” The answer is NO! You are welcome to be a happy shopper – and a smart cookie, I might add, to get all the products you love at the demonstrator discount!
Please contact me with any questions! I’d love to have you join my “We’d Rather Bee Stampin'” team!
You will then enjoy 20% off all future purchases while you are active! What have you got to lose? The link to join is below! The best part – there is no obligation to sell, or hold parties ever!!! You can simply become a “happy shopper” and get discounts on all your Stampin’ Up! purchases! If you’d like to pursue this as a business and make a little extra money, I can help you with that as well! 
![]()


0 Comments