Apr 9, 2026 | Gallery, More Friend Cards |

Two Cards, One Creative Escape – All a Flutter & Help Me Grow
There’s something extra special about sitting down, going live, and letting creativity lead the way—and that’s exactly what we did on Wednesday, April 8! If you joined me, you saw these two cards come to life step-by-step… and if you missed it, don’t worry—I’ve got all the inspiration waiting for you right here.
This pair of cards may use different bundles, but they share one thing in common: they’re proof that a few thoughtful layers and a pop of detail can turn simple supplies into something truly eye-catching.

Be sure to catch the replay of my Facebook Live if you haven’t already, and let me know which card is your favorite—I always love hearing what inspires you most!

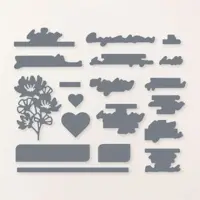
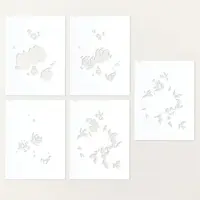
Bold & Beautiful with All a Flutter 🦋
Now this one is bringing the energy! The rich Flora Designer Series Paper creates a dramatic backdrop, and those layered butterflies practically dance right off the card. Adding them over the circular focal point really helps them stand out—it’s like giving them their own little stage.

The soft ribbon and subtle embellishments balance everything out, keeping it elegant while still feeling fun. And that “friend” sentiment? The perfect finishing touch.

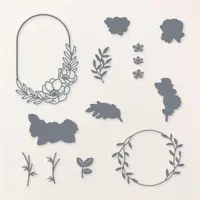
Soft & Sweet with Help Me Grow🌿
This card has such a gentle, welcoming feel—like a breath of spring. The soft striped background sets the stage, while that adorable flower pot steals the show. I love how the layered blooms add just enough dimension without feeling fussy.

The little “HELLO” sentiment tucked into the arrangement makes it perfect for just about any occasion. It’s one of those designs you could easily recreate with whatever florals you have on hand—simple, sweet, and full of charm.
A Little Inspiration to Take With You
What I love most about these two cards is how different they feel—one soft and subtle, the other bold and vibrant—yet both come together using simple techniques like layering, die cuts, and thoughtful placement.
If you’ve got these bundles, now’s the time to pull them out and play. And if not? Let this be your reminder that you can recreate these looks with what you already have in your craft room.
Creativity doesn’t need to be complicated—it just needs a place to begin 💛


How to Get the April 2026 Springtime Scenes Tutorial Bundle
You’ve got two easy options to get your hands on this tutorial:
Option 1: Earn It FREE
Place a $50 order (before tax and shipping) with me, and you’ll receive the Filled with Sweetness Tutorial Bundle for FREE. (a link to the tutorial will be emailed to you within 24-48 hours after you place your order).
• Available to U.S. residents only
• Orders must be placed through me

Option 2: Purchase the Tutorial
Not shopping right now or live outside the U.S.? No problem.
• Purchase the tutorial for $20
• Available to anyone, anywhere

This tutorial is perfect if you love fresh card ideas, thoughtful layouts, and projects that feel polished but totally doable.


Mar 31, 2026 | Gallery, More Holiday Cards |

There’s something so peaceful about a clean, simple Easter card—and this one feels like a quiet moment wrapped in paper. 💙
Today’s card features a soft, layered cross created with cardstock strips, set against a sweet polka dot Designer Series Paper background. The gentle blues paired with crisp white details give it that calm, reflective feel that’s just perfect for Easter. And that sentiment—“you are loved”—says everything that needs to be said, doesn’t it?
What I really love about this design is how versatile it is. Think of it like a sketch you can dress up or down depending on what’s sitting on your craft table! Also perfect for a Baptism or First Confirmation!

Measurements:
- Base: 5 ½” x 8 ½” – score at 4 ¼” and 7 ¼”
- 1 ¼” x 3 ¾” – cross bar for cross – same cardstock as card base
- DSP: 2 ¾” x 5 ¼” (front)
- 4” x 5 ¼” (inside panel)
- White: 2 ½” x 5” (inside panel)
The layered die cut behind the greeting adds just enough detail without overwhelming the design, and that little ribbon accent gives it a soft, finished touch—like tying a bow on a meaningful moment.
This is one of those cards that looks thoughtful and intricate, but comes together easily… and can be recreated again and again with whatever supplies you already have.
So grab your favorite papers, dies, and stamps, and let this design be your starting point. Sometimes the simplest layouts leave the most room for creativity to bloom.
FREE TUTORIALS- I send out Weekend Inspiration every weekend that includes a handful of Card Projects with tutorials and supply lists – and yes they are free! The first card on today’s post is one of the project tutorials! I send these out to all who are on my email list. Interested in getting these project sheets? Simply subscribe to my email list click here:


Mar 25, 2026 | Gallery, More Sympathy Cards |
There’s something truly special about creating a card that brings comfort, and today’s project is one of those heartfelt designs. This soft, watercolor-inspired background paired with delicate floral line art creates a calm and peaceful feel—perfect for sharing words of encouragement or sympathy. The simple sentiment, “Peace I leave with you, my peace I give unto you,” adds a meaningful touch without overwhelming the design.
I love how the warm tones blend effortlessly behind the stamped flowers, giving this card a gentle, artistic look while still being easy to recreate. And that little ribbon detail? It’s the perfect finishing touch that adds just enough texture and dimension.

Free Card Tutorial: Flowers Fair Handmade Card
Measurements:
- Poppy Parade: 8 1/2” x 5 1/2” scored at 4 1/4”
- Basic White: 4” x 5 1/4”
- Timid Tiger: 4” x 5 1/4”
- DSP: 4” x 5” and 2” x 2” scrap
Instructions:
- Fold the Poppy Parade cardstock in half at the score line. Adhere the 4″ x 5 1/4″ piece of Basic White Cardstock inside the card.
- Adhere the Timid Tiger cardstock to the front of the card.
- Using the Tuxedo Black Memento ink pad, stamp the Flowers Fair image onto the 4” x 5” Garden Poetry DSP. Adhere to the Timid Tiger cardstock on the card front.
- Stamp the sentiment from Prayers & Promises onto the center of the 2” DSP scrap using Tuxedo Black Memento ink. Punch out the sentiment using the 1 3/4” Circle Punch.
- Cut 8” of the Timid Tiger Ribbon and fold into thirds, creating a “Z” pattern. Adhere to the back of the 1 3/4” circle using Stampin’ Dimensionals.
- Add additional Stampin’ Dimensionals as needed and adhere to the front of the card as shown in the sample to finish.


Mar 22, 2026 | Gallery, More Friend Cards |

There’s just something about a garden theme that feels like a breath of fresh air—don’t you think? 🌿 This card came together during my most recent Facebook Live, and it’s one of those designs that feels equal parts sweet, simple, and just a little bit special.
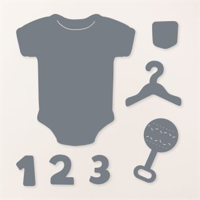
The Help Me Grow Bundle really does all the heavy lifting here. I mean…how cute are those gardening tools?! I paired them with some soft patterned paper for the tool handles to give them a little personality—because even garden tools deserve a glow-up every now and then.
The layout is clean and classic, starting with that stitched white panel layered over a soft neutral card base. It creates the perfect “garden bed” to build on. From there, I tucked in some bright green foliage (because more leaves = more happy 🌱), and added a few tiny flowers for pops of color that feel like they just bloomed into place.

And let’s talk about that sentiment for a second…
Simple. Straightforward. Perfect.
Sometimes a little “hello” is all you need.
To finish it off, I added a bit of twine for texture and just a hint of rustic charm—it ties everything together without stealing the spotlight.
Why I love this card:
- It’s easy to recreate with scraps and dies you already have
- The layers add interest without feeling fussy
- It works for so many occasions—hello, thinking of you, or just because
If you missed the live, be sure to catch the replay—I walk through all the steps and share a few tips along the way to help you get those layers just right.
And if you’ve got the Help Me Grow Bundle in your craft room, consider this your sign to pull it out and play. 🌼
Happy stamping!
Laura 💛


How to Get the March 2026 Filled with Sweetness Tutorial
You’ve got two easy options to get your hands on this tutorial:
Option 1: Earn It FREE
Place a $50 order (before tax and shipping) with me, and you’ll receive the Filled with Sweetness Tutorial Bundle for FREE. (a link to the tutorial will be emailed to you within 24-48 hours after you place your order).
• Available to U.S. residents only
• Orders must be placed through me
Option 2: Purchase the Tutorial
Not shopping right now or live outside the U.S.? No problem.
• Purchase the tutorial for $20
• Available to anyone, anywhere
This tutorial is perfect if you love fresh card ideas, thoughtful layouts, and projects that feel polished but totally doable.