Oct 3, 2026 | Gallery, More Fall Cards, More Friend Cards |
Today, I’m sharing an elegant Christmas card I created using the Luxe Foliage Specialty Designer Series Paper and the Graceful Evergreen Deer Bundle from Stampin’ Up! — and I have been having so much fun with our new Stampin’ Hot Foil System!

Isn’t this paper just gorgeous? The
Luxe Foliage paper is the September Product of the Month, and this design is my favorite of the pack — beautiful gold foiled florals on a rich
Secret Sea background. It does all the work on this card! I layered it over a
Gold Foil mat on a
Basic White card base, and that gold-on-dark contrast is just stunning in person. You really need to see it catch the light!
For my focal point, I hot foiled that beautiful frame in gold using the
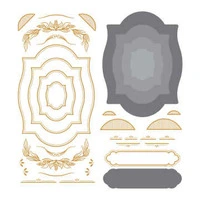
Flourish & Frames Hot Foil Dies on the new Smooth Foiling Paper. Then I hot foiled the sweet doe and her little fawn in gold with the
Graceful Evergreen Deer Hot Foil Dies — don’t you just love that little spotted fawn? — and popped them up with
Stampin’ Dimensionals.My
‘Tis the Season sentiment is hot foiled in gold, too, using the
Magical Christmas Hot Foil Dies. I love that all of the foiled pieces come together in one pretty layered label!To finish the card, I wrapped it with a length of
Secret Sea & Gold ribbon and tied a bow — such a pretty finishing touch. And of course, I dressed up my envelope flap with a piece of that same Luxe Foliage paper and a thin strip of Gold Foil. I always love when the envelope matches the card!
If you haven’t snagged the Luxe Foliage paper yet, check the online store — it’s just $5 with a $75 order (after rewards), one per customer, and only while supplies last!
DIMENSIONS:
- Crumb Cake Cardstock: 11 x 4 1/4, scored at 5 1/2
- Gold Foil Sheets: 5 1/4 x 4, 5 3/4 x 1 (envelope flap)
- Secret Sea Two-Tone Cardstock: 5 x 3 3/4
- Luxe Foliage Specialty Designer Series Paper: 5 x 3 3/4; 5 3/4 x 2 (envelope flap)
- Smooth Foiling Specialty Paper: 5 x 7 (all foiled pieces)
INSTRUCTIONS:
- Burnish the fold of the card base with a Bone Folder.
- Adhere Designer Series Paper, Two Tone and Gold Foil panels together.
- Wrap with the ribbon, tying a bow on the left side.
- Adhere to the card base with Dimensionals.
- Use a Hot Foil system to foil the frame, deer and sentiment in Gold Hot Foil. Crop with the coordinating dies. Adhere as shown with Stampin’ Dimensionals.
- Add the Gold Foil and Designer Series Paper to the envelope flap.


FREE TUTORIALS- I send out Weekend Inspiration every weekend that includes a handful of Card Projects with tutorials and supply lists – and yes they are free! The first card on today’s post is one of the project tutorials! I send these out to all who are on my email list. Interested in getting these project sheets? Simply subscribe to my email list click here:


Oct 1, 2026 | Gallery, More Fall Cards, More Friend Cards |

Sometimes a card comes together with just the right combination of products, colors, and a little bit of shine. This “Just a Little Hello” card is one of those cards!
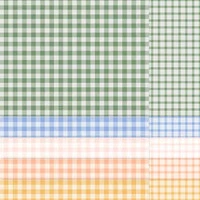
I combined the Lustrous Leaves Hot Foil Dies, Sweetly Sentimental Hot Foil Dies, and the 2026–2028 In Color Gingham Gallery Designer Series Paper to create a card with a beautiful, rich color combination and just the right amount of shine.
The star of this card is definitely the Lustrous Leaves Hot Foil Dies. I used copper hot foil on Peaceful Pine cardstock to create the beautiful leafy details. The copper really pops against that deep, rich green! I layered several of the foiled leaves together to create a full leafy focal point in the center of the card. I love how the leaves overlap and extend in different directions, creating lots of dimension without making the card feel too busy. For the sentiment, I used the Sweetly Sentimental Hot Foil Dies and the same copper foil. “Just a Little Hello” is one of those sentiments that works for so many occasions.
Sometimes you don’t need a reason to send a card. A little hello in the mailbox is reason enough!
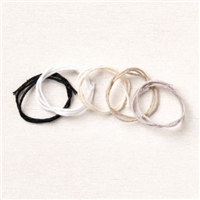
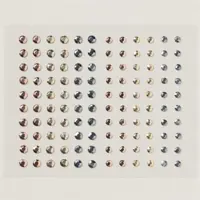
I added a strip of the 2026–2028 In Color Gingham Gallery Designer Series Paper behind the leaves. The gingham adds just the right amount of pattern and coordinates beautifully with the Peaceful Pine cardstock. I love how the gingham gives the card a cozy, casual feel while the copper foil adds a little elegance. A bit of linen thread tied around the leafy arrangement and a few coordinating embellishments finish off the card. Peaceful Pine + gingham + copper foil + linen thread + gorgeous leafy details = a pretty little hello!
I really love how the copper foil stands out against the Peaceful Pine. It’s a great reminder that you don’t need a lot of different colors to make a card interesting. Sometimes a simple color palette with a little metallic shine is all you need. And, of course, the best part is that this design could easily be adapted with a different sentiment for birthdays, thank-yous, thinking of you cards, and more.

DIMENSIONS:
- Crumb Cake Cardstock: 4 1/4 x 11, scored at 5 1/2
- Basic White Cardstock: 4 x 5 1/4
- Peaceful Pine Two-Tone Cardstock: 3 3/4 x 5
- 2026-28 In Color Gingham Gallery Designer Series Paper: 1 1/2 x 5 (large gingham), 1/2 x 5 (small gingham)
- Peaceful Pine Two-Tone Cardstock: 4 x 4 1/2 (leaves), 3 1/2 x 4 1/2 (sentiments)
- 2026-28 In Color Gingham Gallery Designer Series Paper: 5 3/4 x 2 3/8 (envelope flap)
INSTRUCTIONS:
- Burnish the fold of the card base with a Bone Folder.
- Adhere the Basic White panel to the card base.
- Adhere the two Designer Series Paper panels together and to the Peaceful Pine panel.
- Double wrap with Crumb Cake Baker’s Twine. Tie a bow to secure. Adhere the card.
- Use a Hot Foil system to foil the leaves and sentiment in Copper Hot Foil. Crop with the coordinating dies. Adhere as shown with Stampin’ Dimensionals.
- Embellish with Copper Adhesive-Backed Metallic Gems.
- Add the Designer Series Paper to the envelope flap.


FREE TUTORIALS- I send out Weekend Inspiration every weekend that includes a handful of Card Projects with tutorials and supply lists – and yes they are free! The first card on today’s post is one of the project tutorials! I send these out to all who are on my email list. Interested in getting these project sheets? Simply subscribe to my email list click here:


Aug 20, 2026 | Gallery, More Fall Cards |

Fall crafting is here, and I had so much fun playing with the new Stampin’ Up! Painted Pumpkins Bundle during my Facebook Live! I created two cards featuring the bundle, along with the coordinating masks and Designer Series Paper.
I love how versatile the Painted Pumpkins Bundle is. With the masks, coordinating DSP, different pumpkin images, and fun greetings, you can create cards that are sweet and simple or layered and detailed.

If you missed my Facebook Live, be sure to check out the replay and craft along with me! These two cards are a fun way to kick off the fall crafting season. I lost internet connection at before i could complete the second card – only to find out the cause – squirrels had chews through my internet cables! Those rascals! All is repaired now so, hoping I am good to go!!!!

I started with the “I hope your day is fabulous” card. I love the soft, layered look of this one, combining the Painted Pumpkins images with patterned paper, blending with one of the masks, ribbon, and a few pops of color. The pumpkins add just the right amount of fall fun without making the card feel too busy.

For my second card, I went with a more whimsical look featuring the “Hello Gourd-geous” sentiment. The assortment of pumpkins in different colors makes this card especially fun, and I love how the little details bring it all together. It’s definitely a card that will make someone smile! I stamped the three pumpkins/gourds with Black ink – and then used one of the masks to add color to each – Calypso Coral, Golden Glow and Pool Party. I also used a Black Stampin’ Blend and flecked some color onto the pumpkins.