Sep 19, 2025 | Gallery, More Friend Cards |

On Wednesday’s Facebook Live, I had so much fun creating these two cards featuring the Branching Out Bundle! This bundle is the star of my current Card Class To Go, and it’s one you’ll love using again and again.
Both of these cards showcase how versatile this bundle is — one has a clean, fresh look with lots of white space and a pop of bright color, while the other takes on a warmer, cozier feel with earthy tones and stripes. I just love how a simple change in color and background can give such a different vibe!


If you missed my live, you can catch the replay here:

The dies in this bundle are packed with great details — branches, sprigs, pinecones and more — perfect for layering and adding those special finishing touches to your projects. Add in a few embellishments, a touch of texture, and you’re set with cards that are simple yet beautiful.


And don’t forget, my Branching Out Card Class To Go is open now! This class is a great way to craft along with me from home — and it’s available for a limited time!

It’s time to register for my beautiful BRANCHING OUT Card Class to GO! Together we’ll create a set of 6 beautiful, nature-inspired cards that are perfect for birthdays, thinking of you, and more, all from the comfort of your own home!
For just $55 (+ $10 shipping if needed), you’ll receive:
- Autumn Toile Designer Series Paper
Streaked Dots
Black & White & Gold Baker’s Twine
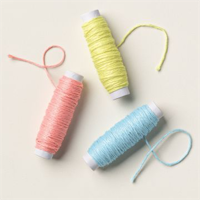
Irregular Weave TrimEarly Bird Registration closes Sept. 15 Noon ET! Free pkg. of Espresso & Olive Linen Thread!
Details and Registration here: Branching Out Card Class
FREE TUTORIALS- I send out Weekend Inspiration every weekend that includes a handful of Card Projects with tutorials and supply lists – and yes they are free! The first card on today’s post is one of the project tutorials! I send these out to all who are on my email list. Interested in getting these project sheets? Simply subscribe to my email list click here:


Sep 17, 2025 | Gallery, More Friend Cards |

Sometimes all you need is a simple hello to brighten someone’s day – and today’s card does just that! I paired the Branching Out Dies with the cozy, neutral patterns from the Autumn Toile Designer Series Paper for a card that feels warm and welcoming.
I love how the striped paper sets the stage for the layered labels – so crisp and classic! The stitched edges give just the right amount of detail, and of course, I had to finish it off with a sweet little cluster of die-cut sprigs and a Linen Thread bow. 🌿
This card would be perfect for sending to a friend “just because,” or as part of a card set – swap out the sentiment and it could work for birthdays, thank-yous, or even masculine cards.
DIMENSIONS:
- Basic White Thick Cardstock: 5 1/2 x 8 1/2, scored at 4 1/4
- Autumn Toile Designer Series Paper: 5 1/4 x 4, 4 3/4 x 3 1/2, 7/8 x 2
- Basic White Cardstock: 4 x 2 3/4
- Early Espresso and Gray Granite: scraps

INSTRUCTIONS:
- Burnish the fold of the card base with a Bone Folder.
- Adhere the striped panel to the card base.
- Stamp “hello” in Early Espresso Classic Ink onto the left side of the Basic White panel.
- Crop the Designer Series Paper and Sentiment panels with the 4 1/8 wide and 3 1/2 wide Branching Out dies.
- Adhere the Designer Series Paper strip to the Basic White panel as shown.
- Adhere the two die-cuts together and to the card base with Stampin’ Dimensionals.
- Crop the Early Espresso and Gray Granite scraps with the pine cone, pine branch and sprig dies. Adhere with a Mini Stampin’ Dimensional.
- Tie a bow of Early Espresso Linen Thread and adhere with a Mini glue Dot.
- Add 3 White Neutral Matte Dots.

It’s time to register for my beautiful BRANCHING OUT Card Class to GO! Together we’ll create a set of 6 beautiful, nature-inspired cards that are perfect for birthdays, thinking of you, and more, all from the comfort of your own home!
For just $55 (+ $10 shipping if needed), you’ll receive:
- Autumn Toile Designer Series Paper
Streaked Dots
Black & White & Gold Baker’s Twine
Irregular Weave TrimEarly Bird Registration closes Sept. 15 Noon ET! Free pkg. of Espresso & Olive Linen Thread!
Details and Registration here: Branching Out Card Class
FREE TUTORIALS- I send out Weekend Inspiration every weekend that includes a handful of Card Projects with tutorials and supply lists – and yes they are free! The first card on today’s post is one of the project tutorials! I send these out to all who are on my email list. Interested in getting these project sheets? Simply subscribe to my email list click here:

Aug 5, 2025 | Gallery, More Friend Cards, More Thank You Cards |

I’m so excited to share today’s card with you—it’s bursting with bright, happy color and showcases ALL FIVE of the 2025–2027 In Colors™, which just happen to be on sale right now! 🎉 These colors pair beautifully together and really pop on this fun stitched background. I used strips of cardstock in each of the 5 In Colors, embossed with the Pattern of Friendship die, to create a bold ombré look. I love how the texture adds interest without overpowering the design! The sentiments are from the Pattern of Friendship stamp set and great news: they’re part of the Last Chance Products list and up to 70% off while supplies last!
🌲 The adorable trees are from the Scenic Adventures Dies and the sentiments were cropped with the More Messages Die.
The inside of the card keeps the color theme going with a sweet “Let’s Keep in Touch” message—simple and heartfelt. 💌
CLICK ON THE IMAGES BELOW TO SHOP THE SALES!


Grab the supplies while you can! The In Colors are 15% off and Last Chance items are flying off the shelves. Add your favorites to your cart and don’t forget—you can earn Free Bees and Stampin’ Rewards on your qualifying purchases, too!

DIMENSIONS:
- Secret Sea Cardstock: 4 1/4 x 11, scored at 5 1/2
- Basic White Cardstock (layer): 4 x 5 1/4 (qty 3)
- Basic White Cardstock (trees and sentiments): 4 1/4 x 5
- Secret Sea Cardstock: 2 1/2 x 1 1/2
- Strawberry Slush Cardstock: 4 x 3/4
- 2025-2027 In Color Strips – 4 x 1 (in each color)
INSTRUCTIONS:
- Burnish the fold of the card base with a Bone Folder.
- Adhere the In Color strips to one of the 4 x 5 1/4 Basic White panels.
- Zip through the Stampin’ Cut & Emboss Machine with the Pattern of Friendship die. Trim down to 3 1/2 x 4 3/4.
- Crop the Basic White and Secret Sea cardstock with the More Messages die.
- Crop the trees with the Scenic Adventure die.
- Stamp the sentiments in Secret Sea and Strawberry Slush Classic Ink onto the die-cut pieces.
- Adhere the panels and die-cuts as shown on the inside and outside as shown.
- Add a bow of Strawberry Slush Baker’s Twine.
- Embellish with 2025-2027 In Color Flat Pearls.
FREE TUTORIALS- I send out Weekend Inspiration every weekend that includes a handful of Card Projects with tutorials and supply lists – and yes they are free! The first card on today’s post is one of the project tutorials! I send these out to all who are on my email list. Interested in getting these project sheets? Simply subscribe to my email list click here:
Sale: $16.20
Price: $18.00
Sale: $25.20
Price: $36.00
Sale: $11.90
Price: $14.00
Sale: $11.90
Price: $14.00
Sale: $11.90
Price: $14.00
Sale: $11.90
Price: $14.00
Sale: $11.90
Price: $14.00

Jul 16, 2025 | Gallery, More Birthday Cards, More Friend Cards |

I had so much fun during my last Facebook Live creating these three cheerful cards using the Sweetest Jar Bundle. Each card shows just how versatile this adorable bundle is — from sending a little luck, to celebrating a birthday, to sharing a touch of sweetness!
Whether you love the playful shamrocks, the colorful shaker jar, or the charming little cookie jar, these cards are sure to make someone smile. I love how easy it is to mix and match the stamps and dies in this bundle to fit any occasion.

Want to make these cards too?
I have an Ordering Special happening now through Sunday, July 20th! When you place a $40+ order (after rewards) in my online store, you’ll receive all 3 card kits — free! It’s my way of saying thank you and giving you a head start on creating with your new goodies. Note: You will need the bundle since Stampin’ Up! policy doesn’t allow us to send stamped images in kits.
Don’t miss out on this sweet deal — shop right here!

Here’s a closer look at the cards below:
FREE TUTORIALS- I send out Weekend Inspiration every weekend that includes a handful of Card Projects with tutorials and supply lists – and yes they are free! The first card on today’s post is one of the project tutorials! I send these out to all who are on my email list. Interested in getting these project sheets? Simply subscribe to my email list click here:

Jul 11, 2025 | Gallery, More Friend Cards |

Hi friends — I’m so excited to share a little recap of my latest Facebook Live! This week, I featured five quick and beautiful cards using one of my go-to favorites: the Sunflower 3D Embossing Folder by Stampin’ Up!® and the More Messages Bundle. 🌻✨
I just love how embossing folders can take simple cardstock and turn it into something WOW — with texture, dimension, and instant elegance. And when you pair them with the More Messages Bundle, you have dozens of sentiments ready to grab and go!
✨ The Best Part?
These cards are quick and easy — no complicated techniques, just the magic of a great embossing folder, pre-cut sentiments from the More Messages Bundle, and a few finishing touches.
🎥 Missed the Live?
You can catch the replay here — I’d love for you to watch and stamp along with me!

Here’s a closer look at each card!


Final Day of the Two-Tone Cardstock Sale – Now – July 11!
If you love adding color and texture to your cards, this is your chance to stock up! For three days only, you can grab your favorite colors of Two-Tone Cardstock at a great price.
This cardstock is perfect for stamping, embossing, tearing, and more — with a beautiful smooth texture and a crisp white core for those fun techniques we all love. I have a feeling some colors will go fast, so you’ll want to get your order in early!


🎁 Ordering Special — Through Sunday! To make this sale even sweeter, I’m offering a little bonus just for you!
Place a $50 order (before tax & shipping, after any rewards) between now and Sunday, July 14, and I’ll send you a pack of the Strawberry Slush Gems as a thank you! 🍓✨ These little gems are so pretty and will add the perfect pop of sparkle to your summer projects.
FREE TUTORIALS- I send out Weekend Inspiration every weekend that includes a handful of Card Projects with tutorials and supply lists – and yes they are free! The first card on today’s post is one of the project tutorials! I send these out to all who are on my email list. Interested in getting these project sheets? Simply subscribe to my email list click here:

Jul 9, 2025 | Gallery, More Friend Cards |

I have so much fun news to share with you today — and you won’t want to miss any of it!
✨ 3-Day Two-Tone Cardstock Sale – Now – July 11!
If you love adding color and texture to your cards, this is your chance to stock up! For three days only, you can grab your favorite colors of Two-Tone Cardstock at a great price.
This cardstock is perfect for stamping, embossing, tearing, and more — with a beautiful smooth texture and a crisp white core for those fun techniques we all love. I have a feeling some colors will go fast, so you’ll want to get your order in early!
🎁 Ordering Special — Through Sunday! To make this sale even sweeter, I’m offering a little bonus just for you!
Place a $50 order (before tax & shipping, after any rewards) between now and Sunday, July 14, and I’ll send you a pack of the Strawberry Slush Gems as a thank you! 🍓✨ These little gems are so pretty and will add the perfect pop of sparkle to your summer projects.

During my recent Facebook Live, I created
three card ideas featuring this gorgeous cardstock and the
Sunflower 3D Embossing Folder — and I just love how they turned out!
Missed the Live? You can catch the replay on my
I’d Rather Bee Stampin’ Facebook Page or on YouTube above. A soft Pool Party birthday card with the Sunflower 3D Embossing Folder. LOL! VIDEO BLOOPER! In order to get two-tones on this card, cut two pieces of Pool Party Two-Tone Cardstock to 4 1/2 x 3 1/2. Layer the two pieces one on top of the other (one with the dark side up and one with light side up). Cut diagonally from corner to corner. Then adhere one light and one dark diagonal piece to the Basic White, then emboss.
A sunny Daffodil Delight Two-Tone “lots of love” card showing off a fun background technique — made extra special with that sanded bawhite-core cardstock peeking through!
A bold and cheerful HI card using Strawberry Slush Two-Tone Cardstock and the Party Dies Bundle!
FREE TUTORIALS- I send out Weekend Inspiration every weekend that includes a handful of Card Projects with tutorials and supply lists – and yes they are free! The first card on today’s post is one of the project tutorials! I send these out to all who are on my email list. Interested in getting these project sheets? Simply subscribe to my email list click here:
Sale: $8.00
Price: $10.00
Sale: $8.00
Price: $10.00
Sale: $8.00
Price: $10.00