
For my Facebook Live yesterday, I shared 6 different ways to dress up your envelopes! When you take the time to create a beautiful card for someone, be sure to add a little something to make the envelope special as well! Hope these ideas will inspire you to do just that!
I am offering an ordering special this week -scroll down to the end of my post to find out how you can receive a FREE Package of Basic White Envelopes from me!
The first envelope is one of our Clear Envelopes – did you know you can mail a card in these? Such fun to receive something like this in the mail – with a view of the card inside! My friend says “the mail carrier will enjoy it too!”

Here is the recording of my Facebook Live – please watch and enjoy!

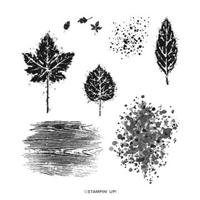
Envelope #2 that I created is a stamped frame that coordinates beautifully with my card featuring the Gorgeous Leaves Bundle. Simply stamp your leaves all the way around the perimeter of the envelope to create a bright, color coordinated frame.

Envelope #3 was created with the In Bloom embossing folder – just slip your envelope into an embossing folder and zip it through your Stampin’ Cut and Emboss machine to create this beauty! I added a coordinating label cut from the Tasteful Labels Dies – attached with Liquid Glue. This creates the perfect spot to add the name and address of the lucky recipient.

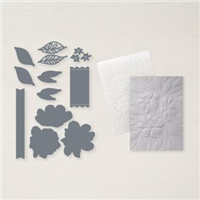
Envelope #4 was created using the Basic Borders dies – the flap of the envelope mimics the “hill” I created on this card – Don’t miss the Basic Borders dies – they are awesome for both cards………..and envelope flaps!

Envelope #5 was created with the Rectangle Stitched Dies and the Beautifully Penned Designer Series Paper – a free Saleabration reward!! I used 2 Rectangle dies, zipped them through my Stampin’ Cut and Emboss Machine and created a frame. Simply attach to your envelope front with a good amount of Liquid Glue. Another way to attach the frame, would be to adhere a piece of the Adhesive Sheet to the back of the DSP before cropping the frame, and attach it that way.

And envelope #6 was super simple – I stamped the sparrow, and then used a 3″ x 4″ rectangle as a template to draw little dashes and dots that will frame the name/address of the recipient.

I hope you have enjoyed these ideas – which is your favorite? I’d love to know! These are all quite simple ideas, but will take your beautifully created hand stamped cards to a new level!
In the spirit of kicking your envelopes up a notch, I am offering an ordering special for online orders placed now through this Friday, Sept. 24th. Place a $50 product order, and not only will you earn a FREE Saleabration reward, I’ll also send you a FREE packages of our Basic White envelopes. (This is for online orders only, code must be used! Does not apply to any class or club orders!)

Want it all?? Have a big wish list? The BEST deal is always buying the Stampin' Up! Starter Kit! You get $125 in product of your choice for just $99 & Free Shipping! No obligation
I am blessed to lead an amazing team with members all across the United States. My team consists of both business builders and happy shoppers! The question I am most often asked about joining the SU family is – “do I have to sell?” The answer is NO! You are welcome to be a happy shopper – and a smart cookie, I might add, to get all the products you love at the demonstrator discount!
Please contact me with any questions! I’d love to have you join my “We’d Rather Bee Stampin'” team!
You will then enjoy 20% off all future purchases while you are active! What have you got to lose? The link to join is below! The best part – there is no obligation to sell, or hold parties ever!!! You can simply become a “happy shopper” and get discounts on all your Stampin’ Up! purchases! If you’d like to pursue this as a business and make a little extra money, I can help you with that as well! 
![]()


0 Comments