I’m showcasing the beautiful Eden’s Garden Collection this week! It’s an early release of a bundle that will appear in our upcoming January – June Mini Catalog. Some of the products in this early release are only while supplies last and won’t be featured in the Mini Catalog.
Thanks to everyone who left a comment last week for my “week of tricks and treats!” I enjoyed hearing from you and learning about your favorite candy and Halloween traditions! If you were one of the daily winners, I will be sending out your prizes tomorrow!
EDEN’S GARDEN COLLECTION • 160849 | $82.00 – Available November 2, 2021
• Stems, sprigs, berries, and twigs abound in the beautiful and bountiful Eden’s Garden Collection! Explore the elegance of Eden with this exclusive, early-release collection. Only available while supplies last.
The Eden’s Garden Collection includes:
• Eden’s Garden Bundle (10% off)
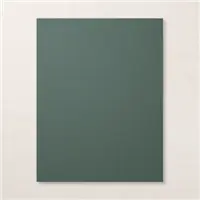
• Ever Eden 12″ x 12″ Specialty Designer Series Paper
• Ever Eden 12″ x 12″ Cotton Paper
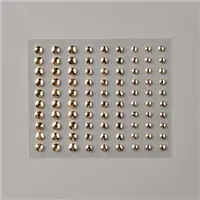
• Garden Gems
I love slimline cards and this one really shows off the beautiful Eden’s Garden Collection! The Designer Paper is gorgeous – it’s a specialty paper with gold – that and the combination of Evening Evergreen and Soft Succulent colors make it very striking! Please click below for a tutorial for this card! Enjoy!!
MEASUREMENTS:
- Evening Evergreen- 8 1/2 x 8 (card base), score at 4
- Vellum Cardstock – 8 3/8 x 3 (layer)
- Ever Eden 12×12 Specialy DSP – 8 1/4 x 2 (layer), 3 x 3, 2 x 2 (die-cutting)
- Gold Foil Sheet – 4 1/2 x 2 1/2 (die-cutting)
INSTRUCTIONS:
- Fold the Evening Evergreen Cardstock in half and burnish the fold with a Bone Folder.
- Adhere the Ever Eden Specialty Designer Series Paper to the Vellum Cardstock together with Multipurpose Liquid Glue.
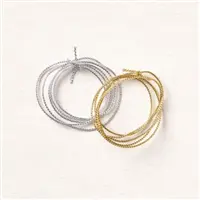
- Double wrap with Gold Simply Elegant Trim. Secure with a bow.
- Adhere to the card with Stampin’ Dimensionals.
- Crop the Gold Foil a Stampin’ Cut & Emboss Machine and the Eden Dies. Adhere with Dimensionals.
- Crop the Ever Eden Specialty Designer Series Paper with the 3″ scalloped and 2 3/8″ Layering Circle Dies.
- Stamp the sentiment in Versamark Ink onto the 2 3/8″ die-cut circle. Cover with Gold Metallic Embossing Powder. Set with a Heat Tool.
- Adhere the two die-cut circles together with Multipurpose Liquid Glue. Adhere the Gold Foil die-cut with Mini Glue Dots.
- Adhere to the card with Stampin’ Dimensionals.
- Embellish with Gilded Gems.
Want it all?? Have a big wish list? The BEST deal is always buying the Stampin' Up! Starter Kit! You get $125 in product of your choice for just $99 & Free Shipping! No obligation
I am blessed to lead an amazing team with members all across the United States. My team consists of both business builders and happy shoppers! The question I am most often asked about joining the SU family is – “do I have to sell?” The answer is NO! You are welcome to be a happy shopper – and a smart cookie, I might add, to get all the products you love at the demonstrator discount!
Please contact me with any questions! I’d love to have you join my “We’d Rather Bee Stampin'” team!
You will then enjoy 20% off all future purchases while you are active! What have you got to lose? The link to join is below! The best part – there is no obligation to sell, or hold parties ever!!! You can simply become a “happy shopper” and get discounts on all your Stampin’ Up! purchases! If you’d like to pursue this as a business and make a little extra money, I can help you with that as well! 


0 Comments