Mar 31, 2025 | Gallery, More Sympathy Cards |

Creating a stunning handmade birthday card has never been easier—this no-stamp-needed design showcases the beautiful Wildflower Birthday Designer Series Paper, bringing a fresh and floral touch to any celebration!
Measurements:
- Thick Basic White: 4 1/4 x 11, scored at 5 1/2
- Night of Navy: 4 1/8 x 5 3/8, 3 1/4 x 4 1/2
- Designer Series Paper: 3 7/8 x 5 1/8, 5 3/4 x 2 1/2 (envelope flap)
- Pretty in Pink: 3 x 4 1/4
- Basic White: 2 3/4 x 4

Instructions:
- Use Bone Folder to score the fold.
- Glue the Night and Navy and Designer Series Paper to the card base.
- Glue the Basic White, Pretty in Pink and Night of Navy panels together and to the card.
- Pick the die-cuts you want from the Designer Series Paper pack and adhere.
- Pick the sentiment from the Greetings for All Mix and Match Ephemera Pack and color with Stampin’ Blends if desired.
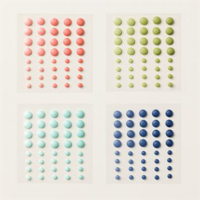
- Embellish with Night of Navy Ombre Matte Decorative Dots.


Textured Notes Card Class to Go + Add-On Class
Join me for a beautifully designed card class featuring the Textured Notes Bundle!
In this class, we’ll explore beautiful ways to craft heartfelt cards perfect for any occasion.
Two options (see tickets for full details):
- Textured Notes Card Class Fee is $38 + Shipping (if needed). Includes 6 Card Kits & Lots of Products!
- Add-On Class with You Are Remarkable Stamp Set- $25 + Shipping (if needed). Includes 4 Card Kits. You will use some of the products from the Textured Notes Class.
Two classes you won’t want to miss! I LOVE them both!
Registration Closes April 4 at 12 PM
Please email me with any questions!
FREE TUTORIALS- I send out Weekend Inspiration every weekend that includes a handful of Card Projects with tutorials and supply lists – and yes they are free! The first card on today’s post is one of the project tutorials! I send these out to all who are on my email list. Interested in getting these project sheets? Simply subscribe to my email list click here:


Mar 28, 2025 | Gallery, More Birthday Cards |

Hello, friends! Today, I’m so excited to share this absolutely gorgeous Mixed Media Floral Easel Card with you! If you love elegant, textured designs with a pop of color, this card is sure to inspire your creativity. The combination of embossed details, delicate die cuts, and hand-colored florals creates a show-stopping effect, perfect for birthdays, celebrations, or just sending a little handmade happiness.
The bold red and black color palette adds a striking contrast, making the flowers practically leap off the card! And let’s not forget the clever easel fold – a beautiful way to display your handmade work of art. Plus, with the charming “Make a Wish” sentiment, this card is all about spreading joy!
Stay with me as I walk you through how to create this stunning card step by step. Whether you’re a seasoned crafter or just getting started, you’ll love how fun and easy it is to put together!
Ready to dive in? Let’s get started!
Card Tutorial: Make a Wish Easel Card
Measurements:
- Basic Black – 4¼” x 5 ½”
- Poppy Parade – 4 1/8”x 5 3/8”
- Basic White – 4” x 5 ¼”

Instructions:
- Cut a piece of Basic Black 4 ¼” x 5 ½”
- Cut a piece of Poppy Parade 4 1/8” x 5 3/8”
- Cut a piece of Basic White 4” x 5 ¼” and adhere to Poppy Parade
- To make the easel piece cut a piece of Basic Black 3”x 6 ¼” and score at 2 ¾” and 5 ½”. Adhere to the Basic Black piece from step 1. Adhere smallest part to the top of the base to form the easel as shown. Then adhere the piece in step 3 to this card base.
- To make the easel standing piece. Cut a piece of Poppy Parade 3”x 5 ½”.
- Cut a piece of Basic Black 2 7/8 x 5 3/8” and adhere to Poppy Parade.
- Cut a piece Basic White 2 ¾” x 5 ¼”. Then emboss with the Plaster Painting 3D Embossing Folder. Then adhere to the Piece is step 6. Adhere to easel you created as shown.
- On basic White Stamp the Flowers in Versamark and emboss with Black embossing powder. Then color with Stampin Blend markers as follows and die cut.
- Big, Small Flowers & Lady Bugs – Poppy Parade
- Flower middles – Daffodil Delight
- Leaves and Stems – Granny Apple Green
- Die cut leaves out of Basic Black. Cut them apart and adhere with glue dots to the back of the flower you created and punched out in step 8. Adhere to Basic White part of easel popped up with Dimensionals.
- Stamp lady bugs in Memento Tuxedo Black and color in with Poppy Parade Stampin Blends. Then adhere to front with Dimensionals.
- Stamp sentiment with Versamark on Basic Black and emboss with white embossing powder. Fussy cut and then adhere to card as shown with dimensionals so it is a stand for the easel.
- Cut a piece of Mixed Media Floral DSP 4” x 1 ¼” and adhere to card base as shown.


Mar 24, 2025 | Gallery, More Sympathy Cards |

There’s nothing like a heartfelt handmade card to brighten someone’s day, and today I’m sharing a stunning monochrome design featuring the gorgeous Botanical Textures Designer Series Paper!
Measurements:
- Thick Basic White: 4 1/4 x 11, scored at 5 1/2
- Designer Series Paper: 4 x 4
- Basic White: 3 x 3 3/4
- Designer Series Paper: 3 1/4 x 3 1/4
- Basic White Die-cut – 3 x 2 1/2

Instructions:
- Use Bone Folder to score the fold.
- Glue the DSP to the card base.
- Use a Basic Black Stampin’ Blends to flick ink onto the Basic white panel. Adhere with Dimensionals.
- Crop the Designer Series Paper with the 3″ circle. Trim off about 1/4 from an edge. Adhere with Dimensionals.
- Crop the Basic White with the Thankful Garden die. Adhere with Dimensionals.
- Choose a sentiment from the Greetings for All Ephemera Pack, adhere with Dimensionals.
- Tie a bow of Linen Thread and adhere with Mini Glue Dot.
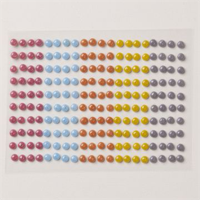
- Embellish with Neutral Matted Dots.
Textured Notes Card Class to Go + Add-On Class
Join me for a beautifully designed card class featuring the Textured Notes Bundle!
In this class, we’ll explore beautiful ways to craft heartfelt cards perfect for any occasion.
Two options (see tickets for full details):
- Textured Notes Card Class Fee is $38 + Shipping (if needed). Includes 6 Card Kits & Lots of Products!
- Add-On Class with You Are Remarkable Stamp Set- $25 + Shipping (if needed). Includes 4 Card Kits. You will use some of the products from the Textured Notes Class.
Two classes you won’t want to miss! I LOVE them both!
Registration Closes April 4 at 12 PM
Please email me with any questions!
FREE TUTORIALS- I send out Weekend Inspiration every weekend that includes a handful of Card Projects with tutorials and supply lists – and yes they are free! The first card on today’s post is one of the project tutorials! I send these out to all who are on my email list. Interested in getting these project sheets? Simply subscribe to my email list click here:

Mar 17, 2025 | Gallery, More Friend Cards |

Handmade cards are little works of art, and the Mixed Media Florals Suite from Stampin’ Up! makes creating them effortless and fun! With vibrant colors, intricate floral details, and creative layering techniques, this collection is perfect for bringing your card-making vision to life.
Plus, for a limited time through Friday, you can take advantage of a special ordering offer!

FREE kit to make the four cards as a thank you for your $40 or more online order using host code HXNPHMUQ!

Let’s take a closer look at these gorgeous designs and how you can grab your own supplies before the deal ends.

FREE TUTORIALS- I send out Weekend Inspiration every weekend that includes a handful of Card Projects with tutorials and supply lists – and yes they are free! The first card on today’s post is one of the project tutorials! I send these out to all who are on my email list. Interested in getting these project sheets? Simply subscribe to my email list click here:

Mar 14, 2025 | Gallery, More Thank You Cards |

Looking for a simple yet elegant masculine thank-you card idea? Today, I’m sharing a card that features the stunning Textured Notes Bundle and the versatile Everyday Arches Dies. This design is perfect for expressing gratitude while maintaining a neutral and sophisticated style.

Dimensions:
- Crumb Cake Cardstock – 4 1/4 x 11, scored at 5 1/2 (card base), 3 1/4 x 4 3/4
- Early Espresso Cardstock – 4 1/4 x 5 1/2, 3 1/2 x 1 1/2
- Basic Beige Cardstock – 3 1/4 x 4 3/4

Instructions:
- Burnish the fold of the card base with a bone folder.
- Crop the Early Espresso pieces with the 3 3/4 x 5 1/4 and 1 3/4 x 3 1/4 Textured Notes dies.
- Stamp the branch and sentiment in Early Espresso Ink onto the Crumb Cake piece.
- Crop with the 2 5/8 x 3 7/8 Everyday Arches die.
- Zip the Basic Beige piece of cardstock through a Stampin’ Cut & Emboss Machine (Standard) tucked inside the Mini Corrugated 3D Embossing Folder.
- Adhere the small Early Espresso die-cut to the embossed piece with Multipurpose Liquid Glue.
- Adhere the remaining pieces with Stampin’ Dimensionals.
- Embellish with Basic Beige Neutral Matte Dots!


Registration for the Everyday Arches Class to Go Closes Monday!!
Join me for a creative and inspiring card class featuring the Everyday Skies Bundle and the stunning Everyday Arches Dies!
In this class, we’ll explore beautiful ways to to craft eye-catching, heartfelt cards perfect for any occasion.
Two options (see tickets for full details):
1. Everyday Skies Card Class Fee is $45 + Shipping (if needed). Includes 6 Card Kits
2. Add-On Class with Arched Wishes Stamp Set- $30 + Shipping (if needed). Includes 4 Card Kits
Registration Closes March 17 at 12 PM CT!
Please email me with any questions!
FREE TUTORIALS- I send out Weekend Inspiration every weekend that includes a handful of Card Projects with tutorials and supply lists – and yes they are free! The first card on today’s post is one of the project tutorials! I send these out to all who are on my email list. Interested in getting these project sheets? Simply subscribe to my email list click here:

Mar 12, 2025 | Gallery, More Friend Cards |

What if you could step into a fairytale with just paper, ink, and a little creativity? The Storybook Moments Suite from Stampin’ Up! brings whimsical charm to your card-making, and I’ve created two adorable designs to inspire you! Whether you’re drawn to the cozy cottage scene or the playful woodland critter, these cards are perfect for sending a little magic through the mail. Follow along with my Facebook Live or use the tutorial below to create these enchanting designs for yourself!


Measurements:
- Thick Base White: 8 ½” x 5 ½”, scored at 4 ¼”
- Basic White: 3” x 3 ½”, ½” x 2” (words)
- Calypso Coral: 3 7/8” x 5 1/8”
- Designer Paper 3 ¾” x 5”; small piece with house.
- Die cut from the DSP
Instructions:
- Crease card base with bone folder.
- Use Liquid Glue to adhere DSP to Calypso Coral panel, then glue to card front.
- Die cut the frame with Basic White.
- Position frame over a piece of DSP so that the house is in the center. Die cut. You will just use the center cut out piece for the card.
- Use dimensionals to hold the house die cut to the frame and position to card front.
- Use Linen Thread to tie a small bow. Position behind the floral die cut with a glue dot. Use dimensionals to position to lower left corner of frame.
- Stamp words onto small strip of Basic White, angle end with Paper Snips.
- Attach word panel to card front with liquid glue.
- Add one of the Opaque Sparkle Gems to word panel.

Measurements:
- Thick Base White: 8 ½” x 5 ½”, scored at 4 ¼”
- Basic White: 3” x 4”, ½” x 2” (words)
- Designer Paper 4” x 5 ¼”
- Die cuts from the DSP
Instructions:
- Crease card base with bone folder, use Liquid Glue to adhere DSP to card front.
- Die cut the Arches – use the 5th and 2nd smallest dies to create the arch shape. Center dies onto the Basic White cardstock and hold in place with a post it or post it tape. Run through Stampin’ Cut & Emboss Machine.
- Use liquid glue to adhere arch to center of card front.
- Attach die cuts – attach tall green sprig with glue. Use Dimensionals to attach the cat and the coral flower sprig.
- Use Linen Thread to tie a small bow. Adhere to upper left corner of arch with glue dot. Attach small butterfly over Linen Thread bow with a glue dot.
- Stamp words onto small strip of Basic White, angle end with Paper Snips.
- Attach word panel to card front with Dimensionals.
- Add one of the Opaque Sparkle Gems to word panel.
FREE TUTORIALS- I send out Weekend Inspiration every weekend that includes a handful of Card Projects with tutorials and supply lists – and yes they are free! The first card on today’s post is one of the project tutorials! I send these out to all who are on my email list. Interested in getting these project sheets? Simply subscribe to my email list click here: