Jan 7, 2025 | Gallery, More Christmas Cards |

In the midst of this winter season – with snow and cold, it’s so nice to create with these beautiful butterflies! Spring is coming! Please enjoy this tutorial and take a look at my current Class to Go featuring this gorgeous bundle!

Dimensions:
- Basic White Thick card base – 4 1/4 x 11, scored at 5 1/2
- Basic White Cardstock – 3 3/4 x 5 (layer), 4 1/4 x 4 1/4 (qty 2 – stamped/die-cut butterflies)
- Balmy Blue & Berry Burst Cardstock: 1 3/4 x 1 1/4 (die-cut butterflies)


Balmy Blue Card:
- Burnish the fold of the card base with a bone folder.
- Stamp the large butterflies as shown in Balmy Blue ink onto the Basic White layer.
- Stamp the sentiment in Tuxedo Black Memento Ink as shown.
- Adhere to the card with Stampin’ Dimensionals.
- Crop the Balmy Blue Cardstock with the smallest Beautiful Butterflies die.
- Adhere with a Mini Stampin’ Dimensional.
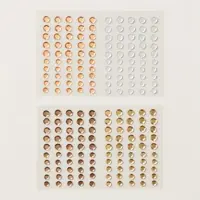
- Embellish with Itty Bitty Bokeh mix adhered with a Fine-Tip Glue Pen.
Berry Burst Card:
- Burnish the fold of the card base with a bone folder.
- Stamp the large butterflies as shown in Berry Burst ink onto the Basic White squares.
- Tuck one butterfly at a time inside the Beautiful Butterflies Hybrid Embossing Folder along with the coordinating die. TIP: Secure the butterfly in place with Post It Tape or Masking Paper.
- Adhere each cropped butterfly to the Basic White layer as shown with Stampin’ Dimensionals.
- Use a Paper Snips to trim the butterflies with the edge of the layer.
- Stamp the sentiment in Tuxedo Black Memento Ink as shown.
- Adhere to the card with Stampin’ Dimensionals.
- Crop the Berry Burst Cardstock with the smallest Beautiful Butterflies die.
- Adhere with a Mini Stampin’ Dimensional.
- Embellish with Itty Bitty Bokeh mix adhered with a Fine-Tip Glue Pen.


Registration for the Beautiful ButterfliesCard Class to Go is OPEN!!
This card class to go is all about Beautiful Butterflies! A NEW Bundle from the 2025 Spring Mini Catalog!
The Class includes the following products:
6 Card Kits
Beautiful Bokeh Designer Series Paper
Itty Bitty Bokeh
PDF with step by step assembly instructions, & measurements
Basic Class Fee is $35 + $10 Shipping if Needed
Registration Open: NOW – January 10!
Please email me with any questions!
FREE TUTORIALS- I send out Weekend Inspiration every weekend that includes a handful of Card Projects with tutorials and supply lists – and yes they are free! The first card on today’s post is one of the project tutorials! I send these out to all who are on my email list. Interested in getting these project sheets? Simply subscribe to my email list click here:


Dec 19, 2024 | Gallery, More Christmas Cards, More Holiday Cards |

Create a stunning yet simple Merry Christmas card with the Greetings of the Season and Golden Green Bundles by Stampin’ Up!, both featured in the elegant Season’s of Green & Gold Suite Collection.
Card Tutorial: Greetings of the Season Christmas Card
Measurements:
- Basic Beige: 8 1/2” x 5 1/2”, 3 1/2” x 3/4”, 5” x 3 3/4”
- Old Olive: 5 1/4” x 4”
- Seasons of Green & Gold DSP: 4” x 1” (green), 4” x 2” (gold)
- Vanilla Twine: 12”
Instructions:
- Score Basic Beige cardstock to create card base.
- Adhere the green 4” x 1” piece of DSP to the front. Adhere the gold 4” x 2” piece slightly to the right over the edge of the green piece.
- Die cut the two sets of leaves from the Graceful Greenery Vellum. Adhere together and to the card front using Mini Glue Dots.
- Tie a bow with the twine and attach with a Mini Glue Dot.
- Stamp greeting of your choice with Cherry Cobbler ink. Trim and add to the front of the card using Dimensionals.
- Add three foil gems.
- Stamp the leaves from the Golden Greenery stamp set with Old Olive ink for the inside Basic Beige cardstock. Layer with the Old Olive cardstock for the inside. Stamp the envelope to match.


Dec 11, 2024 | Gallery, More Christmas Cards, More Holiday Cards |

Get ready to spread some festive joy with the NEW Stampin’ Up! Classic Wedding Bundle — featuring an adorable holiday card design with a car decked out in Christmas lights, piled high with gifts, and a cheerful ‘CHEER’ license plate!
Card Tutorial: Classic Wedding Holiday Card
Measurements:
- Thick Basic White – 5 ½ x 8 ½ scored at 4 ¼ on the 8 ½ inch side
- Basic White – 4 1/8 x 5 3/8, 3 x 3 ½ for car, 3/8 x 15/16
- Real Red – scraps for lights and bows and car back lights
- Garden Green – scraps for lights and present
- Granny Apple Green – scraps for lights and bow and present
- Designer Series Paper – 1 x 3 ¼ – 4 different patterns
- Silver Foil – scraps for window frame, light string, truck handle and bumper
Instructions:
- Fold and burnish card base with bone folder.
- Run the larger piece of basic white with the snowflake sky 3D embossing folder though the Stampin’ Cut and Embossing machine. Adhere to the front of the card.
- Stamp the outline of the car with memento ink and then stamp the fill in with real red.
- Do all your die cutting, the car, the presents, bows, silver pieces.
- Snip off the lights and adhere to the silver string of lights.
- Cut the presents with cardstock and DSP, adhere the bows to the presents as shown.
- Using multi-purpose glue, adhere all the silver to the car.
- Using the light basic black blend, color the tires.
- After adhering all the pieces to the car, adhere to the front of the card so that the tires are about 3/8 to a ½ inch from the bottom of the card.
- Put the completed presents on the top of the car using stamping dimensionals and glue.
- Stamp CHEERS! in real red, then cut off the S! and cut down to 3/8 x 15/16.
- Scatter the snowflake embellishments as desired.
- Finish inside and envelope as desired.

Dec 8, 2024 | Gallery, More Christmas Cards |


Dimensions:
- Cherry Cobbler card base – 4 1/4 x 11, scored at 5 1/2 and 2 3/4 x 4 (layer)
- Brushed Gold Foil – 4 x 5 1/4
- Basic White Cardstock – 3 3/4 x 5, 1 3/4 x 1 3/4 (for heart)
- Marbled Elegance Specialty Designer Series Paper – 3 1/4 x 4 1/2 (layer), 2 1/2 x 3 3/4 (layer), 1 1/2 x 1 1/2 (for heart)
- Melon Mambo Cardstock – 2 1/2 x 2 1/2 (for heart)

- Burnish the fold of the card base with a bone folder.
- Adhere the Basic White and Brushed Gold Foil layers together and to the card base with Multipurpose Liquid Glue.
- Adhere the Designer Series Papers and Cherry Cobbler layers together with Multipurpose Liquid Glue.
- Wrap with Gold Twisted Thread and secure with a bow.
- Adhere to the card with Stampin’ Dimensionals.
- Crop the three hearts with a machine and Hearts of Elegance dies.
- Stamp the XOXO in Cherry Cobbler Classic Ink.
- Adhere as shown with Stampin’ Dimensionals.
- Embellish with Adhesive-Backed Heart Sequins.

Registration for the Hearts of Elegance Bee-u-tiful Card Class to Go is OPEN!!
The Class includes the following products:
- 8 Card Kits – 2 each of 4 Designs
- Marbled Elegance Specialty Designer Series Paper
- Heart Sequins
- Gold Twisted Thread
- PDF with step by step assembly instructions, & measurements
Basic Class Fee is $45 + $9 Shipping if Needed
Registration Open: NOW – December 16!
Please email me with any questions!
FREE TUTORIALS- I send out Weekend Inspiration every weekend that includes a handful of Card Projects with tutorials and supply lists – and yes they are free! The first card on today’s post is one of the project tutorials! I send these out to all who are on my email list. Interested in getting these project sheets? Simply subscribe to my email list click here:

Dec 7, 2024 | Gallery, More Christmas Cards |
One of my favorite Christmas cards – I made this awhile ago and just now realized I never posted it. I love the color combination -Pretty Peacock, Pool Party and Lost Lagoon. The Seasons of Elegance Suite consists of gorgeous products – and they are on the Last Chance List – you may want to take advantage of next week’s Free Shipping special and put them in your shopping cart! Santa approves! Look below to watch my FB Live to see how this card comes together!
Seasons of Elegance Suite Collection
Peaceful Season and Peaceful Evergreen Bundles

.


The card that I shared previously and was the inspiration for today’s card can be found here.
FREE TUTORIALS- I send out Weekend Inspiration every weekend that includes a handful of Card Projects with tutorials and supply lists – and yes they are free! The first card on today’s post is one of the project tutorials! I send these out to all who are on my email list. Interested in getting these project sheets? Simply subscribe to my email list click here:

Dec 3, 2024 | Gallery, More Christmas Cards, More Holiday Cards |

This Good Shepherd’s Care Holiday Card in Pretty Peacock is a beautiful creation that showcases both elegance and heartfelt sentiment. The card features a soft and serene design with a combination of intricate stamping and layered elements.
Card Tutorial: Good Shepherd’s Care Holiday Card
Measurements:
- Pretty Peacock 8 ½ x 5 ½
- Designer Series Paper 5 ¼ x 4
- Gold Foil 2 7/8 x 4 1/8
- Basic Beiges 2 ¾ x 4
- Very Vanilla for stamping/cutting star
Instructions:
- Fold Pretty Peacock in ½ to create card base
- Wrap Twine around DSP and attach to card base
- Stamp shepherd on Very Vanilla with Basic Beige ink
- Stamp sentiment on Very Vanilla with Pretty Peacock Ink.
- Add Very Vanilla to Gold Foil and attach to card with Stampin’ Dimensional
- Tie bow with Gold Twine
- Stamp star on Very Vanilla in Crushed Curry and hand cut. Attach using Mini Glue Dots
- Add sequin