Sep 26, 2024 | More Christmas Cards |

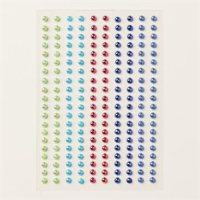
Be an early bird and register by TOMORROW, Sept. 27th and get a bonus gift of Iridescent Rhinestones
Last year, Sherry and I partnered together to bring you 12 Days of Christmas, it was a big hit so we are doing it again!
FOCUS: Reindeer Fun and Snowy Wonder Bundles (Purchase at Catalog Price, No shipping or Tax)
INCLUDED IN FEE:
12 Different Card Kits
Reindeer Days
Snowy Scenes Designer Series Paper
White Loose Snowflakes
Red/White Baker’s Twine
An invitation to a private Facebook Group where we will assemble the 12 cards together over 12 days, staring Oct. 21!
Registration closes on Oct. 6
Please email me with any questions!
FREE TUTORIALS- I send out Weekend Inspiration every weekend that includes a handful of Card Projects with tutorials and supply lists – and yes they are free! The first card on today’s post is one of the project tutorials! I send these out to all who are on my email list. Interested in getting these project sheets? Simply subscribe to my email list click here:


Jul 18, 2024 | More Christmas Cards |

Today I am sharing a beautiful pair of cards featuring products from the new Online Exclusive – Season of Green and Gold Suite. I am featuring this suite in my Christmas in July Class to Go. I hadn’t planned to do a Christmas In July – but once I had a chance to work with these products I just couldn’t resist – and planned a class!
This is a Mega Suite – which means it includes two bundles, gorgeous papers, beautiful gems and ribbon. If you are interested in my Christmas in July Class, you will find the details below.

Here is the first card – with matching envelope. This layout was from a card I made last week and shared on my blog. I just switched out some of the products to make it a Christmas card.

The second card is simple but so pretty:

Here is the recording:

Don’t miss this class – the projects are gorgeous!

REQUEST TO REGISTER BELOW!
Please email me with any questions!
FREE TUTORIALS- I send out Weekend Inspiration every weekend that includes a handful of Card Projects with tutorials and supply lists – and yes they are free! The first card on today’s post is one of the project tutorials! I send these out to all who are on my email list. Interested in getting these project sheets? Simply subscribe to my email list click here:


Dec 21, 2023 | More Christmas Cards, More Gift Wrap Ideas |

If you are scurrying around trying to finish up some Christmas projects, or are looking for a cute place setting for your Christmas dinner table, I am hoping this project will be of help for you! It is quick and super and fast! Just what we need on the 21st of December!
This project uses the Nested Essentials dies – hopefully you have them in your stash – and then just pick out any Christmas Designer Series Paper – and your project will be done quick as a wink!
Watch the recording below to see how these go together!
Of course these could be used for any occasions – just by switching the DSP to a different color scheme/ holiday!!

Dec 1, 2023 | Gallery, More Christmas Cards |

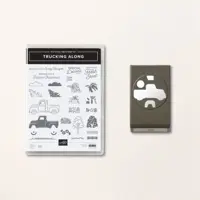
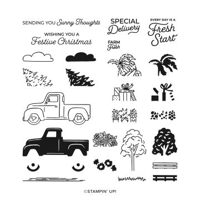
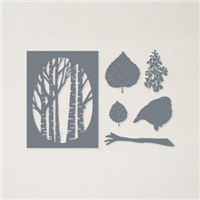
Here’s a fun card with the oh so popular Trucking Along Bundle! Combine it with the Aspen Tree die for a beautiful card!
Measurements:
- Basic White Thick CS: 4 ¼” x 11”
- Basic White CS: 5 ½” x 4 ¼”, 4 ¼” x 1 ½”, scraps
- One Horse Open Sleigh Designer Series Paper: 5 ½” x 4 ¼”
Instructions:
- Fold Basic White card base on score line.
- Adhere DSP to card front.
- Die cut Basic White CS panel using Aspen Tree die.
- Adhere to card front, using Foam Adhesive Strips.
- Emboss Basic White CS strip, using Painted Textures Embossing Folder.
- Rip this panel about ¼” from the top.
- Adhere to bottom of card front, using Dimensionals.
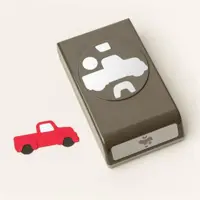
- Stamp truck on scrap Basic White CS, using Memento Black Ink for the outline of the truck, and Real Red Ink for the inside of the truck.
- Punch the truck out.
- Stamp tree on scrap Basic White CS, using Shaded Spruce Ink for the tree outline, and the Garden Green Ink for the inside of the tree.
- Fussy cut tree and adhere to back of truck using a fine line of Multipurpose Liquid Glue.
- Adhere truck to card front, using Dimensionals.
- Stamp sentiment on scrap white CS, using Real Red Ink.
- Die-cut this using Stylish Shapes Die in the banner shape.
- Trim left side of banner to match left side of card edge.
- Adhere banner to upper left corner using Dimensional.


Sep 28, 2023 | More Christmas Cards |

Did you see this beautiful card on my blog last week? I decided to do a Facebook Live to share how to create it using the Abundant Beauty Decorative Masks with Embossing Paste! Check out my Facebook Live, which have been uploaded to my YouTube Channel so see these amazing products in action!


 Dimensions:
- Starry Sky Cardstock – 5 1/2 x 8 1/2, scored at 4 1/4 (card base), 5 x 3 3/4 (layer)
- Basic White 5 1/4 x 4 (layer), 3 1/4 x 1 1/2 (die-cut sentiment)

Instructions:
- Burnish the fold of the card base with a Bone Folder.
- Adhere the Basic White to the card base with Stampin’ Dimensionals.
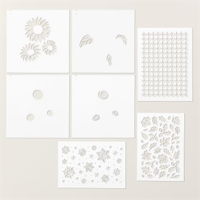
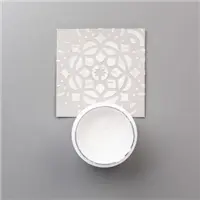
- Cover the Starry Sky layer with the Abundant Beauty Decorative Mask, apply Embossing Paste with a Palette Knife.
- Adhere to the card with Stampin’ Dimensionals.
- Stamp the sentiment in Starry Sky Classic Ink.
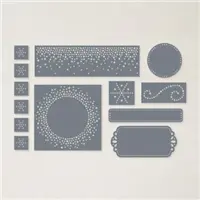
- Crop with a Stampin’ Cut & Emboss Machine and the coordinating Labels Aglow die.
- Adhere the ribbon as shown with Mini Glue Dots.
- Adhere the sentiment with Stampin’ Dimensionals.
- Embellish with Starry Sky 2022-2024 In Color Pearls.


Sep 18, 2023 | More Christmas Cards |
A gorgeous Christmas card using the beauty of Starry Sky, the texture of Embossing Paste when paired with the NEW Abundant Beauty Decorative Masks (back in stock) and the Brightest Glow Stamp Set paired with the coordinating Labels Aglow dies.
Dimensions:
- Starry Sky Cardstock – 5 1/2 x 8 1/2, scored at 4 1/4 (card base), 5 x 3 3/4 (layer)
- Basic White 5 1/4 x 4 (layer), 3 1/4 x 1 1/2 (die-cut sentiment)
Instructions:
- Burnish the fold of the card base with a Bone Folder.
- Adhere the Basic White to the card base with Stampin’ Dimensionals.
- Cover the Starry Sky layer with the Abundant Beauty Decorative Mask, apply Embossing Paste with a Palette Knife.
- Adhere to the card with Stampin’ Dimensionals.
- Stamp the sentiment in Starry Sky Classic Ink.
- Crop with a Stampin’ Cut & Emboss Machine and the coordinating Labels Aglow die.
- Adhere the ribbon as shown with Mini Glue Dots.
- Adhere the sentiment with Stampin’ Dimensionals.
- Embellish with Starry Sky 2022-2024 In Color Pearls.