Apr 8, 2025 | Gallery, More Friend Cards, More Love Cards |
I loved creating these three cards with the Thankful Garden Suite of products. I hope they show how beautiful and versatile these products are!

Below you will find the recording of my FB Live. Please watch to see how these cards go together!

The first card I created used a bold color palette – featuring Blueberry Bushel. I used the coordinating masks to add color to the stamped image. I am lucky to have blue hydrangeas in my garden – oh they are just beautiful! That was the inspiration for the first card:

Next, a shabby chic, vintage card. This card was based on my Annabelle hydrangeas in my garden. They are so pretyt as well, and I love the soft white with a hint of green on the flower. For this card, I used Basic Beige ink and added a very light touch of color to the stamped images. Soft Seafoam was the ink for the leaves- color was added with the Masks. I used an upcoming online exclusion called Damask Designs Embossing Folder for the Basic White panel. I used a Blending Brush with some Basic Beige ink to highlight the embossed floral pattern. The addition of the small lock and key was also fun – these come from the Tags to Go dies.

The third card is a fun fold – you can see how it comes together on the FB Live recording. For this card, I pulled the colors from the Desinger Series Paper. So pretty!

Hope you have enjoyed these cards! Do you have a favorite?
FREE TUTORIALS- I send out Weekend Inspiration every weekend that includes a handful of Card Projects with tutorials and supply lists – and yes they are free! The first card on today’s post is one of the project tutorials! I send these out to all who are on my email list. Interested in getting these project sheets? Simply subscribe to my email list click here:


Mar 17, 2025 | Gallery, More Friend Cards |

Handmade cards are little works of art, and the Mixed Media Florals Suite from Stampin’ Up! makes creating them effortless and fun! With vibrant colors, intricate floral details, and creative layering techniques, this collection is perfect for bringing your card-making vision to life.
Plus, for a limited time through Friday, you can take advantage of a special ordering offer!

FREE kit to make the four cards as a thank you for your $40 or more online order using host code HXNPHMUQ!

Let’s take a closer look at these gorgeous designs and how you can grab your own supplies before the deal ends.

FREE TUTORIALS- I send out Weekend Inspiration every weekend that includes a handful of Card Projects with tutorials and supply lists – and yes they are free! The first card on today’s post is one of the project tutorials! I send these out to all who are on my email list. Interested in getting these project sheets? Simply subscribe to my email list click here:

Mar 12, 2025 | Gallery, More Friend Cards |

What if you could step into a fairytale with just paper, ink, and a little creativity? The Storybook Moments Suite from Stampin’ Up! brings whimsical charm to your card-making, and I’ve created two adorable designs to inspire you! Whether you’re drawn to the cozy cottage scene or the playful woodland critter, these cards are perfect for sending a little magic through the mail. Follow along with my Facebook Live or use the tutorial below to create these enchanting designs for yourself!


Measurements:
- Thick Base White: 8 ½” x 5 ½”, scored at 4 ¼”
- Basic White: 3” x 3 ½”, ½” x 2” (words)
- Calypso Coral: 3 7/8” x 5 1/8”
- Designer Paper 3 ¾” x 5”; small piece with house.
- Die cut from the DSP
Instructions:
- Crease card base with bone folder.
- Use Liquid Glue to adhere DSP to Calypso Coral panel, then glue to card front.
- Die cut the frame with Basic White.
- Position frame over a piece of DSP so that the house is in the center. Die cut. You will just use the center cut out piece for the card.
- Use dimensionals to hold the house die cut to the frame and position to card front.
- Use Linen Thread to tie a small bow. Position behind the floral die cut with a glue dot. Use dimensionals to position to lower left corner of frame.
- Stamp words onto small strip of Basic White, angle end with Paper Snips.
- Attach word panel to card front with liquid glue.
- Add one of the Opaque Sparkle Gems to word panel.

Measurements:
- Thick Base White: 8 ½” x 5 ½”, scored at 4 ¼”
- Basic White: 3” x 4”, ½” x 2” (words)
- Designer Paper 4” x 5 ¼”
- Die cuts from the DSP
Instructions:
- Crease card base with bone folder, use Liquid Glue to adhere DSP to card front.
- Die cut the Arches – use the 5th and 2nd smallest dies to create the arch shape. Center dies onto the Basic White cardstock and hold in place with a post it or post it tape. Run through Stampin’ Cut & Emboss Machine.
- Use liquid glue to adhere arch to center of card front.
- Attach die cuts – attach tall green sprig with glue. Use Dimensionals to attach the cat and the coral flower sprig.
- Use Linen Thread to tie a small bow. Adhere to upper left corner of arch with glue dot. Attach small butterfly over Linen Thread bow with a glue dot.
- Stamp words onto small strip of Basic White, angle end with Paper Snips.
- Attach word panel to card front with Dimensionals.
- Add one of the Opaque Sparkle Gems to word panel.
FREE TUTORIALS- I send out Weekend Inspiration every weekend that includes a handful of Card Projects with tutorials and supply lists – and yes they are free! The first card on today’s post is one of the project tutorials! I send these out to all who are on my email list. Interested in getting these project sheets? Simply subscribe to my email list click here:

Mar 7, 2025 | Gallery, More Friend Cards |
It’s always a pleasure when Lucy is in my studio! She loves stamping and shared a funny mushroom joke with me, so we decided to create a pocket card using the Terrific Toadstool to go along with her joke.
Follow along in our Fb live recording to see how this card comes together. Lucy shares the mushroom joke near the end of the recording.

Please leave a comment! Lucy loves hearing from her “fans!!”
FREE TUTORIALS- I send out Weekend Inspiration every weekend that includes a handful of Card Projects with tutorials and supply lists – and yes they are free! The first card on today’s post is one of the project tutorials! I send these out to all who are on my email list. Interested in getting these project sheets? Simply subscribe to my email list click here

Feb 11, 2025 | Gallery, More Friend Cards, More Get Well Cards, More Love Cards, More Sympathy Cards, More Thank You Cards |

Yesterday, on my Facebook Live, I assembled eight cards featuring the NEW Heirloom Arrangements Kit!


Ordering Special! NOW – Sunday, February 16!
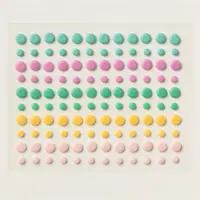
Orders of $50 or more will receive a pack of the In Color Shimmer Gems (2024-2026)
FREE TUTORIALS- I send out Weekend Inspiration every weekend that includes a handful of Card Projects with tutorials and supply lists – and yes they are free! The first card on today’s post is one of the project tutorials! I send these out to all who are on my email list. Interested in getting these project sheets? Simply subscribe to my email list click here:

Jan 29, 2025 | Gallery, More Friend Cards, More Love Cards, More Sympathy Cards |

Today on my Facebook Live I created three cards featuring the Memorable Blooms bundle. The florals and die-cuts are stunning and a must-have!

Ordering Special! NOW – Sunday, February 4!
Orders of $35 or more will receive the kits to make the cards.
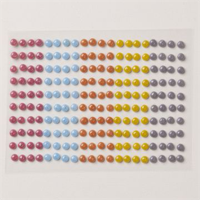
Orders of $50 or more will receive a pack of the In Color Resin Dots (2024-2026)
Details:
- No pre-stamped images will be included per SU! policy. Included will be all of the cardstock and DSP. You will need the Memorable Blooms bundle to complete the cards – anything from that bundle will need to be die cut by you.
- Minimum order of $35 must be placed by Sunday, Feb. 2, using the host code.
- If your order is $50 plus you will receive the dots.
- If your order is $60, you will receive a Sale-a-bration reward!
- Limit: 1 class packet per customer
If you’d like the measurements for these cards, they can be found on the FB Live recording!

Here’s a closer look at the cards and what you will receive in your kits (note: stamped images are not included).
FREE TUTORIALS- I send out Weekend Inspiration every weekend that includes a handful of Card Projects with tutorials and supply lists – and yes they are free! The first card on today’s post is one of the project tutorials! I send these out to all who are on my email list. Interested in getting these project sheets? Simply subscribe to my email list click here: