Aug 6, 2021 | Gallery, More Gift Wrap Ideas, More Video Tutorials |


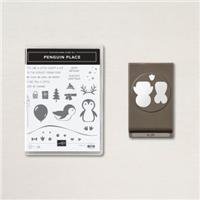
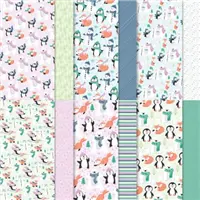
The Penguin Place bundle is so cute! Who wouldn’t love these cute penguins!?? On this edition of Facebook Live I share how to make this cute little Tea Bag holder – could also hold a chocolate or a little note – and then a card with the little penguin sledding down a snowbank! Easy projects to make – and just so stinkin’ cute!
If you’d like to see how this project was made, please click below to watch the replay!


LAST DAY to register for my Peaceful Cabin Card Class to Go! Don’t miss out on this amazing class! You won’t be disappointed!!

Registration is open from now to August 6 for my Peaceful Cabin Card Class to Go!
I am excited to offer my first Class to Go with brand new, beautiful products from our upcoming Mini Catalog!
Want it all?? Have a big wish list? The BEST deal is always buying the Stampin' Up! Starter Kit! You get $125 in product of your choice for just $99 & Free Shipping! No obligation
I am blessed to lead an amazing team with members all across the United States. My team consists of both business builders and happy shoppers! The question I am most often asked about joining the SU family is – “do I have to sell?” The answer is NO! You are welcome to be a happy shopper – and a smart cookie, I might add, to get all the products you love at the demonstrator discount!
Please contact me with any questions! I’d love to have you join my “We’d Rather Bee Stampin'” team!
You will then enjoy 20% off all future purchases while you are active! What have you got to lose? The link to join is below! The best part – there is no obligation to sell, or hold parties ever!!! You can simply become a “happy shopper” and get discounts on all your Stampin’ Up! purchases! If you’d like to pursue this as a business and make a little extra money, I can help you with that as well! 


Aug 4, 2021 | Gallery, More Bee Creative Tutorials, More Gift Wrap Ideas |

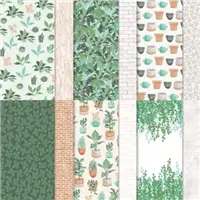
I am doing a Facebook Live every day this week to kick off the new July- December Mini Catalog and Saleabration! The card above is created with products from one of my favorite new suites – The Harvest Meadow Suite. This suite consists of a beautiful stamp set with dies, gorgeous Designer Series Paper, new ribbon and even cork paper! This suite is a must have for year round beautiful stamping!

If you’d like to see how this project was made, please click below to watch the replay!

Measurements:
Basic White Thick Cardstock: 5 ½ x 8 ½
Harvest Meadow Crumb Cake DSP: 3 x 4
Harvest Meadow Misty Moonlight Two-Tone DSP: 1 ¼ x 5
Harvest Meadow Misty Moonlight/White Foral DSP: 1 ¼ x 5 ½
Cork Specialty Paper: 4 x 1
Instructions:
- Stamp the large floral image with Misty Moonlight ink onto a panel of Thick Basic White cardstock. Crop with the coordinating die and the Stampin’ Cut and Emboss Machine.
- Likewise, stamp words onto the small label die with Misty Moonlight ink.
- Adhere the layers of Designer Series Paper to the Thick Basic White card base – starting form the right side of the card, moving towards the left.
- Attach the Cork Specialty paper as show in the photo.
- Adhere the Floral die cut with dimensionals to the card front.
- Use two small pieces of the Diamond Weave Ribbon and position, overlapping slightly, onto the Cork Specialty Paper.
- Use Stampin’ Dimensionals to attach the word panel.
- To finish the card, use the Take Your Pick Tool to pick up and attach the Brushed Metallic Adhesive Backed Dots – position as desired.
Only two days left to register for my Peaceful Cabin Card Class to Go! Don’t miss out on this amazing class! You won’t be disappointed!!
Registration is open from now to August 6 for my Peaceful Cabin Card Class to Go!
I am excited to offer my first Class to Go with brand new, beautiful products from our upcoming Mini Catalog!
Want it all?? Have a big wish list? The BEST deal is always buying the Stampin' Up! Starter Kit! You get $125 in product of your choice for just $99 & Free Shipping! No obligation
I am blessed to lead an amazing team with members all across the United States. My team consists of both business builders and happy shoppers! The question I am most often asked about joining the SU family is – “do I have to sell?” The answer is NO! You are welcome to be a happy shopper – and a smart cookie, I might add, to get all the products you love at the demonstrator discount!
Please contact me with any questions! I’d love to have you join my “We’d Rather Bee Stampin'” team!
You will then enjoy 20% off all future purchases while you are active! What have you got to lose? The link to join is below! The best part – there is no obligation to sell, or hold parties ever!!! You can simply become a “happy shopper” and get discounts on all your Stampin’ Up! purchases! If you’d like to pursue this as a business and make a little extra money, I can help you with that as well!

Jul 27, 2021 | Gallery, More Bee Creative Tutorials, More Gift Wrap Ideas |

In my weekly Facebook Live yesterday, I shared two cute and very simple ways to package hot cocoa, and a gift card. First was a Hot Cocoa packet, complete with a candy cane and a bit of chocolate.
This project’s base is a 6″ x 12″ piece of Designer Series Paper – folded up about 5″, leaving a bit of the inside DSP showing. I used Tear and Tape to adhere the sides, and created a tag with the Perfectly Plaid stamp set and coordinating Pine punch.
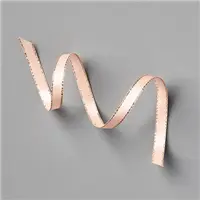
I used a tag die (love these!) and added a bit of a sneak peek with the Real Red Ruffled Ribbon coming in our new Mini that begins on August 3.

If you’d like to see how these projects were made, please click below to watch the replay!

My second project uses one of our In Color 2021-2023 Ombre’ Gift bags. Simply fold up the bag -this creates 2 pockets.
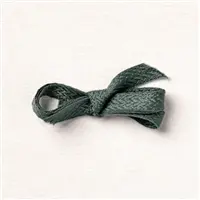
I wrapped the bag with the Evening Evergreen Chevron Ribbon and again used a tag die as a the focal point of my bag.
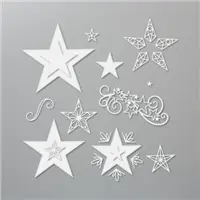
My stamped words are from the Tidings & Trimmings stamp set. I used the Pine punch with the Tidings of Christmas 6 x 6 DSP to create the sweet tree.

The front pocket of the card holds a little card from your personal message. This consists of a panel of Evening Evergreen cardstock measuring 4 1/4″ x 3 1/2″, a panel of Basic White measuring 4″ x 3 1/4″. I added a 1″ x 4″ piece of DSP, a cherry cobbler sprig cropped from the Christmas Trimmings dies, and a bow (Baker’s Twine Essentials Pack).


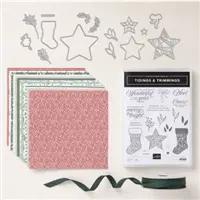
My Christmas in July was a super fun day of stamping and crafting! This class consisted of “giftables” – projects you can gift to friends and family (or keep for yourself!) for the upcoming holidays, as well as four cards. My Christmas in July event featured the Tidings & Trimmings Bundle from our 2021-2022 Annual Catalog. I offered the class both in person and “to go”. I’ve had some requests for a PDF-only option – and am happy to offer it starting today!

Sale: $9.78
Price: $11.50

Jul 22, 2021 | Gallery, More Bee Creative Tutorials, More Gift Wrap Ideas |

I held a Christmas in July event earlier this month, both in person and “to go.” The PDF tutorial for all of the projects made for this event are available for purchase -scroll down to the bottom of this post if you’d like the tutorial!
These projects today are not projects from that event, but some of the additional projects that I had on display.
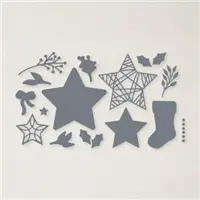
Today’s projects were made during my Facebook Live Take-Two on Thursday. Both feature the Tidings of Trimmings bundle in the 2021-2022 Annual Catalog. Also featured is the Tidings of Christmas 6 x 6 Designer Series Paper that is currently part of our Designer Series Paper Sale! CLICK TO SHOP THE SALE IN MY ONLINE STORE

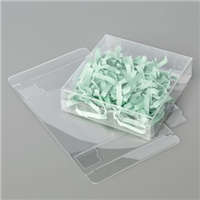
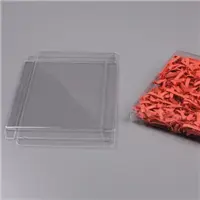
This first project is a great little gift for anyone – or would be a darling favor for a holiday event! It contains a cookies, of course! The base of this project is one of the 3 1/8″ x 3 1/8″ Acetate Card Boxes – they come in a pack of 10. You can use them to package a cute set of 3 x 3 cards and matching envelopes – another great gift idea – but I love the cookie idea – who doesn’t like cookies!! A little bit of stamping, and die cutting and you have an adorable gift!

I wrapped some dsp around the box and secured it to the bottom of the box. I kept the opening of the box on the right hand side – that way, when someone is ready to eat their cookie, all they need to do is untie the box – and the box decoration will remain intact!
I used our Foam Adhesive Sheets for the “Cookies” die – they make the entire word a dimensional – and I love the look!
If you’d like to see how these projects were made, please click below to watch the replay!

My next project was a super simple wrapped gift card. When I say super simple, I mean it! Just take a small strip of DSP and wrap it around the gift card, attaching to the back of the gift card. Crop out a small tag from the Tailored Tag die set (a favorite of mine!), stamp with Evening Evergreen Ink and add a Soft Succulent star and tag hole re-enforcement. Embellish with a Holiday Rhinestone and then attach to the bow with some White Baker’s Twine. Done! And such a great way to “dress up” a simple gift card!

My Christmas in July was a super fun day of stamping and crafting! This class consisted of “giftables” – projects you can gift to friends and family (or keep for yourself!) for the upcoming holidays, as well as four cards. My Christmas in July event featured the Tidings & Trimmings Bundle from our 2021-2022 Annual Catalog. I offered the class both in person and “to go”. I’ve had some requests for a PDF-only option – and am happy to offer it starting today!
Sale: $9.78
Price: $11.50

Jul 2, 2021 | Gallery, More Gift Wrap Ideas |

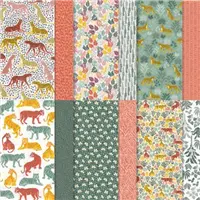
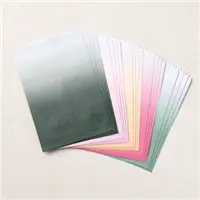
Each month I treat my In Color Club members to an extra “something” – ribbon, or bling, or in this case – I package of our new Ombre Gift Bags. I also include something stamped – normally it’s a card but since I gave them a package of the bags, I decided to give them an idea of how to “dress them up!”


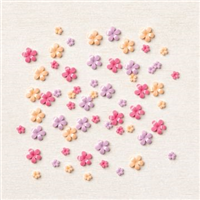
Not sure which color I prefer – I really love them all – and love the added touch of the Loose Flower Flourishes as a little accent on the butterflies! Which is your favorite?
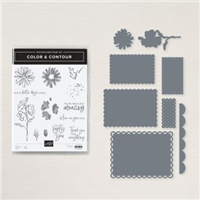
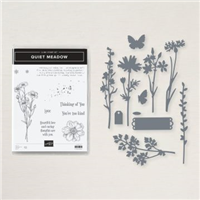
I used the Quiet Meadow dies to crop the flower sprig and the butterfly. The white scalloped panel and the words are from the Color and Contour bundle. Both are favorites of mine from the new Annual catalog!


Sale: $9.78
Price: $11.50
Sale: $9.78
Price: $11.50
Sale: $9.78
Price: $11.50
Sale: $9.78
Price: $11.50
Sale: $9.78
Price: $11.50
Sale: $9.78
Price: $11.50
Sale: $9.78
Price: $11.50
Sale: $9.78
Price: $11.50
Sale: $17.85
Price: $21.00

Feb 12, 2021 | Gallery, More Gift Wrap Ideas, More Video Tutorials |

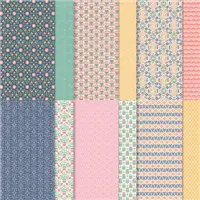
This week I’ve been sharing different ways to use the True Love DSP – of course you can switch up these ideas by using any DSP you have in your stash.
Today’s project makes a great gift – a card holder for four cards (you could easily make six and they would fit!)

The holder uses an Acetate Card Box. I simply cut it in half at four inches to create two pockets- one for the cards and one for the envelopes.
You can watch my Facebook Live Take 2 to see how easily this goes together! Enjoy!

MEASUREMENTS:
Cut two 4 1/2 x8 3/4 pieces of Basic Black Cardstock. Score at 1 1/2.
The top strip is 1 1/4 x 4 1/4, Bottom is 3/4 x 3 5/8
Petal Pink Cardstock 4 1/4 x51/2
True Love DSP- Dot – 2 1/2 x 5 1/4
True Love DSP – Stripe – 1 1/2 x 5 1/4
Here are a few photos of the cardholder! The first one is opened up showing both sides. Envelopes on one side, cards on the other!

Here’s a closeup of the cards slipped into the 1/2 Acetate Card Box! As you can see there is room for more if you wanted to do a set of six!

Here’s a closeup of the envelope side. Each envelope flap is decorated with coordinating True Love Designer Series Paper DSP.

Here’s a look at the four cards in the gif pack! All decorated with the beautiful black and white True Love Designer Series Paper with a pop of Petal Pink, embellishments and ribbon!

Want it all?? Have a big wish list? The BEST deal is always buying the Stampin' Up! Starter Kit! You get $125 in product of your choice for just $99 & Free Shipping! No obligation
I am blessed to lead an amazing team with members all across the United States. My team consists of both business builders and happy shoppers! The question I am most often asked about joining the SU family is – “do I have to sell?” The answer is NO! You are welcome to be a happy shopper – and a smart cookie, I might add, to get all the products you love at the demonstrator discount!
Please contact me with any questions! I’d love to have you join my “We’d Rather Bee Stampin'” team!
You will then enjoy 20% off all future purchases while you are active! What have you got to lose? The link to join is below! The best part – there is no obligation to sell, or hold parties ever!!! You can simply become a “happy shopper” and get discounts on all your Stampin’ Up! purchases! If you’d like to pursue this as a business and make a little extra money, I can help you with that as well!