Sep 22, 2023 | More Thank You Cards |

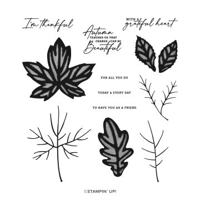
The NEW Abundant Beauty Decorative Masks (back in stock) and the Autumn Leaves Bundle pair so well together!

 Dimensions:
- Very Vanilla Thick card base – 4 1/4 x 11, scored at 5 1/2
- Cajun Craze die cuts – 3 3/8 x 4 3/4 and 1 7/8 x 1 3/8
- Crushed Curry and Copper Clay – scraps for leaves
- Very Vanilla – layer – 3 x 4 3/8 and sentiment – 2 3/8 x 1

Instructions:
- Burnish the fold of the card base with a Bone Folder.
- Use a die-cut machine to crop the Cajun Craze with the Deckled Rectangle Die.
- Adhere to the card base with Stampin’ Dimensionals.
- Cover the Very Vanilla layer with the argyle Abundant Beauty Decorative Mask.
- Use a Blending Brush to add Cajun Craze Ink.
- Use a die-cut machine to crop the with the Deckled Rectangle Die.
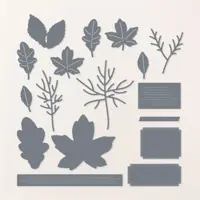
- Crop the Copper Clay, Crushed Curry and Cajun Craze pieces with the coordinating Autumn Leaves dies.
- Stamp the sentiment onto the Very Vanilla layer in Cajun Craze ink,
- Crop with the coordinating Autumn Leaves die.
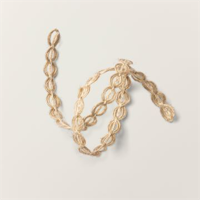
- Cut two 3 1/2 inch pieces of the Natural 1/4″ Wavy Trim. Adhere as shown with Mini Glue Dots.
- Layer and adhere the remaining pieces as shown with Multipurpose Liquid Glue and Stampin’ Dimensionals.


Sep 1, 2023 | Gallery, More Thank You Cards |
I did an extra Facebook Live this week – again geaturing the All About Autumn Suite. So pretty and makes me so ready for fall!
Here’s a look at the products in the suite:
I’m not sure which part(s) of this suite is my favorite – but I do love the DSP – it is amazing – and it is the focus of the card I’m featuring today. I love pumpkins and gourds and I guess that’s why I love this dsp!
Here is the recording of my Facebook Live –
Really the only measurement needed for this card is the dsp – which is cut 5 1/2″ x 4 1/4″ – it fills the entire card front. The rest of the components of the card are die cut!
It goes togheter quickly once all the die cutting is done. Ink used is Cajun Craze.
Are you ready for fall? Later today I will be releasing my September Class to Go – it’s a great deal! So watch for the details – and I will have an Early Bird Special for those that register right away! YAY!
FREE TUTORIALS- I send out Weekend Inspiration every weekend that includes a handful of Card Projects with tutorials and supply lists – and yes they are free! The first card on today’s post is one of the project tutorials! I send these out to all who are on my email list. Interested in getting these project sheets? Simply subscribe to my email list click here:


Aug 28, 2023 | More Thank You Cards |

This thankful card was created with Copper Clay Ink and NEW Products from the 2023 Holiday Catalog (shown below), available for purchase on September 6, 2023!
- All About Autumn Suite Collection | 162193 | p. 42 | $105.75
- Autumn Leaves Bundle | 162186 | p. 44 | $55.75
- Distressed Tile 3D Embossing Folder | 162189 | p. 43 | $9.50
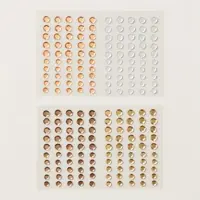
- Adhesive-Backed Speckled Dots | 162191 | p. 43 | $8.00
- Copper & Natural Ribbon Combo Pack | 162192 | p. 43 | $9.50
- All About Autumn Specialty 6×6 Designer Series Paper | 162178 | p. 43 | $15.00


Dimensions:
- Very Vanilla Thick Card Base – 5 1/2 x 8 1/2, scored at 4 1/4
- Designer Series Paper – 4 3/4 x 1 (strip), 1 7/8 x 1 3/8 (die-cut)
- Very Vanilla – 5 1/4 x 4 (embossed layer), 5 x 1/4 (strip), 2 3/8 x 1 (die-cut sentiment), 6 x 3 1/2 (stamped/die-cut leaves)

Instructions:
- Burnish the fold of the card base.
- Tuck the Very Vanilla layer inside the Distressed Tile 3D Embossing Folder and run through a die-cut machine.
- Adhere to the card with Stampin’ Dimensionals.
- Adhere the Very Vanilla strip to the Designer Series Paper strip with Multipurpose Liquid Glue.
- Adhere to the card with Stampin’ Dimensionals.
- Stamp the maple leaf in Copper Clay ink onto the Very Vanilla piece two times without re-inking. Stamp the sentiments as shown onto the Very Vanilla.
- Crop all with the coordinating Autumn Leaves dies and a die-cut machine.
- Crop the Designer Series Paper with the Autumn Leaves die-cut.
- Adhere the ribbon as shown with Stampin’ Seal Plus.
- Adhere the sentiment and Designer Series Paper die-cuts together and to the card with Stampin’ Dimensionals.
- Embellish with Adhesive-Backed Speckled Dots.

Aug 12, 2023 | More Friend Cards, More Thank You Cards |

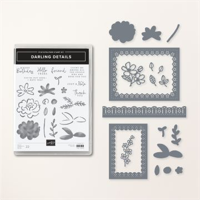
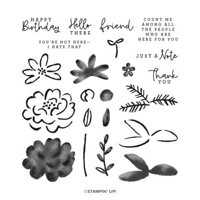
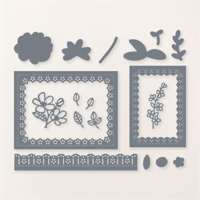
The Darling Details Bundle from the Stampin’ Up! 2023-2024 Annual Catalog is just “Darling”! I created two card one simple and another a little on the stepped-up side.


Simple Card Dimensions:
- Basic Black Card Base – 5 1/2 x 8 1/2, scored at 4 1/4
- Melon Mambo – 5 x 3 3/4
- Basic White – 4 1/2 x 3 1/2 (layer), 4 x 4 (for all images & sentiment)
Instructions:
- Burnish the fold of the card base.
- Crop the Melon Mambo with the largest Darling Details and a Cut & Emboss Machine.
- Adhere to the Basic White Layer with Multipurpose Liquid Glue.
- Stamp the sentiment, leaves and flower outline in Tuxedo Black Memento Ink onto the Basic White layer.
- Stamp the flower center in Melon Mambo Ink first on scratch paper, then onto the flower outline.
- Crop with the flower and leaves with the coordinating Darling Details Dies and the sentiment with the Countryside Corners Die.
- Adhere as shown with Stampin’ Dimensionals.
- Embellish with black Classic Matte Dots.

Stepped-Up Card Dimensions:
- Basic White Thick Card Base – 5 1/2 x 8 1/2, scored at 4 1/4
- Melon Mambo – 5 x 3 3/4
- Basic Black – 4 1/2 x 3 1/4
- Basic White – 3 x 3 (for all images)
Instructions:
- Burnish the fold of the card base.
- Crop the Melon Mambo with the largest Darling Details die and a Cut & Emboss Machine.
- Crop the Basic Black with the 2nd largest Darling Details die tucked inside the largest Darling Details die.
- Adhere both to the Basic White Layer with Stampin’ Dimensionals.
- Stamp the sentiments in Tuxedo Black Memento Ink onto the Basic White card base center.
- Stamp the leaves and flower outline in Tuxedo Black Memento Ink onto the Basic White layer
- Stamp the flower center in Melon Mambo Ink first on scratch paper, then onto the flower outline.
- Crop with the flower and leaves with the coordinating Darling Details Dies and the sentiment with the Countryside Corners Die.
- Adhere as shown with Stampin’ Dimensionals.
- Embellish with black Classic Matte Dots.


Aug 8, 2023 | Gallery, More Friend Cards, More Thank You Cards |
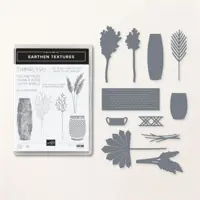
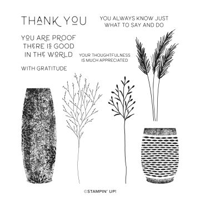
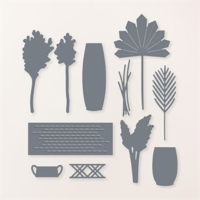
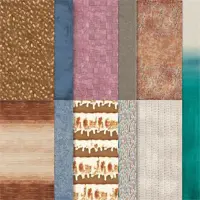
Yesterday for my Facebook Live I created two different cards based on two different card tutorials I shared to my email list subscribers. I loved the layouts of the cards and wanted to make them with different products! I am loving the Earthen Textures Suites – it’s very chic and quite stunning! Here’s a look at the suite –
Here’s the recording of the card on made on today’s Facebook Live. You will be able to see the measurements for the cards as you watch along on the video recording.

The first card is a fun fold – a small panel opens from the center section of the card. I used a die to create an interesting panel for the inside, too.

My next card shows a unique way to cut a 6″ x 6″ piece of DSP – simply mark each side at 1 1/2″ and then cut – you can see how i do this in the Facebook Replay. By cutting it in this way, you will have four identical panels to create four cards. I love the combination of colors in this card:

If you like these cards, then you will love my latest Card Class to go – it features this suite – and includes product plus 6 different cards, a complete PDF with measurements and a video that will walk you through each project. Details below!

Our Class to Go for August features the Earthen Textures bundle, beautiful Designer Series Paper and adhesive backed sequins! Combine these products to create stunning cards!
REQUEST TO REGISTER BELOW! Registration closes August 14 at 12 PM ET!
Please email me with any questions!
FREE TUTORIALS- I send out Weekend Inspiration every weekend that includes a handful of Card Projects with tutorials and supply lists – and yes they are free! The first card on today’s post is one of the project tutorials! I send these out to all who are on my email list. Interested in getting these project sheets? Simply subscribe to my email list click here:

Jul 15, 2023 | Gallery, More Thank You Cards |
Create a beautiful, yet simple slimline card using the products from the Earthen Elegance Suite Collection from Stampin’ Up! The frond from the Earthen Textures Dies is so fun! You can leave flat or fold on the score lines for some 3-D fun!

 MEASUREMENTS:
- Basic White Thick: Card Base – 8 1/2 x 7, scored at 3 1/2
- Basic White – 8 x 3 (layer), 8 x 1/2 (sentiment strip)
- Earthen Elegance Designer Series Paper – 8 1/4 x 3 1/4 (layer), 8 1/4 x 3 1/4 (for die-cuts)

INSTRUCTIONS:
- Burnish the fold of the card base with a Bone Folder.
- Adhere the Basic White & Designer Series Paper layers together and to the card.
- Crop the three fronds from the Designer Series Paper with a Stampin’ Cut & Emboss Machine and the Earthen Textures die.
- Use a Bone Fold to fold the fronds on the score lines.
- Adhere to the card with Stampin’ Dimensionals.
- Stamp the sentiment in Pretty Peacock Classic Ink onto the Basic White strip.
- Adhere to the card with Stampin’ Dimensionals.
- Embellish with Pretty Peacock Adhesive-Backed Sequins Trio.

FREE TUTORIALS- I send out Weekend Inspiration every weekend that includes a handful of Card Projects with tutorials and supply lists – and yes they are free! The first card on today’s post is one of the project tutorials! I send these out to all who are on my email list. Interested in getting these project sheets? Simply subscribe to my email list click here: