Feb 5, 2025 | Gallery, More Holiday Cards, More Love Cards |

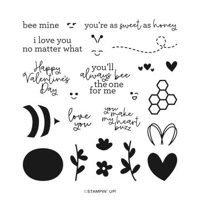
Today on my Facebook Live I created four cards featuring the Sale-a-Bration Pick a Season Stamp Set – Free with a $60 Purchase! It’s so versatile, a must-have for Valentine’s Day, Easter, Spring and St Patty’s Day!

Ordering Special! NOW – Sunday, February 9!
Orders of $35 or more will receive the kits to make the cards.
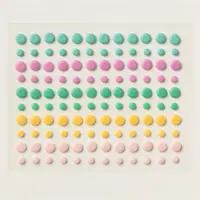
Orders of $50 or more will receive a pack of the In Color Resin Dots (2024-2026)
Details:
- No pre-stamped images will be included per SU! policy. Included will be all of the cardstock and DSP. You will need the Pick a Season Stamp Set to complete the cards!
- Minimum order of $35 must be placed by Sunday, Feb. 9, using the host code.
- If your order is $50 plus you will receive the dots.
- If your order is $60, you will receive a Sale-a-bration reward!
- Limit: 1 class packet per customer

Here’s a closer look at the cards and what you will receive in your kits (note: stamped images are not included).
FREE TUTORIALS- I send out Weekend Inspiration every weekend that includes a handful of Card Projects with tutorials and supply lists – and yes they are free! The first card on today’s post is one of the project tutorials! I send these out to all who are on my email list. Interested in getting these project sheets? Simply subscribe to my email list click here:


Jan 29, 2025 | Gallery, More Friend Cards, More Love Cards, More Sympathy Cards |

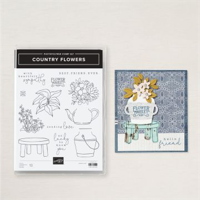
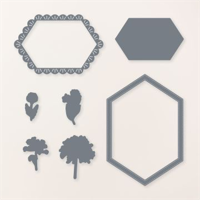
Today on my Facebook Live I created three cards featuring the Memorable Blooms bundle. The florals and die-cuts are stunning and a must-have!

Ordering Special! NOW – Sunday, February 4!
Orders of $35 or more will receive the kits to make the cards.
Orders of $50 or more will receive a pack of the In Color Resin Dots (2024-2026)
Details:
- No pre-stamped images will be included per SU! policy. Included will be all of the cardstock and DSP. You will need the Memorable Blooms bundle to complete the cards – anything from that bundle will need to be die cut by you.
- Minimum order of $35 must be placed by Sunday, Feb. 2, using the host code.
- If your order is $50 plus you will receive the dots.
- If your order is $60, you will receive a Sale-a-bration reward!
- Limit: 1 class packet per customer
If you’d like the measurements for these cards, they can be found on the FB Live recording!

Here’s a closer look at the cards and what you will receive in your kits (note: stamped images are not included).
FREE TUTORIALS- I send out Weekend Inspiration every weekend that includes a handful of Card Projects with tutorials and supply lists – and yes they are free! The first card on today’s post is one of the project tutorials! I send these out to all who are on my email list. Interested in getting these project sheets? Simply subscribe to my email list click here:

Jan 20, 2025 | Gallery, More Love Cards |

Sending You A Big Hug – A Handmade Slider Card with the Stampin’ Up! Hugs for Love Bundle!
Hugs for Love Bundle & Coordinating Bright Border Stamp Set


Card Tutorial: Sending You a Big Hug
Measurements:
- Blackberry Bliss CS: 8 ½” x 5 ½”
- Fresh Freesia CS: 4 ½” x 3 ¼”
- Basic White CS: 5 ¼” x 4”, 4 ¼” x 3”, scrap
- DSP: 3 ½” x 3 ½”
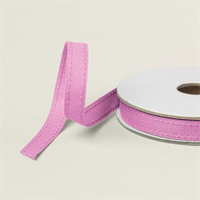
- Ribbon: 20”, 2 ½”
Instructions:
- 5 ½” x 4 ¼” Blackberry Bliss single layer is the card base.
- Adhere white panel to card base.
- Cut the DSP square in half, corner to corner.
- Adhere each triangle to card base. ADHERE SIDES AND BOTTOM EDGES ONLY, SO YOU CAN SLIDE THE OTHER SMALLER CARD IN AND OUT!
- Adhere smaller white panel to Fresh Freesia cardstock panel.
- Stamp a heart in the upper left corner of this piece, using Fresh Freesia ink.
- Fold smaller Fresh Freesia 3/8” Seam Binding Ribbon in half, and staple to top of Fresh Freesia panel.
- Stamp a scrap piece white cardstock, using a border image from the Hugs for Love stamp set, using Fresh Freesia ink.
- Stamp sentiment inside the stamped border, using Blackberry Bliss ink.
- Punch out, using To the Point Punch.
- Tie larger piece of Fresh Freesia 3/8” Seam Binding Ribbon around card, positioning bow towards the right side.
- Adhere punched image to card front center, using Dimensionals. Be careful not to put Dimensional at the top center of the punched piece, or the 2nd card won’t be able to slide in and out of the card.
- Add some Purple Adhesive-Backed Sequins to punched piece.


Jan 16, 2025 | Gallery, More Love Cards |

Happy Valentine’s in gorgeous Cherry Cobbler & Melon Mambo with the Stampin’ Up! Hugs for Love Bundle!
Hugs for Love Bundle & Coordinating Bright Border Stamp Set
Card Tutorial: Happy Valentine’s Day
Measurements:
- Cherry Cobbler: 4 ¼” x 11” card base
- Cherry Cobbler: 3” x 4 ¼” layer
- Basic White: 2” x 2 ½”
- Melon Mambo: 2 ¾” x 4”
- Marbled Elegance DSP: 4” x 5 ¼”
Instructions:
- Score the Cherry Cobbler card base on the long side at 5 ½” and fold.
- Attach the piece of DSP to the card front using Stampin’ SEAL.
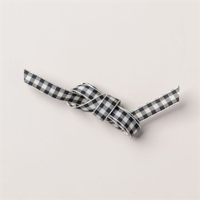
- Wrap a piece of Large Check Ribbon around the center of the card front adhering it to the front of the card with Stampin’ SEAL. This will be hidden with the next layer.
- Emboss a piece of Melon Mambo cardstock using the Plaster Painting Embossing Folder and attach to the 3” x 4 ¼” layer of Cherry Cobler cardstock.
- Pop this layer up using Stampin’ Dimensionals in the center of the card front over the seam of the ribbon.
- Stamp the border image on Basic White cardstock using Melon Mambo ink. Then, stamp the sentiment using Memento Black ink on the inside of the border.
- Stamp two lined hearts using Melon Mambo ink stamping off once on scrap paper for a lighter shade for each one.
- Punch out the sentiment using the To the Point Punch. Then, pop the sentiment piece on to the card front using Stampin’ Dimensionals.
- Add a bow to the left side of the sentiment using Mini Glue Dots.
- Lastly, add three Metallic Gems to the card.

Jan 15, 2025 | Gallery, More Love Cards |

Yesterday I shared a trio of cards that used the Stampin’ Up! Hugs for Love Bundle and the coordinating Bright Borders Stamp Set. You can see those cards here. Today I bring you another… Lots of Hugs & Kisses! This card only uses the Hugs for Love Bundle, but be sure to snag the Bright Borders that also works perfectly with the To the Point Punch.
Hugs for Love Bundle & Coordinating Bright Border Stamp Set

Dimensions:
- Basic White Thick card base – 5 1/2 x 8 1/2, scored at 4 1/4
- Basic White Cardstock – 4 1/4 x 3 3/4, 5 x 2 1/2 (punched sentiment, two hearts)
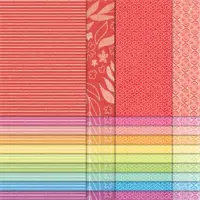
- Fruit Salad Designer Series Paper: 4 x 3 1/2
- Crumb Cake Cardstock: 5 1/2 x 1
Instructions:
- Burnish the fold of the card base with a bone folder.
- Layer and adhere the Designer Series Paper and Basic White layers together and to the card base.
- Zip the Crumb Cake Cardstock through a Stampin’ Cut & Emboss Machine (Standard) tucked inside the Exposed Brick 3D Embossing Folder. Adhere as shown.
- Stamp the sentiment and group of hearts in Real Red Classic Ink onto the far right side of the Basic White layer. Crop with the To the Point Punch. Adhere.
- Stamp the hearts (one in Real Red, one in Crumb Cake) onto the remaining piece of Basic White Cardstock. Snip out with Paper Snips. Adhere.
- Embellish with a bow of Real Red & White Baker’s Twine and 3 Low Profile Adhesive-Backed Dots.

FREE TUTORIALS- I send out Weekend Inspiration every weekend that includes a handful of Card Projects with tutorials and supply lists – and yes they are free! The first card on today’s post is one of the project tutorials! I send these out to all who are on my email list. Interested in getting these project sheets? Simply subscribe to my email list click here:

Jan 14, 2025 | Gallery, More Congrats Cards, More Love Cards, More Thank You Cards |
It was so great to do a Facebook Live again, after recent surgery and time to heal! I featured two different stamp sets that both coordinate with a new punch – On Point. I love punch bundles and love that for this punch, we have not one but two stamp sets that coordinate! I paired the stamped, punched images with some gorgeous Designer Series Papers for some simple, quick but lovely cards!
If you’d like the measurements for these cards, they can be found on the FB Live recording!
Hugs for Love Bundle & Coordinating Bright Border Stamp Set
.
FREE TUTORIALS- I send out Weekend Inspiration every weekend that includes a handful of Card Projects with tutorials and supply lists – and yes they are free! The first card on today’s post is one of the project tutorials! I send these out to all who are on my email list. Interested in getting these project sheets? Simply subscribe to my email list click here: