Dec 23, 2024 | Gallery, More Love Cards |

A lovely mix of hearts in beautiful jewel tones and gold foil! This sending lots of love card showcases the NEW Hearts of Elegance Suite Collection.
Card Tutorial: Sending Lots of Love Card
Measurements:
- Thick Basic White C/S : 8 ½” x 5 ½” ,
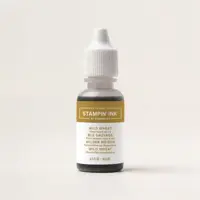
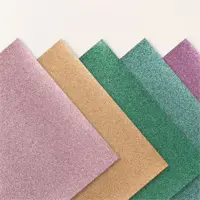
- Melon Mambo: 5 ¼”x 4”, scraps of the following to die cut the hearts, Wild Wheat, Pretty Peacock, Moody Mauve, Pretty in Pink, Gold Foil,
- Basic White 3 ¼”x ¾
Instructions:
- Fold the Thick Basic White card base at 4 ¼” and burnish.
- Emboss the Melon Mambo with the Exposed Brick embossing folder using the Stampin’ cut and embossing machine. Adhere to the card base with Multipurpose Liquid Glue.
- With the small, stitched heart die, die cut two of each colour card stock listed above.
- Add dimensionals to all the hearts and adhere onto the front of the card as shown.
- With the Wild Wheat ink stamp sentiment on Basic White Card Stock. Adhere onto the card front.
- Finish off the card by adding a heart onto the sentiment piece.


Jun 25, 2024 | Gallery, More Birthday Cards, More Friend Cards, More Love Cards |

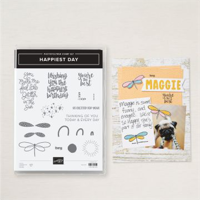
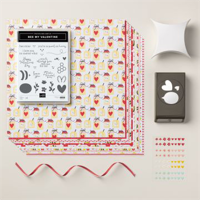
GET THE CARD KITS ABOVE FREE! Place an order of $35+ with host code EMD4GF2T by this Friday, June 28 and I will send you the pieces needed to make the cards above for FREE! Also included is a PDF with measurement that will be emailed to you when I send you your kit.
Place an order of $50+ and you will get both the pieces for the cards and the 2024-26 In Color Resin Dots FREE (Limit One Resin Dot Per Customer)!
Monday on my FB Live, I shared the above three cards featuring the Happiest Day Stamp Set paired with the Spotlight on Nature and Wildly Flowering Dies. I hope you will take advantage of my ordering special to get the card kits for free – AND with a $50 order, you will get the dots as well!!! Win Win!

You can watch how to assemble the cards below in the video here:

Here’s the first card. Simple – a fun layout, the dragonfly could be switched out with a different image – leaf, flower, butterfly, etc. Love the Spotlight on Nature die used for the word panel.

For the second card, I wanted to play up the word stamp that mentions glitter, and thought it would be fun to use some of the 2024-2026 In Color Glimmer Specialty Paper – another simple layout, but a bit different and fun!! Always fun to try a different layout.

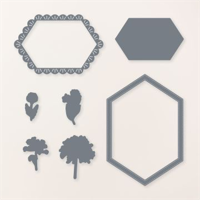
The third card is a monochromatic card featuring Pretty in Pink. I love the frame and focal point – both die cut from the Wildflower Designs Dies.

I hope you have enjoyed these three cards and will take advantage of my ordering special!
Sale: $117.00
Price: $130.00
Sale: $59.40
Price: $66.00
Sale: $56.70
Price: $63.00

Feb 1, 2024 | Gallery, More Love Cards |
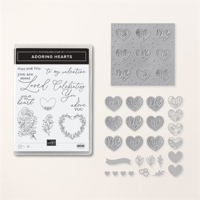
This is another card using the beautiful Adoring Hearts bundle – I shared a lot of detail in last week’s Facebook Live and wanted to add one more card idea this week. I love hearts and find this bundle very appealing!
Here’s a look at the bundle:
The Designer Series Paper I used for my projects is a Saleabration freebie called Most Adored – and coordinates with the Adoring Hearts bundle.
Here’s the recording of my Facebook Live:
Here’s a glimpse at the inside of the card:

Jan 25, 2024 | Gallery, More Love Cards |
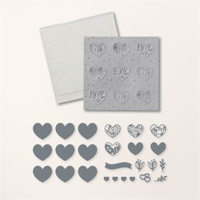
I love hearts – and when I saw this Adoring Hearts bundle with the Hybrid Embossing folder, I knew I had to have it! If you have never used a hybrid embossing folder, you will enjoy watching my FB Live replay as I go into quite a bit of detail on how to use one – they are amazing!!!
Here’s a look at the bundle:
The Designer Series Paper I used for my projects is a Saleabration freebie called Most Adored – and coordinates with the Adoring Hearts bundle.
Here’s the recording of my Facebook Live:
For the first card, I showed how to use the embossing folder as it is – and how you would normally use it – just insert your cardstock into the folder and zip it through your Stampin’ Cut and Emboss machine.
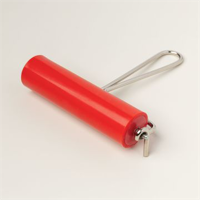
For the next card I used the hybrid embossing folder and the brayer- please refer to the FB live to see this in action!
I had an extra heart so I put it in the inside of the card:
I hope you will give this new folder a try!!! It is so fun !!

Jan 21, 2024 | Gallery, More Love Cards |
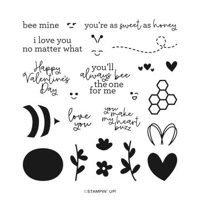
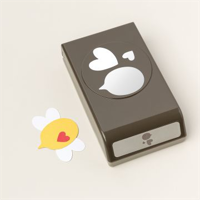
Follow along via the video below while I create this cute Valentine’s card using the Bee Mine Suite Collection from Stampin’ Up!
Isn’t that little bee just adorable? I love that the wings and antennas are created from the shape of a heart! The punch just got much more versatile by taking on that double duty!

Jan 10, 2024 | More Love Cards |

I love the adorable bee from the Bee My Valentine Bundle, part of the Bee Mine Suite Collection from Stampin’ Up!


 Dimensions:
- Basic White Thick card base – 4 1/4 x 11, scored at 5 1/2
- Basic Black Card Stock: 4 x 5 1/4, 3 x 4
- Bee Min Designer Series Paper – 3 3/4 x 5
- Basic White Stamped Layer – 2 3/4 x 3 3/4
- Basic White Bee and Wings – 3 x 4

INSTRUCTIONS:
- Burnish the fold of the card base with a Bone Folder.
- Adhere Designer Series Paper to the Basic Black layer with glue and to the card with dimensionals.
- Stamp the images and sentiment in Tuxedo Black Memento Ink and the hearts in Real Red Classic Ink onto the Basic White layer as shown.
- Adhere to the Basic Black layer with glue and to the card with dimensionals.
- Stamp the wings Tuxedo Black Memento Ink onto the Basic White layer as shown.
- Stamp the bee in Daffodil Delight and Tuxedo Black Memento Ink as shown.
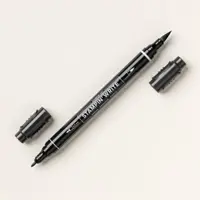
- Use Daffodil Delight and Basic Black Stampin’ Write Markers to add shading to the bee.
- Crop the wings and bee (qty 2) with the Bee Builder Punch.
- Adhere the wings and solid white bee to the card with Stampin’ Dimensionals.
- Adhere the stamped bee to the card with Mini Stampin’ Dimensionals thru the center and Multipurpose Liquid Glue on the outer edges (so the bee is curved).
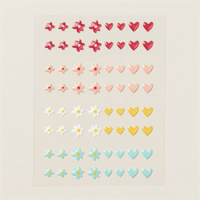
- Embellish with Real Red Adhesive-Backed Hearts & Flowers.


Registration for the Bee My Valentine Card Class is open NOW – January 14!
Don’t miss this class – the cards are so cute and three of them are FUN FOLDS!
REQUEST TO REGISTER BELOW!
Please email me with any questions!
&