Aug 29, 2023 | Gallery, More Love Cards |
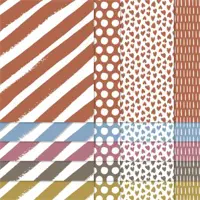
Yesterday on my Facebook Live I shared a beautiful card featuring the upcoming All About Autumn Suite Collection of products. It is such a gorgeous suite and it sure gets me excited about fall!! Here’s a look at the products in the suite:
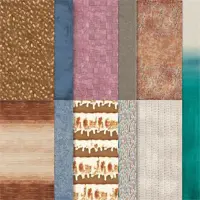
I’m not sure which part(s) of this suite is my favorite – but I do love the DSP – it is amazing – and it is the focus of the card I’m featuring today. The particular piece of DSP I used makes me think of walking down a sidewalk in fall – that is full of all the different colors of leaves!
Here is the recording of my Facebook Live –
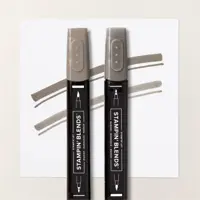
The panel that the words are stamped on is part of the set – the crumb cake panel is from the Nested Essentials set of dies. I burnished the edges of both with Moody Mauve ink and a blending brush – just lightly.
And here’s a peek at the inside of the card – I had a small scrap of the DSP left and so added that along with two small die cut leaves.
The only measurement really needed for this card is the DSP layer – it is cut 4″ x 5 1/4″ – the rest of the card is done with die cuts.
Are you ready for fall? I love fall – and there was a nice brisk feel to the air this morning! YAY!


FREE TUTORIALS- I send out Weekend Inspiration every weekend that includes a handful of Card Projects with tutorials and supply lists – and yes they are free! The first card on today’s post is one of the project tutorials! I send these out to all who are on my email list. Interested in getting these project sheets? Simply subscribe to my email list click here:


Jun 13, 2023 | Gallery, More Friend Cards, More Love Cards |
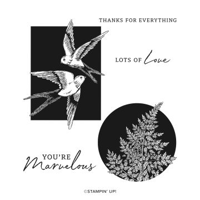
For my Facebook Live yesterday, I shared 3 different cards featuring the Marvelous Nature stamp set – a favorite of mine from the new 2023-2024 Annual Catalog. I decided to offer an ordering special this week – and I hope you will take advantage of it!
ORDERING SPECIAL!
Place an order of $35 with Host Code H99Z3MXU and I’ll send you the three card kits for FREE!
Place an order of $50 with Host Code H99Z3MXU and I’ll send you the card kits and 2022-2024 In Color Pearls for FREE!
Here’s a look at the stamp set:
Here’s the recording- I really love these cards – what do you think? They are simple and easy to put together but are strikingly beautiful in their simplicity! The cards feature two of our newest In Colors – Boho Blue and Pebbled Path. Which is your favorite?

Here is a close up of the three cards:
I love pairing the fern in the stamp set with the Fern 3D Embossing Folder.

This card features the Radiating Stitches dies – I love the texture and interest they add! These dies are part of our Online Exclusives which means they don’t appear in the catalog – you can view them in my onlinei store.

This next card is Boho Blue with a touch of Wild Wheat – another one of our new In Colors.

Don’t miss out on my Bird’s Eye View card class!

Time for another fun Card Class via Zoom with Fun and Games added! There are two ways to participate in this class – you can do it as a Class to Go – and complete the cards on your own – Or you can join me (and some other fun stampers) for a LIVE class via Zoom. We play Bingo for some fun Stampin’ Up! products as prizes too! It’s always a fun night and one that I look forward to every month!
Date: Tuesday, June 27th, 6:30 PM EST
The LIVE class will be offered online via Zoom. We will start the night with four Bingo games – with Stampin’ Up! products as prizes!!
Then, together, we will assemble four beautiful cards featuring the Bird’s Eye View stamp set. Birds, books and birds with glasses!! Adorable!
REQUEST TO REGISTER BELOW!
Please email me with any questions!
FREE TUTORIALS- I send out Weekend Inspiration every weekend that includes a handful of Card Projects with tutorials and supply lists – and yes they are free! The first card on today’s post is one of the project tutorials! I send these out to all who are on my email list. Interested in getting these project sheets? Simply subscribe to my email list click here:

May 10, 2023 | Gallery, More Friend Cards, More Love Cards |
The Marvelous Nature stamp set really caught my eye as I first glanced through our new Annual Catalog! I decided for this week’s Facebook Live to “case the catalog” – and share the beautiful samples that were pictured on page 106.


Here’s the recording- What do you think? I think these cards are beautiful!

For the first card, I used sponge daubers to add color to the large bird stamp – Azure Afternoon at the top and then Night of Navy on the bottom. You could really use any color combinations with this technique! So fun! This panel was trimmed and off set above the bird image stamped onto a panel of Basic White with Pebbled Path ink. I love the added texture/detail of the Radiating Stitches dies on the Crumb Cake panel. If you have been waiting to order these dies – they are available again!

The next card started with a 4 1/4″ x 11″ Thick Basic White – the DSP starts with a 3″ x 4 1/4″ rectangle and is cut on the diagonal – you will have two pieces – one for this card and one for a second card. I LOVE the new Natural 1/4″ Wavy Trim!!! I added some embellishments with the new 2023-2025 In Color Dots. Please watch the FB Live recording for a step by step guide on putting these cards together!

FREE TUTORIALS- I send out Weekend Inspiration every weekend that includes a handful of Card Projects with tutorials and supply lists – and yes they are free! The first card on today’s post is one of the project tutorials! I send these out to all who are on my email list. Interested in getting these project sheets? Simply subscribe to my email list click here:

May 1, 2023 | Gallery, More Friend Cards, More Love Cards |
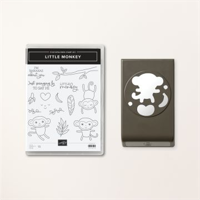
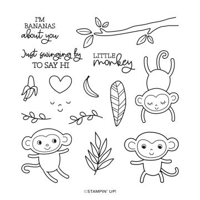
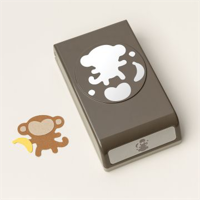
How cute are these little monkeys? I think they are pretty cute! I shared this card on my weekly facebook live yesterday, and it was well received by those watching! The monkeys are from a new bundle that is called Little Monkey – and it’s a punch bundle.
Of course the big news for the day is that our new annual catalog is now LIVE! Do you need a copy? If you don’t have a demonstrator, and would like a copy, please email me and I’ll be happy to send one your way asap!
Here’s the recording-

Here’s a close up! You can now purchase these products in my online store!

FREE TUTORIALS- I send out Weekend Inspiration every weekend that includes a handful of Card Projects with tutorials and supply lists – and yes they are free! The first card on today’s post is one of the project tutorials! I send these out to all who are on my email list. Interested in getting these project sheets? Simply subscribe to my email list click here:

Feb 27, 2023 | Gallery, More Friend Cards, More Love Cards |
Exciting new products coming on March 1 – with a twist! These products will not be in any of our catalogs, but instead will be offered only in my online store – under the category of Online Exclusives! I am in love with these products – they are all so beautiful!
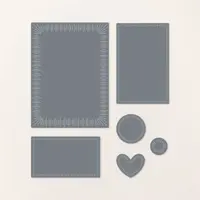
Here’s a beautiful card that showcases the new products in the suite- the stamp set, the dies, the Designer Series Paper and the frosted dots – put them all together for a gorgeous card!
I’ll be sharing more with this suite tomorrow- it was what I highlighted in today’s Facebook Live and will be posted tomorrow on my blog. And I will be releasing a wonderful “Class to Go” featuring these new products on March 1! So stay tuned – more inspiration is coming over the next few days!
 MEASUREMENTS:
- Basic White Thick Card Base – 4 1/4 x 8 1/2 , Scored at 4 1/4
- Hello Irresistible DSP – 4 x 4 (layer), 1 1/2 (for die-cut sentiment)
- Basic White – 3 1/4 x 3 1/4

INSTRUCTIONS:
- Burnish the fold of the card base with a Bone Folder.
- Adhere the DSP layer to the card base with Stampin’ Dimensionals.
- Crop the center of the Basic White layer with the Irresistible Blooms die. Adhere with Multipurpose Liquid Glue.
- Stamp the sentiment in Versamark onto the DSP layer. Cover with white Basics Embossing Powder. Set with a Heat Tool.
- Crop with the Stylish Shapes 1-1/4 Circle Die. Adhere with a Stampin’ Dimensional.
- Embellish by adhering Loose Frosted Dots as shown with a Fine-Tip Glue Pen.

FREE TUTORIALS- I send out Weekend Inspiration every weekend that includes a handful of Card Projects with tutorials and supply lists – and yes they are free! The first card on today’s post is one of the project tutorials! I send these out to all who are on my email list. Interested in getting these project sheets? Simply subscribe to my email list click here:
Want it all?? Have a big wish list? The BEST deal is always buying the Stampin' Up! Starter Kit! You get $125 in product of your choice for just $99 & Free Shipping! No obligation
I am blessed to lead an amazing team with members all across the United States. My team consists of both business builders and happy shoppers! The question I am most often asked about joining the SU family is – “do I have to sell?” The answer is NO! You are welcome to be a happy shopper – and a smart cookie, I might add, to get all the products you love at the demonstrator discount!
Please contact me with any questions! I’d love to have you join my “We’d Rather Bee Stampin'” team!
You will then enjoy 20% off all future purchases while you are active! What have you got to lose? The link to join is below! The best part – there is no obligation to sell, or hold parties ever!!! You can simply become a “happy shopper” and get discounts on all your Stampin’ Up! purchases! If you’d like to pursue this as a business and make a little extra money, I can help you with that as well! 

Feb 17, 2023 | Gallery, More Friend Cards, More Love Cards |
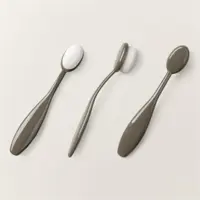
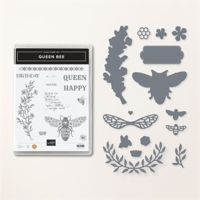
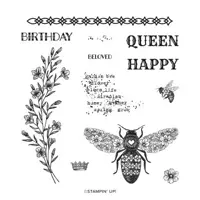
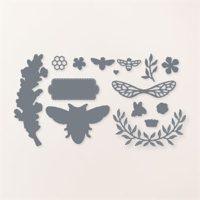
Sharing a fun technique- Smooching!- with my Queen Bee Bundle for these two cards! Which color palette do you prefer?
Enjoy this tutorial and I hope you will give this technique a try!
MEASUREMENTS:
- Basic Black or Crumb Cake Card Bases – 5 1/2 x 8 1/2, scored at 4 1/4
- Basic Black or Soft Suede Layers – 5 1/8 x 4 7/8, 3 x 3 layer adhered to an Adhesive Sheet
- Fluid 100 Watercolor Paper – Full Sheet for Smooching Technique, 3 3/4 x 5 Layers
- Basic White Card Stock – 3 x 3 for Stamping
INSTRUCTIONS:
- Burnish the fold of the card base with a Bone Folder.
- Adhere the card stock layer to the card base with Stampin’ Dimensionals.
- Smooch or stamp the Fluid 100 Watercolor layer with Soft Suede or Tuxedo Black Memento Ink. Adhere with Multipurpose Liquid Glue.
- Smooch the full sheet of Fluid 100 Watercolor paper with Crushed Curry Ink. Crop with all sizes of hexagons dies (Beautiful Shapes). Stamp the sentiment in coordinating ink onto the bottom of one hexagon. Adhere as shown with Dimensionals and Liquid Glue.
- Crop the Basic Black or Soft Suede layers (with Adhesive Sheets adhered) with the small hexagon die (Queen Bee Dies). Adhere as shown by removing the adhesive backing.
- Use a Stamparatus to stamp the bees onto the Basic White card stock. Rub with an Embossing Buddy. Stamp again with Versamark. Cover with Clear Embossing Powder, then set with a Heat Tool. Crop with a Stampin’ Cut & Emboss Machine and the coordinating Queen Bee Dies. Adhere as shown with Stampin’ Dimensionals.
- Embellish with Classic Matte or Rustic Metallic Dots.

Smooching Technique:
- Use a Stampin’ Spritzer to spray water onto a piece of Fluid 100 Watercolor Paper.
- Use the edge of an ink pad to add color to a scrap of Window Sheet.
- Gently touch the Window Sheet to the watercolor paper to transfer the color.
- Allow to dry completely.


FREE TUTORIALS- I send out Weekend Inspiration every weekend that includes a handful of Card Projects with tutorials and supply lists – and yes they are free! The first card on today’s post is one of the project tutorials! I send these out to all who are on my email list. Interested in getting these project sheets? Simply subscribe to my email list click here:
Want it all?? Have a big wish list? The BEST deal is always buying the Stampin' Up! Starter Kit! You get $125 in product of your choice for just $99 & Free Shipping! No obligation
I am blessed to lead an amazing team with members all across the United States. My team consists of both business builders and happy shoppers! The question I am most often asked about joining the SU family is – “do I have to sell?” The answer is NO! You are welcome to be a happy shopper – and a smart cookie, I might add, to get all the products you love at the demonstrator discount!
Please contact me with any questions! I’d love to have you join my “We’d Rather Bee Stampin'” team!
You will then enjoy 20% off all future purchases while you are active! What have you got to lose? The link to join is below! The best part – there is no obligation to sell, or hold parties ever!!! You can simply become a “happy shopper” and get discounts on all your Stampin’ Up! purchases! If you’d like to pursue this as a business and make a little extra money, I can help you with that as well!