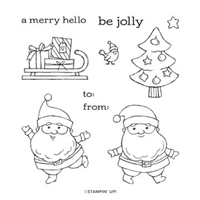
Today’s SOOOOO cute holiday card features the Santa and sleigh from the Be Jolly Stamp Set by Stampin’ Up! How adorable??
A week of Tricks & Treats Giveaway! Comment at the end of this post with your favorite Halloween treat for your chance to win a pack of Tidings of Christmas Designer Series Paper! A random winner will be drawn and posted on my blog tomorrow!
MEASUREMENTS:
Basic White Thick Cardstock- 4 1/4 x 11 (card base), score at 5 1/2.
Pattern Party 12×12 Host Exclusive DSP – 1 1/2 x 4 1/2
Basic White Cardstock – 3 1/4 x 4 (layer), 4 x 4 (stamping and snipping)
Basic Black Cardstock – 3 x 3 (die-cutting)
INSTRUCTIONS:
Fold the Basic White Thick Cardstock in half and burnish the fold with a Bone Folder.
Adhere the Pattern Party 12×12 Host Exclusive DSP to the card base with Stampin’ Dimensionals.
Adhere the Basic White layer to the card base with Stampin’ Dimensionals and Multipurpose Liquid Glue.
Crop the Basic Black Cardstock with the Delicate Bauble Die. Cut the top of the bauble off with a Paper Trimmer.
Stamp the sentiment in Versamark Ink onto the Basic Black die-cut. Cover with White Basics Embossing Powder and set with a Heat Tool. Wrap with the Black/White Baker’s Twine securing with a bow. Adhere to the card with Stampin’ Dimensionals.
Stamp the three images in Tuxedo Black Memento Ink onto Basic White Cardstock. Color with the following Stampin’ Blends Combo Packs: Cherry Cobbler, Smoky Slate, Petal Pink, Basic Black, Soft Suede, Shaded Spruce, Balmy Blue, Pumpkin Pie. Cut closely with Paper Snips. Adhere to the card with Stampin’ Dimensionals.
Embellish with Matte Black Dots.
Want it all?? Have a big wish list? The BEST deal is always buying the Stampin' Up! Starter Kit! You get $125 in product of your choice for just $99 & Free Shipping! No obligation
I am blessed to lead an amazing team with members all across the United States. My team consists of both business builders and happy shoppers! The question I am most often asked about joining the SU family is – “do I have to sell?” The answer is NO! You are welcome to be a happy shopper – and a smart cookie, I might add, to get all the products you love at the demonstrator discount!
Please contact me with any questions! I’d love to have you join my “We’d Rather Bee Stampin'” team!
You will then enjoy 20% off all future purchases while you are active! What have you got to lose? The link to join is below! The best part – there is no obligation to sell, or hold parties ever!!! You can simply become a “happy shopper” and get discounts on all your Stampin’ Up! purchases! If you’d like to pursue this as a business and make a little extra money, I can help you with that as well!
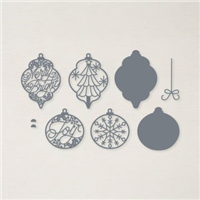
Today’s card features the GORGEOUS Silver Foil Specialty Paper Pack! Pictures do not do it justice! It is breathtaking in person, if you do not have this paper in your stash, I highly recommend adding it to your next order. You will not be disappointed.
Make your next project shine with this Silver Foil 12″ x 12″ Specialty Pack. Use it with one of our Stampin’ Cut & Emboss Machines to cut a variety of eye-catching shapes and elements that are sure to add an unexpected touch to all your paper crafts.
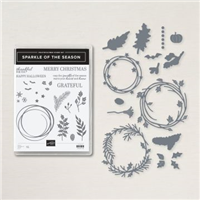
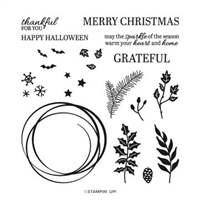
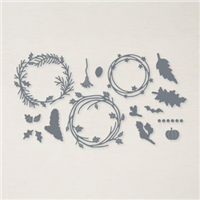
The Sparkle of the Season Bundle includes the Sparkle of the Season Stamp Set and the Seasonal Swirls Dies. Mix and match images from the stamp set and dies to create wreaths for Halloween and autumn, or winter and Christmas! The Seasonal Swirls Dies are estimated to be back in stock on October 25th! Be ready to order at that time!
MEASUREMENTS:
Basic White Thick Cardstock- 5 1/2 x 8 1/2 (card base), score at 4 1/4.
Silver Foil Specialty Dark – 5 3/8 x 4 1/8 (layer), 2 3/4 x 2 3/4 (die-cutting)
Silver Foil Specialty Matte – 5 x 3 3/4 (layer), 2 3/4 x 2 3/4 (die-cutting), 3 1/2 x 1/2 (sentiment)
Fold the Basic White Thick Cardstock in half and burnish the fold with a Bone Folder.
Adhere the Silver Foil Specialty Dark paper to the card base with Multipurpose Liquid Glue.
Adhere the Silver Foil Specialty Matte paper with Stampin’ Dimensionals.
Crop a star swirl of each color Silver Foil Specialty Paper using a Stampin’ Cut & Emboss Machine and the Seasonal Swirls Die.
Stamp the sentiment in Versamark Ink onto the flagged piece of Silver Foil Specialty Matte Paper. Cover with Silver Metallic Embossing Powder and set with a Heat Tool.
Adhere the die-cut swirls to the Vellum Cardstock with Multipurpose Liquid Glue.
Adhere the sentiment with Mini Stampin’ Dimensionals.
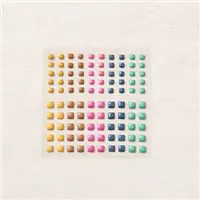
Embellish with Rhinestone Basic Jewels.
Want it all?? Have a big wish list? The BEST deal is always buying the Stampin' Up! Starter Kit! You get $125 in product of your choice for just $99 & Free Shipping! No obligation
I am blessed to lead an amazing team with members all across the United States. My team consists of both business builders and happy shoppers! The question I am most often asked about joining the SU family is – “do I have to sell?” The answer is NO! You are welcome to be a happy shopper – and a smart cookie, I might add, to get all the products you love at the demonstrator discount!
Please contact me with any questions! I’d love to have you join my “We’d Rather Bee Stampin'” team!
You will then enjoy 20% off all future purchases while you are active! What have you got to lose? The link to join is below! The best part – there is no obligation to sell, or hold parties ever!!! You can simply become a “happy shopper” and get discounts on all your Stampin’ Up! purchases! If you’d like to pursue this as a business and make a little extra money, I can help you with that as well!
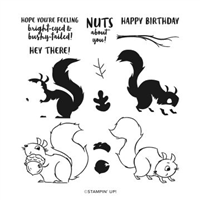
Yesterday for my weekly Facebook Live, I showed two different stamp sets – with very different looks! First, I used the Nuts About Squirrel Stamp Set has won my heart over! These squirrels are just too cute!
Here’s what Stampin’ Up! has to say about this stamp set: Are you nuts about stamping? We are, too! And it’s easy to go nuts with the Nuts about Squirrels Stamp Set. This set features two cheeky squirrels that will look adorable scampering across any of your projects. Create a scene using the acorns, leaves, and tree branch. Mix and match the greetings with the images to create cards for birthdays, get well, and thinking of you.
You can watch the Facebook Live Replay on Facebook by clicking on the image below.
My card design featured a fun fold – with a pull out feature. For the card base, you will need two sheets of 8 1/2 x 5 1/2 Granny Apple Green. You will need to use a paper trimmer to “angle” the edges – you can watch my FB Live recording to see how I did it.
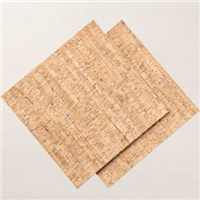
After cutting and attaching the two panels of Granny Green cardstock together, I then decorated the two triangles. I used the wonderful Cork Specialty Paper – if you haven’t used it yet, you need to get some in your hands ASAP! You can stamp on it for a rustic look – as I did. I used a pretty pattern from the Beauty of the Earth DSP for the other triangle.
Here’s the card with the insert positioned in the card base.
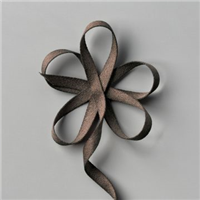
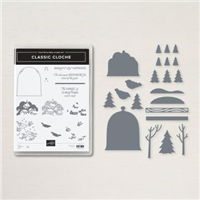
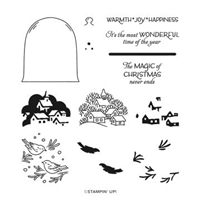
The next card I created features the Christmas Cloche bundle. It is a darling set – and you know I love anything with birds! I wanted to make a card with this bundle as I am featuring it in my October Class to Go – this is an additional idea to the cards in my class. Registration for my class closes this Friday, Oct. 15th. You can contact me via email for a registration link. Don’t miss out on this great class! The bundle is so versatile – it can be used to create Shaker Cards as well!
For this card, I used a card base of Soft Succulent, and then used a small strip of Basic White cardstock and the Cloche dies to crop out the cloche. I used the Wintry Embossing folder to add a snowy/wintry look. I used the Cloche dies to crop the trees as well as the birds and the snowy landscape placed inside the cloche. The thin panel of Crumb Cake cardstock is also cropped from the Cloche dies.
I finished the card with a stamped greeting and a bit of Baker’s Twine from the Baker’s Twine Essentials Pack.
Want it all?? Have a big wish list? The BEST deal is always buying the Stampin' Up! Starter Kit! You get $125 in product of your choice for just $99 & Free Shipping! No obligation
I am blessed to lead an amazing team with members all across the United States. My team consists of both business builders and happy shoppers! The question I am most often asked about joining the SU family is – “do I have to sell?” The answer is NO! You are welcome to be a happy shopper – and a smart cookie, I might add, to get all the products you love at the demonstrator discount!
Please contact me with any questions! I’d love to have you join my “We’d Rather Bee Stampin'” team!
You will then enjoy 20% off all future purchases while you are active! What have you got to lose? The link to join is below! The best part – there is no obligation to sell, or hold parties ever!!! You can simply become a “happy shopper” and get discounts on all your Stampin’ Up! purchases! If you’d like to pursue this as a business and make a little extra money, I can help you with that as well!
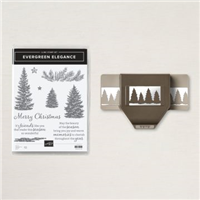
Today’s card is super simple to make and was created with the challenge below in mind and the Evergreen Elegance Stamp Set/Bundle from Stampin’ Up!
I am playing along with the Global Design Project Challenge this week! You can see the #GDP312 post and play along as well by clicking here.
The Evergreen Elegance Bundle includes the Evergreen Elegance Stamp Set and the Evergreen Border Punch.
MEASUREMENTS:
Basic White Thick Cardstock- 4 1/4 x 11 (card base)
Basic White Cardstock – 4 x 5 1/4
INSTRUCTIONS:
Fold the Basic White Thick Cardstock in half and burnish the fold with a Bone Folder.
Stamp the trees in Soft Succulent (medium tree) and Evening Evergreen (small and tall trees) in the top right and bottom left corner of the card layer as shown.
Stamp the sentiment as shown with Evening Evergreen Classic Ink.
Flick ink from the brush end of an Evening Evergreen Stampin’ Write Marker.
Adhere to the card base with Dimensionals.
Adhere two Wonderful Snowflakes as shown with Dimensionals.
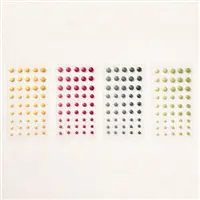
Embellish with Decorative Matte Dots.
Want it all?? Have a big wish list? The BEST deal is always buying the Stampin' Up! Starter Kit! You get $125 in product of your choice for just $99 & Free Shipping! No obligation
I am blessed to lead an amazing team with members all across the United States. My team consists of both business builders and happy shoppers! The question I am most often asked about joining the SU family is – “do I have to sell?” The answer is NO! You are welcome to be a happy shopper – and a smart cookie, I might add, to get all the products you love at the demonstrator discount!
Please contact me with any questions! I’d love to have you join my “We’d Rather Bee Stampin'” team!
You will then enjoy 20% off all future purchases while you are active! What have you got to lose? The link to join is below! The best part – there is no obligation to sell, or hold parties ever!!! You can simply become a “happy shopper” and get discounts on all your Stampin’ Up! purchases! If you’d like to pursue this as a business and make a little extra money, I can help you with that as well!
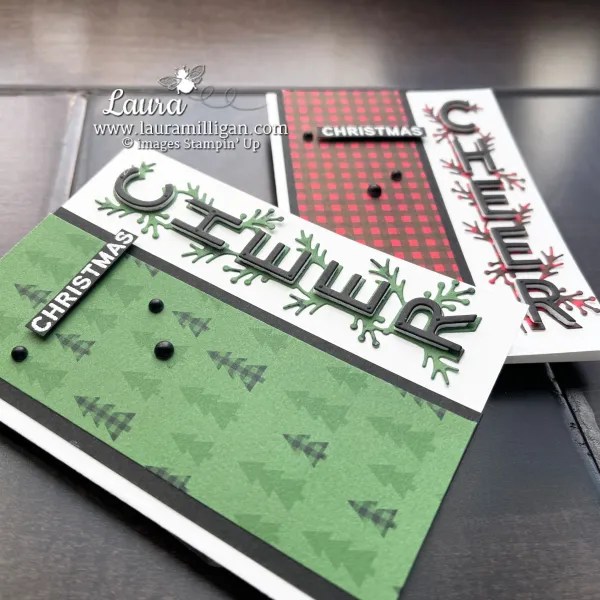
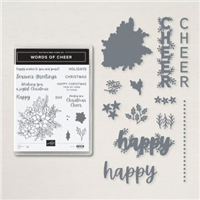
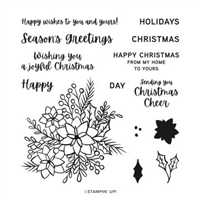
Today I am sharing two simple note cards using the Words of Cheer Bundle from the Stampin’ Up! 2021 August – December Mini Catalog!
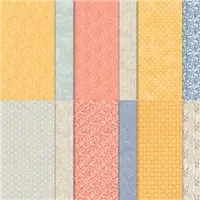
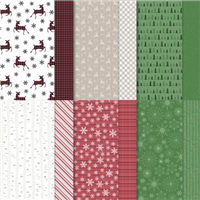
Purchase the Words of Cheer Bundle and a package of Stampin’ Dimensionals (or any other items of your choice valued at $50 before tax & shipping) and earn the Peaceful Prints Designer Series Paper Free during Sale-a-Braiton. (Ends September 30).
MEASUREMENTS:
Basic White Note Cards – 3 1/2 x 5
Basic Black Cardstock – 2 x 5, 1 1/2 x 5 (die-cutting), scrap for stamping
Peaceful Prints DSP – 1 3/4 x 5, 2 x 5 1/8 (envelope flap), 1 1/2 x 5 (die-cutting)
INSTRUCTIONS:
Burnish the fold of a Basic White Note Card with a Bone Folder.
Adhere the DSP to the Basic Black Cardstock and to the card (left side) with Multipurpose Liquid Glue.
Stamp the sentiment in Versamark onto the Basic Black Cardstock. Emboss with White Embossing Powder. Set with a Heat Tool.
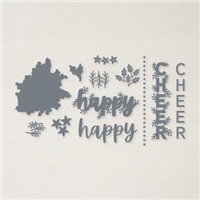
Crop the DSP with the Christmas Cheer Die. Adhere with Multipurpose Liquid Glue.
Layer the piece of Basic Black Cardstock onto a Foam Adhesive Sheet. Crop with the Christmas Cheer Dies. Adhere to the DSP.
Adhere the DSP to the envelope flap with Multipurpose Liquid Glue.
Embellish with Matte Black Dots.
Want it all?? Have a big wish list? The BEST deal is always buying the Stampin' Up! Starter Kit! You get $125 in product of your choice for just $99 & Free Shipping! No obligation
I am blessed to lead an amazing team with members all across the United States. My team consists of both business builders and happy shoppers! The question I am most often asked about joining the SU family is – “do I have to sell?” The answer is NO! You are welcome to be a happy shopper – and a smart cookie, I might add, to get all the products you love at the demonstrator discount!
Please contact me with any questions! I’d love to have you join my “We’d Rather Bee Stampin'” team!
You will then enjoy 20% off all future purchases while you are active! What have you got to lose? The link to join is below! The best part – there is no obligation to sell, or hold parties ever!!! You can simply become a “happy shopper” and get discounts on all your Stampin’ Up! purchases! If you’d like to pursue this as a business and make a little extra money, I can help you with that as well!
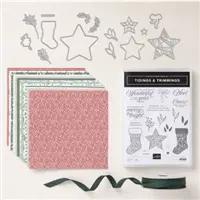
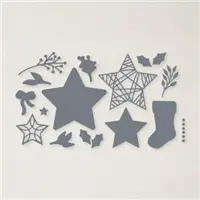
Today I am sharing projects that I made during my Facebook Live on Monday. Both feature the Tidings of Trimmings bundle in the 2021-2022 Annual Catalog. Also featured is the Tidings of Christmas 6 x 6 Designer Series Paper that is currently part of our Designer Series Paper Sale! CLICK TO SHOP THE SALE IN MY ONLINE STORE
I do have a tutorial available for my Christmas in July Event that I held this month (both in person and “to go”), but these projects aren’t a part of the tutorial – these are extra projects that I made using this suite of products. Scroll down to the bottom of this post to purchase the tutorial.
If you’d like to see how these projects were made, please click below to watch the replay!
I also shared a sweet little framed art project. I love these little framed projects – they are perfect gifts and can sit on a desk, a table, a windowsell, etc! Fun to make and fun to “gift” to a friend/family! The little project is made on a 3″ square of DSP – it really it tiny!
It’s tiny but has a lot of detail- which is what makes it special!
Measurements for the Slimline Card:
Thick Basic White – 8 1/4″ x 7″, scored at 3 1/2″
DSP: 2 1/2″ x 3 1/4″ – cut 3 in different patterns
Small scraps for stamping and die cutting the stockings, holly leaves and sprigs – Basic White, Evening Evergreen, Cherry Cobbler
My Christmas in July was a super fun day of stamping and crafting! This class consisted of “giftables” – projects you can gift to friends and family (or keep for yourself!) for the upcoming holidays, as well as four cards. My Christmas in July event featured the Tidings & Trimmings Bundle from our 2021-2022 Annual Catalog. I offered the class both in person and “to go”. I’ve had some requests for a PDF-only option – and am happy to offer it starting today!
The content in this blog is the sole responsibility of Laura Milligan as a Stampin’ Up!® Independent Demonstrator. The use of and content of classes, services or products offered is not endorsed by Stampin’ Up!