Aug 3, 2022 | Gallery, More Bee Creative Tutorials, More Love Cards |

I love fall and while we are in the heat of summer, I enjoyed creating and sharing these cards on this week’s Facebook Live. You can watch the replay here:

For my first card, I used one of my favorite card layouts – I know I use it frequently! Like most of my cards, I started with a Thick Basic White base. Then I made the small scallop edge created with the Scallop Contour dies and Crumb Cake card stock. I added a 1 1/4″ x 5 1/4″ strip of Rustic Harvest DSP along the right edge of the card front and then layered the Crumb Cake scallop strip on top.

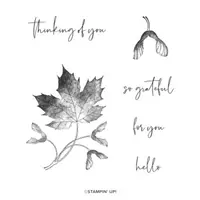
I stamped the leaf image with Crumb Cake ink onto a panel of Basic White measuring 3 1/4″ x 5 1/4″. I used my Bone Folder and the Dark Basic Black Blend to add some splatters to this panel. I stamped the words in Tuxedo Black ink onto a small Basic White panel and then used my Paper Snips to angle the edge. I added a double bow made with Linen Thread beneath the word panel and attached this to my card front with dimensionals. To finish the card, I added a few Champagne Rhinestone Basic Jewels.
Add a little extra touch: Use a piece of Designer Paper and adhere it to the flap of your envelope. Trim excess – following the lines of the envelope flap and you have made the envelope a little extra special!

For my second card I inked up the leaf image with Pale Papaya ink. Then I used a Sponge Dauber with Calypso Coral ink and added some ink onto the leaf for some contrast in color. (You can see me do this in the facebook live video). This is fun to do and for the leaves you could switch up the inks for a multitude of colors! Each leaf will turn out a little different – just like in nature.

I stamped the leaf image onto a die cut shape from the Seasonal Labels dies.
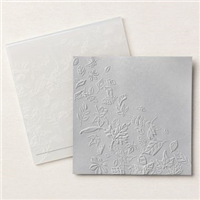
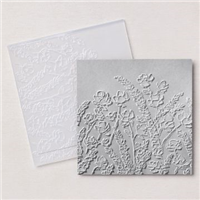
Again, I started with a Thick Basic White card base and then embossed a panel of Basic White with the Leaf Fall embossing folder. I added a strip of Splendid Day Specialty Paper along the left edge, as well as a piece of the 7/8″ Natural Finish Ribbon.
Then I attached the leaf panel to the card front. I stamped “Hello” onto a small circle die shape from the Stylish Labels dies. These have become a “go to” for me – there are so many great shapes in this set of dies – and in multiple sizes.
To finish the card, I added a Linen Thread bow and a sprinkling of the Champagne Rhinestone gems.
Extra Touch: I embossed the envelope flap with the Leaf Fall Embossing Folder and then decided to use a Blending Brush and Calypso Coral ink to highlight the embossing. I like how it turned out and my viewers seemed to like it as well!
Hope you have enjoyed these cards today! I really enjoyed making them and sharing them with you!
FREE TUTORIALS- I send out Weekend Inspiration every weekend that includes a handful of Card Projects with tutorials and supply lists – and yes they are free! The first card on today’s post is one of the project tutorials! I send these out to all who are on my email list. Interested in getting these project sheets? Simply subscribe to my email list click here:

Want it all?? Have a big wish list? The BEST deal is always buying the Stampin' Up! Starter Kit! You get $125 in product of your choice for just $99 & Free Shipping! No obligation
I am blessed to lead an amazing team with members all across the United States. My team consists of both business builders and happy shoppers! The question I am most often asked about joining the SU family is – “do I have to sell?” The answer is NO! You are welcome to be a happy shopper – and a smart cookie, I might add, to get all the products you love at the demonstrator discount!
Please contact me with any questions! I’d love to have you join my “We’d Rather Bee Stampin'” team!
You will then enjoy 20% off all future purchases while you are active! What have you got to lose? The link to join is below! The best part – there is no obligation to sell, or hold parties ever!!! You can simply become a “happy shopper” and get discounts on all your Stampin’ Up! purchases! If you’d like to pursue this as a business and make a little extra money, I can help you with that as well! 


Jul 27, 2022 | Gallery, More Bee Creative Tutorials, More Love Cards |

After my recent foot surgery I was thrilled each day when the mail arrived because it held lots and lots of well wishes from friends and family! Awe- it was the best! I loved when our mail carrier arrived – I got cards nearly every single day – and I loved every single one!!! I shared them all on my Facebook Live that I did on Monday – so you can watch the replay below if you’d like to take a look!

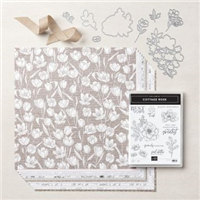
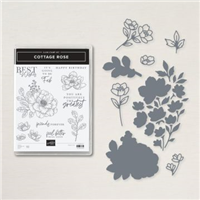
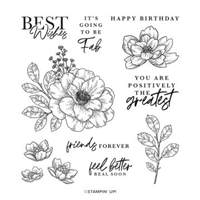
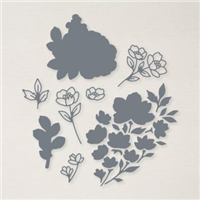
I also created a card featuring the Cottage Rose bundle. It was so fun to get back to doing a Live again! I missed it and was so happy to get to reconnect with my followers! The card features a neutral color palate – which I always like. The flower image was stamped with Early Espresso Ink onto Crumb Cake card stock and cropped with the Cottage Flower dies which are part of the Cottage Rose Bundle.

I used the beautiful Abigail Rose Designer Series Paper for my card – it’s so pretty! I added some splatters of ink on a Very Vanilla panel – to do this, I used the dark Soft Suede Blend and hit it with a bone folder to create the splatters Quick and easy and it’s a fun way to release some tension!!!
The small panel of “journal” looking dsp was cropped with the Deckled Rectangle dies and also splattered with the Soft Suede Blends.

I used the Special Edition stamp set to the back of the card – I love this stamp that says “a paper hug” because that’s exactly what a handmade card is! There are some other really cute stamps in this set too!

Measurements for this card:
Thick Basic Vanilla – 8 1/2″ x 5 1/2″, scored at 4 1/4″; 3 1/4″ x 4 1/2″
Crumb Cake: scrap for stamping/die cutting flower image
Designer Series Paper – 4″ x 5 1/4″, 2″ x 3 1/2″
I’m featuring the Cottage Rose bundle in my Bee Box this month – registration closes on Saturday – so don’t miss out!


Want it all?? Have a big wish list? The BEST deal is always buying the Stampin' Up! Starter Kit! You get $125 in product of your choice for just $99 & Free Shipping! No obligation
I am blessed to lead an amazing team with members all across the United States. My team consists of both business builders and happy shoppers! The question I am most often asked about joining the SU family is – “do I have to sell?” The answer is NO! You are welcome to be a happy shopper – and a smart cookie, I might add, to get all the products you love at the demonstrator discount!
Please contact me with any questions! I’d love to have you join my “We’d Rather Bee Stampin'” team!
You will then enjoy 20% off all future purchases while you are active! What have you got to lose? The link to join is below! The best part – there is no obligation to sell, or hold parties ever!!! You can simply become a “happy shopper” and get discounts on all your Stampin’ Up! purchases! If you’d like to pursue this as a business and make a little extra money, I can help you with that as well!

Jul 11, 2022 | Gallery, More Friend Cards, More Love Cards |


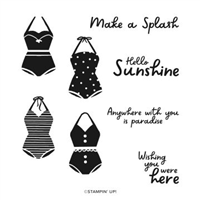
I’m loving the Sunny Splash stamp set! Such fun for summer time stamping! Happy Monday and hope you enjoy this tutorial for today!
Measurements:
- Real Red: 5 ½” x 8 ½”, scored at 4 ¼”
- Basic White: 3 ¾” x 5”, 4” x 5 ¼” (inside panel), 1 ¼” x 2” – cut three
- Designer Series Paper: 3” x 3 ¾”
Instructions:
- Fold the Real Red card stock along the score line to create card base.
- Use Real Red Ink to stamp the three swimsuits on the 1 ¼” x 2” Basic White panels and then stamp greeting towards bottom right of Basic White 3 ¾” x 5” panel.
- Use Multipurpose Liquid Glue to attach the DSP to the Basic White panel.
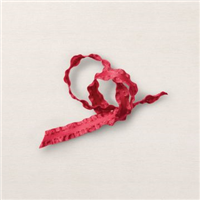
- Wrap a piece of Real Red 3/8” Mini Ruffled Ribbon to Basic White Panel and secure to the back with Mini Glue Dots. Slip a small piece of Ribbon under the attached piece and tie a knot. Trim ends to desired length.
- Adhere this panel to card front with Stampin’ Dimensionals.
- Position swim suits as shown in photo and attach – popping the center swim suit up with a Stampin’ Dimensional.
- Add a Red Rhinestone to each bathing suit.
- Use Tombo Multipurpose Liquid Glue to attach the 4” x 5 ¼” panel to inside of card.


Want it all?? Have a big wish list? The BEST deal is always buying the Stampin' Up! Starter Kit! You get $125 in product of your choice for just $99 & Free Shipping! No obligation
I am blessed to lead an amazing team with members all across the United States. My team consists of both business builders and happy shoppers! The question I am most often asked about joining the SU family is – “do I have to sell?” The answer is NO! You are welcome to be a happy shopper – and a smart cookie, I might add, to get all the products you love at the demonstrator discount!
Please contact me with any questions! I’d love to have you join my “We’d Rather Bee Stampin'” team!
You will then enjoy 20% off all future purchases while you are active! What have you got to lose? The link to join is below! The best part – there is no obligation to sell, or hold parties ever!!! You can simply become a “happy shopper” and get discounts on all your Stampin’ Up! purchases! If you’d like to pursue this as a business and make a little extra money, I can help you with that as well!

Jun 16, 2022 | Gallery, More Love Cards |

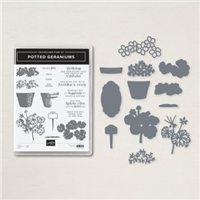
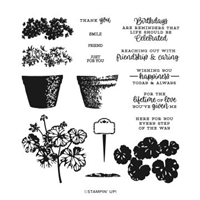
This card, like the one I shared on my Facebook Live this week, features the wonderful Potted Geranium Bundle. I created this card to show another color for the geraniums! Something about red geraniums brings back memories of my mom and dad – and so they are a favorite of mine!
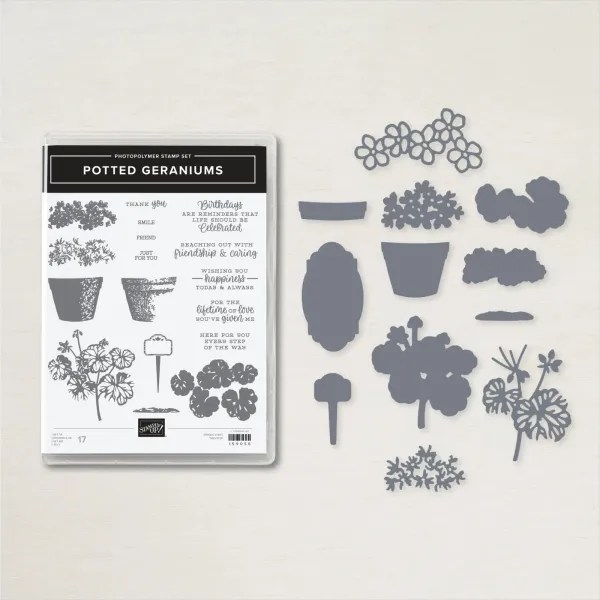
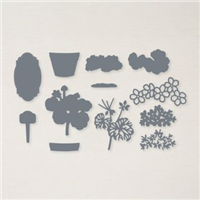
The card I shared on my facebook live featured the stamped images to create the geraniums – but for this card, I just used the dies with different colors of cardstock – to create both the flowers and the leaves/stems.
Check out the background panel – this is a brand new embossing folder called Painted Posies and I love it! I finished the card with a bit of black and white ribbon and Designer Series Paper. The black, white and red colors are always a favorite of mine.

Measurements:
- Thick Basic White: 5 ½” x 8 ½”- scored at 4 ¼”,
- Basic White: 4” square, 1 ¾” x 2 ½”
- Perfectly Penciled Designer Series Paper: 1” x 3” – cut 2
Instructions:
- Stamp the greeting in Tuxedo Black Memento Ink onto the 1 ¾” x 2 ½” Basic White.
- Die cut the greeting with the label from the Geraniums Dies.
- Emboss the 4” square panel of Basic White with the Painted Posies Embossing Folder.
- Adhere the two strips of Designer Series Paper behind the embossed Painted Posies Panel as shown in photo.
- Adhere to the folded card base with Multipurpose Glue.
- Use Die Cuts to crop the two colors of card stock for the geraniums (Real Red and Poppy Parade and the two colors of card stock for the leaves (Garden Green and Pear Pizzazz).
- Adhere cropped pieces together with glue.
- Position onto card front, over the embossed panel with glue.
- Attach a small piece of Black and White Gingham Ribbon behind word panel with a dimensional. Position word panel to card front with additional dimensionals.
- To finish, add three Brushed Brass Butterflies as an embellishment.
Want it all?? Have a big wish list? The BEST deal is always buying the Stampin' Up! Starter Kit! You get $125 in product of your choice for just $99 & Free Shipping! No obligation
I am blessed to lead an amazing team with members all across the United States. My team consists of both business builders and happy shoppers! The question I am most often asked about joining the SU family is – “do I have to sell?” The answer is NO! You are welcome to be a happy shopper – and a smart cookie, I might add, to get all the products you love at the demonstrator discount!
Please contact me with any questions! I’d love to have you join my “We’d Rather Bee Stampin'” team!
You will then enjoy 20% off all future purchases while you are active! What have you got to lose? The link to join is below! The best part – there is no obligation to sell, or hold parties ever!!! You can simply become a “happy shopper” and get discounts on all your Stampin’ Up! purchases! If you’d like to pursue this as a business and make a little extra money, I can help you with that as well!

Jan 26, 2022 | Gallery, More Love Cards |

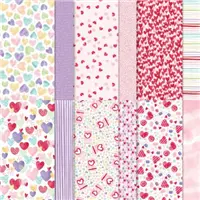
How cute is this heart-holding robot from the Nuts & Bolts Stamp Set by Stampin’ Up!? Pair it with the Sweet Talk Designer Series Paper and you have the recipe for an adorable valentine!

My card was inspired by the #GDP327 Theme Challenge! You can see the details and play along here: Global Design Project

MEASUREMENTS:
- Basic White Thick Cardstock- 4 1/4 x 11, scored at 5 1/2 (card base)
- Sweet Talk Designer Series Paper – 4 1/4 x 5 1/2, 3 1/2 x 3 1/2
- Basic White Cardstock – 4 x 5 1/4 (die-cut layer), 1 1/2 x 1 1/2 (sentiment), 2 x 2 (image)
- Real Red Cardstock – 1 1/2 x 1 1/2 (die-cut)

INSTRUCTIONS:
- Fold the Basic White Thick Cardstock in half and burnish the fold with a Bone Folder.
- Adhere the 4 1/4 x 5 1/2 DSP to the card base with Multipurpose Liquid Glue.
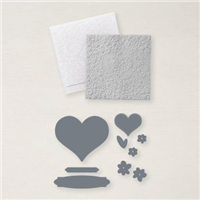
- Run the large piece of Basic White Cardstock through a Stampin’ Cut & Emboss Machine with the Bouquet of Love Heart Die placed in the center.
- Adhere the 3 1/2 x 3 1/2 DSP below the negative die-cut space with dimensionals.
- Adhere to the card with dimensionals.
- Crop the Real Red Cardstock with the smaller heart die-cut. Adhere with dimensionals.
- Stamp the robot and sentiment with Tuxedo Black Memento Ink onto the Basic White Cardstock pieces. Snip with Paper Snips.
- Color the robot with Stampin’ Blends (Basic Black, Smoky Slate, Real Red)
- Adhere as shown with dimensionals.
- Embellish with Black Classic Matte Dots.


Sale-A-Bration is one of Stampin’ Up!’s biggest promotions of the year. It’s overflowing with opportunities for customers, and filled with fun for everyone! During Sale-A-Bration, you can earn free, exclusive products for every $50 USD and $100 USD you spend. And, you can enjoy unique, unbeatable benefits when you host a party or join the Stampin’ Up! family!

Watch these videos to see products, learn about Sale-A-Bration and more!

Want it all?? Have a big wish list? The BEST deal is always buying the Stampin' Up! Starter Kit! You get $125 in product of your choice for just $99 & Free Shipping! No obligation
I am blessed to lead an amazing team with members all across the United States. My team consists of both business builders and happy shoppers! The question I am most often asked about joining the SU family is – “do I have to sell?” The answer is NO! You are welcome to be a happy shopper – and a smart cookie, I might add, to get all the products you love at the demonstrator discount!
Please contact me with any questions! I’d love to have you join my “We’d Rather Bee Stampin'” team!
You will then enjoy 20% off all future purchases while you are active! What have you got to lose? The link to join is below! The best part – there is no obligation to sell, or hold parties ever!!! You can simply become a “happy shopper” and get discounts on all your Stampin’ Up! purchases! If you’d like to pursue this as a business and make a little extra money, I can help you with that as well!

Jan 10, 2022 | Gallery, More Love Cards |

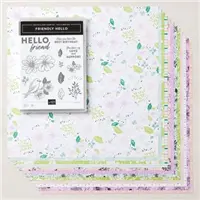
Today’s card introduces you to the Friendly Hello Bundle that can be earned for FREE with a qualifying purchase during Sale-a-Bration, January – February 28, 20221

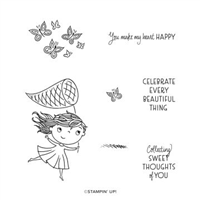
The Friendly Hello Bundle includes the Friendly Hello Stamp Set and the Friendly Hello 12″ x 12″ (30.5 x 30.5 cm) Designer Series Paper. This crafting bundle is a must-have for your collection! The sweet little bird, flowers, and greenery coupled with versatile sentiments are sure to add a touch of grace to your papercrafts over and over again. Some images from the stamp set are designed to be stamped directly onto the paper for a unique look you’ll love.

MEASUREMENTS:
- Basic White Thick Cardstock- 4 1/4 x 11, scored at 5 1/2 (card base)
- Basic White Cardstock – 3 1/2 x 2
- Basic Black Cardstock – 3 3/4 x 5 (layer), 3 3/4 x 1 3/8 (sentiment)
- Friendly Hello Designer Series Paper – 3 1/2 x 4 3/4 (layer), 5 1/2 x 2 3/8 (envelope)

INSTRUCTIONS:
- Fold the Basic White Thick Cardstock in half and burnish the fold with a Bone Folder.
- Adhere the DSP to the Basic Black Cardstock with Multipurpose Liquid Glue and to the card base with Dimensionals.
- Stamp the sentiment in Versamark Ink onto the Basic Black Cardstock. Heat Emboss with White Embossing Powder. Adhere with Multipurpose Liquid Glue.
- Stamp the flowers in Tuxedo Black Memento Ink onto the Basic White Cardstock. Color with Petal Pink Stampin’ Blends. Snip closely with Paper Snips. Adhere with Dimensionals. Use Paper Snips to remove the overhang.
- Use a Stampin’ Cut & Emboss Machine with the Basic Borders die to crop the DSP to decorate the envelope flap. Adhere with Multipurpose Liquid Glue.
- Embellish with Black Classic Matte Dots.
Sale-A-Bration is one of Stampin’ Up!’s biggest promotions of the year. It’s overflowing with opportunities for customers, and filled with fun for everyone! During Sale-A-Bration, you can earn free, exclusive products for every $50 USD and $100 USD you spend. And, you can enjoy unique, unbeatable benefits when you host a party or join the Stampin’ Up! family!
Watch these videos to see products, learn about Sale-A-Bration and more!
Want it all?? Have a big wish list? The BEST deal is always buying the Stampin' Up! Starter Kit! You get $125 in product of your choice for just $99 & Free Shipping! No obligation
I am blessed to lead an amazing team with members all across the United States. My team consists of both business builders and happy shoppers! The question I am most often asked about joining the SU family is – “do I have to sell?” The answer is NO! You are welcome to be a happy shopper – and a smart cookie, I might add, to get all the products you love at the demonstrator discount!
Please contact me with any questions! I’d love to have you join my “We’d Rather Bee Stampin'” team!
You will then enjoy 20% off all future purchases while you are active! What have you got to lose? The link to join is below! The best part – there is no obligation to sell, or hold parties ever!!! You can simply become a “happy shopper” and get discounts on all your Stampin’ Up! purchases! If you’d like to pursue this as a business and make a little extra money, I can help you with that as well!