Jan 24, 2023 | Gallery, More Holiday Cards, More Thank You Cards |
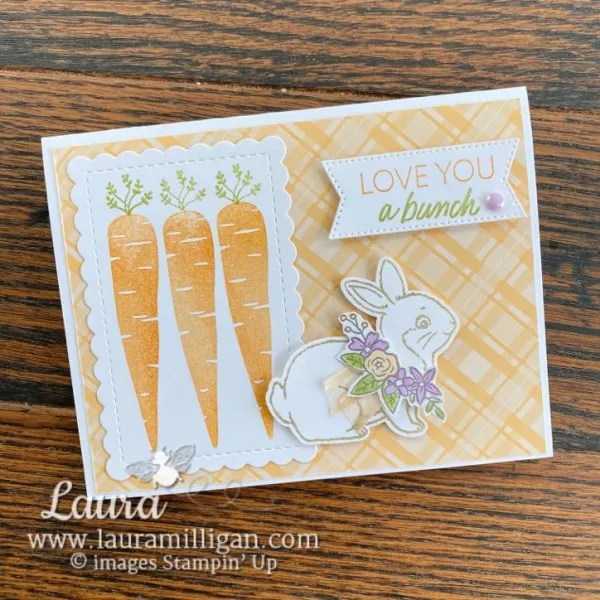
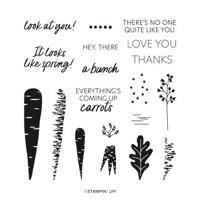
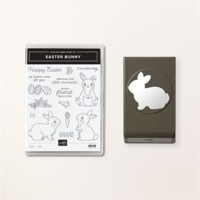
For this week’s Facebook Live, I made a Love You a Bunch Card by pairing the Thanks A Bunch Sale-a-bration Stamp Set with the Easter Bunny Bundle!
I think these two stamp sets compliment each other so well! Carrots and bunnies are a good match, right? The Thanks a Bunch set that is all about carrots has some fun word sentiments and can be earned for free with a $50 product purchase during Saleabration – which is going on now – and ends Feb. 28.


Watch the replay here:

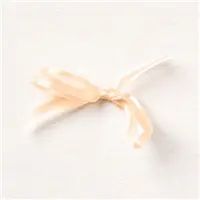
Isn’t this bunny the cutest? I stamped her in Crumb Cake ink and punched her with coordinating Easter Bunny Punch, and then dressed her up with a little Easter “corsage” of flowers and ribbon. I have fond memories of Easter when I was growing up – my grandparents would always give my sister and I corsages to wear to church on Easter morning. While this card isn’t Easter themed at all, it just brought back a fond memory of my childhood! Here’s a close up look at her:

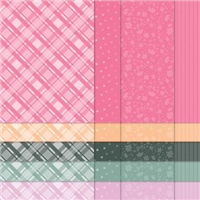
I think she is pretty cute paired with the carrots, and the plaid Designer Series paper, and hope you agree!
Want it all?? Have a big wish list? The BEST deal is always buying the Stampin' Up! Starter Kit! You get $125 in product of your choice for just $99 & Free Shipping! No obligation
I am blessed to lead an amazing team with members all across the United States. My team consists of both business builders and happy shoppers! The question I am most often asked about joining the SU family is – “do I have to sell?” The answer is NO! You are welcome to be a happy shopper – and a smart cookie, I might add, to get all the products you love at the demonstrator discount!
Please contact me with any questions! I’d love to have you join my “We’d Rather Bee Stampin'” team!
You will then enjoy 20% off all future purchases while you are active! What have you got to lose? The link to join is below! The best part – there is no obligation to sell, or hold parties ever!!! You can simply become a “happy shopper” and get discounts on all your Stampin’ Up! purchases! If you’d like to pursue this as a business and make a little extra money, I can help you with that as well! 


Oct 14, 2022 | Gallery, More Bee Creative Tutorials, More Thank You Cards |

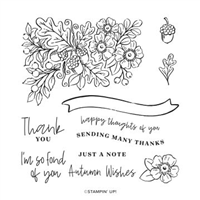
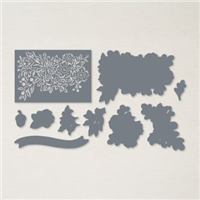
Create this colorful fall thank you card using the Forever Flourishing and Amazing Thanks Dies by Stampin’ Up!
Measurements:
- Soft Suede Card Stock: 8-1/2” x 5-1/2”, scrap for “thanks”
- Pumpkin Pie Card Stock: 4” x 5-1/4”, scrap for leaves
- Very Vanilla Card Stock: 3-13/16” x 5-1/16”, 4” x 5-1/4”, scrap for “thanks” shadow.
- Old Olive Card Stock: Scrap for leaves
- Crumb Cake Card Stock: 1-3/4” x 4”, scrap for leaves
- Daffodil Delight Card Stock: Scrap for leaves
- Ribbon: 12”
Instructions:
- Fold a 5-1/2” x 8-1/2” piece of Soft Suede CS in half to create a card base. Glue a 4” x 5-1/4” piece of Very Vanilla CS to the back inside of the card base.
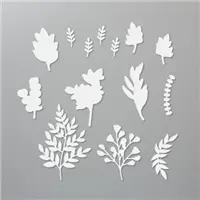
- Die-cut and punch a variety of leaf shapes using Crumb Cake, Old Olive, Daffodil Delight, and Pumpkin Pie CS. Randomly glue the leaf shapes to a 3-13/16” x 5-1/16” piece of Very Vanilla CS with Multipurpose Liquid Glue; allow to dry completely. Using the large fern die-cut, add texture to the front of the card stock piece by dry embossing in several locations. The “sandwich” for dry embossing using a die-cut is: Plate #1, plate #2, card stock piece facing upwards, die-cut facing down, Silicone Craft Sheet, and plate #4. Glue the embossed card to the center of the 4” x 5-1/4” piece of Pumpkin Pie CS. Mount to the center front of the card base.
- Die-cut “thanks” from a piece of Soft Suede CS and a shadow “thanks from a piece of Very Vanilla CS. Glue the die-cuts together with Multipurpose Liquid Glue. Mount to the center top of a 1-3/4” x 4” piece of Crumb Cake CS. Wrap a piece of ribbon around the card stock below the thanks die-cuts and tie a knot; trim ribbon ends. Glue the card stock piece to the card front slightly above center.
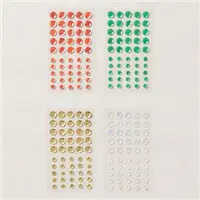
- Randomly add Gold sequins to the card front.
- Add a couple of die-cut leaves to the bottom right corner of the Very Vanilla CS piece on the inside of the card.

FREE TUTORIALS- I send out Weekend Inspiration every weekend that includes a handful of Card Projects with tutorials and supply lists – and yes they are free! The first card on today’s post is one of the project tutorials! I send these out to all who are on my email list. Interested in getting these project sheets? Simply subscribe to my email list click here:

Want it all?? Have a big wish list? The BEST deal is always buying the Stampin' Up! Starter Kit! You get $125 in product of your choice for just $99 & Free Shipping! No obligation
I am blessed to lead an amazing team with members all across the United States. My team consists of both business builders and happy shoppers! The question I am most often asked about joining the SU family is – “do I have to sell?” The answer is NO! You are welcome to be a happy shopper – and a smart cookie, I might add, to get all the products you love at the demonstrator discount!
Please contact me with any questions! I’d love to have you join my “We’d Rather Bee Stampin'” team!
You will then enjoy 20% off all future purchases while you are active! What have you got to lose? The link to join is below! The best part – there is no obligation to sell, or hold parties ever!!! You can simply become a “happy shopper” and get discounts on all your Stampin’ Up! purchases! If you’d like to pursue this as a business and make a little extra money, I can help you with that as well!

Jul 22, 2022 | Gallery, More Bee Creative Tutorials, More Thank You Cards |

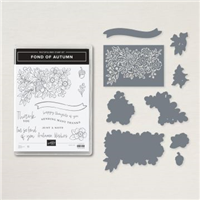
The quick and simple card duo was created with the Fond of Autumn Die Bundle from the Stampin’ Up! 2022 July – December Holiday Mini Catalog! Which do you like better? Basic White or Crumb Cake?


MEASUREMENTS:
- Basic White Thick & Crumb Cake Cardstock : 4 1/4″ x 11″, scored at 5 1/2″
- Basic White & Crumb Cake Cardstock: 4″ x 5 1/2″, 4 1/2″ x 3″ (stamping/die-cutting)
- Rustic Harvest Designer Series Paper: 4 1/4″ x 5 1/2″


INSTRUCTIONS:
- Burnish and fold the card base with a Bone Folder.
- Adhere the Designer Series Paper to the card base.
- Die-cut the layer with the Autumn Bouquet Die and a die-cutting machine. Adhere to the card.
- Stamp the sentiment and images in Soft Suede Classic Ink. Crop with the coordinating Autumn Bouquet Dies. Adhere with Stampin’ Dimensionals.
- Tie a bow of Baker’s Twine and adhere with a Mini Glue Dot.
- Embellish with Rustic Metallic Adhesive-Backed Dots.


Want it all?? Have a big wish list? The BEST deal is always buying the Stampin' Up! Starter Kit! You get $125 in product of your choice for just $99 & Free Shipping! No obligation
I am blessed to lead an amazing team with members all across the United States. My team consists of both business builders and happy shoppers! The question I am most often asked about joining the SU family is – “do I have to sell?” The answer is NO! You are welcome to be a happy shopper – and a smart cookie, I might add, to get all the products you love at the demonstrator discount!
Please contact me with any questions! I’d love to have you join my “We’d Rather Bee Stampin'” team!
You will then enjoy 20% off all future purchases while you are active! What have you got to lose? The link to join is below! The best part – there is no obligation to sell, or hold parties ever!!! You can simply become a “happy shopper” and get discounts on all your Stampin’ Up! purchases! If you’d like to pursue this as a business and make a little extra money, I can help you with that as well!

Jun 27, 2022 | Gallery, More Bee Creative Tutorials, More Thank You Cards |

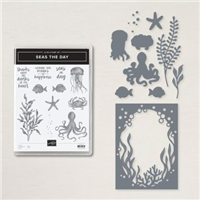
This adorable thank you card was created with the Seas the Day Bundle that retires as of Thursday, June 30, 2022 or While Supplies Last.

You can shop all retiring products in my online store HERE. NOTE: Several stamp sets and a few other items have SOLD OUT!


MEASUREMENTS:
- Basic White Thick Cardstock : 4 1/4″ x 11″, scored at 5 1/2″
- Basic White Cardstock: 4″ x 4″ (stamping/die-cutting)
- Pool Party Cardstock: 4 1/4″ x 5 1/2″

INSTRUCTIONS:
- Burnish and fold the card base with a Bone Folder.
- Stamp the images in the following Classic Ink Colors: Pool Party, Fresh Freesia, and Pale Papaya
- Crop the images with a Stampin’ Cut & Emboss Machine and the coordinating Sea Dies.
- Crop the Pool Party Cardstock with the largest Stitched Rectangle Die and again with the Sea Die.
- Adhere all with Stampin’ Dimensionals.
- Stamp the sentiment in Pool Party as shown.
- Embellish with Sparkle & Shine Sequins.
Want it all?? Have a big wish list? The BEST deal is always buying the Stampin' Up! Starter Kit! You get $125 in product of your choice for just $99 & Free Shipping! No obligation
I am blessed to lead an amazing team with members all across the United States. My team consists of both business builders and happy shoppers! The question I am most often asked about joining the SU family is – “do I have to sell?” The answer is NO! You are welcome to be a happy shopper – and a smart cookie, I might add, to get all the products you love at the demonstrator discount!
Please contact me with any questions! I’d love to have you join my “We’d Rather Bee Stampin'” team!
You will then enjoy 20% off all future purchases while you are active! What have you got to lose? The link to join is below! The best part – there is no obligation to sell, or hold parties ever!!! You can simply become a “happy shopper” and get discounts on all your Stampin’ Up! purchases! If you’d like to pursue this as a business and make a little extra money, I can help you with that as well!

Jun 14, 2022 | Gallery, More Thank You Cards, More Video Tutorials |

This was the card I created this week on my Facebook Live. You can find all my facebook live recordings on my I’d Rather Bee Stampin’ page.
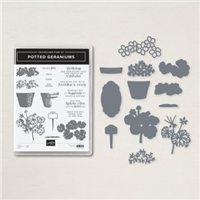
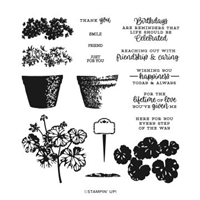
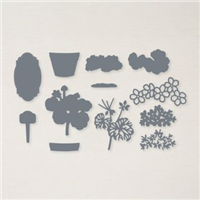
This card features the wonderful Potted Geranium Bundle – we all agreed that geraniums make us feel happy – they are so cheerful! The beauty of this bundle of course is that you can make your geraniums in your favorite color!

Here is the recording of the Facebook Live: Whether you are watching the replay or the recording via my youtube channel, please leave a comment and subscribe! Your name will be entered for a drawing of the projects I create – winners get a project mailed to them!

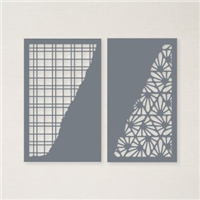
I used the Split Textures dies – they are “stand alone” dies from our new Annual Catalog, meaning they don’t coordinate with any particular stamp set- instead they coordinate with many stamp sets! I thought this die looked like a trellis – with pots of geraniums in front ! With just a few stamps, and the coordinating Geranium dies, this card goes together quickly – the stamp set is a two step one – and I explain that in the recording of the Facebook Live! Enjoy!
Want it all?? Have a big wish list? The BEST deal is always buying the Stampin' Up! Starter Kit! You get $125 in product of your choice for just $99 & Free Shipping! No obligation
I am blessed to lead an amazing team with members all across the United States. My team consists of both business builders and happy shoppers! The question I am most often asked about joining the SU family is – “do I have to sell?” The answer is NO! You are welcome to be a happy shopper – and a smart cookie, I might add, to get all the products you love at the demonstrator discount!
Please contact me with any questions! I’d love to have you join my “We’d Rather Bee Stampin'” team!
You will then enjoy 20% off all future purchases while you are active! What have you got to lose? The link to join is below! The best part – there is no obligation to sell, or hold parties ever!!! You can simply become a “happy shopper” and get discounts on all your Stampin’ Up! purchases! If you’d like to pursue this as a business and make a little extra money, I can help you with that as well!

Jun 8, 2022 | Gallery, More Thank You Cards, More Video Tutorials |

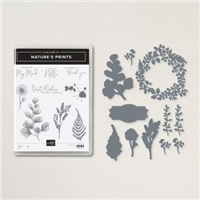
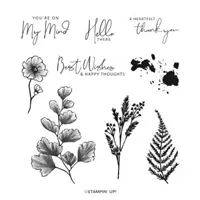
This was the card I created this week on my Facebook Live. You can find all my facebook live recordings on my I’d Rather Bee Stampin’ page. This features the Nature’s Prints bundle – one that is so beautiful! I have created several cards with this set, using the Sun Prints Designer Series Paper – in beautiful blues and gray tones – but I wanted to switch it up for today’s Live and use black and white.

Here is the recording of the Facebook Live: Whether you are watching the replay or the recording via my youtube channel, please leave a comment and subscribe! Your name will be entered for a drawing of the projects I create – winners get a project mailed to them!

I used a Thick Basic White card base and then added a layer of vellum – that I had embossed with the Fern Embossing Folder. I placed all of the various die cuts – the wreath, the “sprigs” and the stamped images (also die cut) on top of the vellum. I used glue dots to hold all of the die cuts together to create a focal point – and positioned them to the back of the word label with dimensionals. I also added a small piece of gingham ribbon – also in black and white!

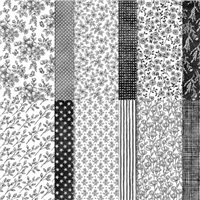
To finish the card, I added quite a few Iridescent Pearl Basic Jewels to add some shimmer. I added a small strip of the Perfectly Penciled DSP to the inside of the card and also on the flap of an envelope. I love this DSP – and it seemed to coordinate perfectly with the color scheme I used for my card.
Thanks for stopping by today!
Want it all?? Have a big wish list? The BEST deal is always buying the Stampin' Up! Starter Kit! You get $125 in product of your choice for just $99 & Free Shipping! No obligation
I am blessed to lead an amazing team with members all across the United States. My team consists of both business builders and happy shoppers! The question I am most often asked about joining the SU family is – “do I have to sell?” The answer is NO! You are welcome to be a happy shopper – and a smart cookie, I might add, to get all the products you love at the demonstrator discount!
Please contact me with any questions! I’d love to have you join my “We’d Rather Bee Stampin'” team!
You will then enjoy 20% off all future purchases while you are active! What have you got to lose? The link to join is below! The best part – there is no obligation to sell, or hold parties ever!!! You can simply become a “happy shopper” and get discounts on all your Stampin’ Up! purchases! If you’d like to pursue this as a business and make a little extra money, I can help you with that as well!